Hand grenade RKG-3 / RKG-3E / RKG-3EM / UPG-8
| RKG-3 |
In 1943, the first cumulative-action anti-tank hand grenades RPG-6 and RPG-43 were adopted by the Red Army. After World War II, they were used in various countries of the socialist camp, and in service with the Soviet Army they were replaced by the RKG-3 grenade.
The RKG-3 hand-held cumulative grenade (and its modifications) is designed to combat enemy tanks, self-propelled artillery, armored personnel carriers and armored vehicles, as well as to destroy strong barriers, long-term and field defensive structures.
The RKG-3 hand-held anti-tank cumulative grenade consists of a body, a handle, a bursting charge and a fuse.
Sectional view of the RKG-3 housing: 1 - shell;
2 - cumulative funnel; 3 - bottom: 4 - cover; 5 - tube; 6 - thread; 7 - main charge; 8 - additional charge; 9 — cardboard gasket; 10 - cumulative notch. The grenade body is cylindrical and serves to house the explosive charge and fuse. The housing is closed with lids. The top cover has a thread for screwing on the handle.
Throwing rules and markings are applied to the outside of the grenade body.
The handle serves for the convenience of throwing a grenade and placing it inside the impact mechanism.
The handle consists of: - body; — movable coupling with a spring; — folding bar; — a hinged hood with a bar; - safety pin with ring;
The handle houses the impact mechanism, stabilizer and safety device.
The handle body is sealed: at the front it is closed with a parchment circle, and at the back there are felt pads between the movable sleeve and the cap.
| RKG-3 handle: 1. movable coupling; 2. safety pin; 3. handle body; 4. hinged hood with strip; 5. folding bar; 6. safety pin ring; 7. parchment circle; 8. movable clutch spring; 9. tube with flange; 10. counter-safety spring; 11. small locking ball (2); 12. mainspring; 13. spring end of the folding bar; 14. large locking ball (2); 15. impact mechanism housing; 16. stabilizer spring; 17. stabilizer ring; 18. stabilizer bushing; 19. stabilizer wire feather; 20. stabilizer; 21. movable tube; 22. central tube; 23. rod; 24. bent end of the folding bar; 25. cuff; 26. cap; 27. hinged hood spring; 28. rod spring; 29. ball (2); 30. nipple; 31. inertial weight; 32. ball; 33. hammer body; 34. drummer. |
The movable coupling has a thread for screwing onto the cover of the grenade body. On its side surface there is an eye with holes for a safety pin and two grooves. Using an eye and a pin, the movable coupling is connected to the folding bar. The spring end of the hinged bar is placed in one groove of the movable coupling, and in the second (placed diametrically opposite) the end of the hinged cap bar with a ball.
Impact mechanism: 1. inertial weight;
2. hammer body; 3. impact mechanism housing; 4. tube with flange; 5. counter-safety spring; 6. mainspring; 7. drummer. The impact mechanism is designed to ignite the detonator cap of the fuse. It consists of a housing, a tube with a flange, a firing pin housing, a firing pin, a main and counter-safety spring, safety balls and an inertial weight.
The firing pin body is placed in a tube with a flange and has four holes for safety balls. The firing pin and mainspring are located inside the body. Two large safety balls hold the firing pin body in the tube, and two small ones hold the firing pin in the firing pin body.
The counter-safety spring does not allow the inertial weight to move during the flight of the grenade.
The stabilizer serves to give the grenade directional flight with the bottom of the body forward. It consists of a fabric cone, four wire feathers, a sleeve, a ring and a spring.
The safety device includes four fuses that ensure safety when handling and flying the grenade.
The first fuse, a safety pin, connects the movable coupling to the folding bar and ensures safety when handling the grenade. It turns off before throwing a grenade.
The second fuse ensures the safety of the grenade in case of accidental fall if the safety pin is pulled out. It consists of a hinged cap bar with a ball, a movable coupling and its spring. The safety switch is turned off at the moment the grenade is thrown.
The third fuse ensures the safety of the grenade after being thrown (the second fuse is triggered) in the event of an accidental impact on an obstacle located closer than 1 m from the thrower. It consists of a rod with a cap and a spring, a movable and central tube, a nipple and two balls. The fuse is turned off by the stabilizer after it is deployed during the flight of a grenade.
The fourth fuse, a counter-safety spring, ensures the safety of the grenade in flight by keeping the inertial weight from moving forward.
Explosive charge: 1. fuse shell;
2. bushing; 3. detonator capsule; 4. additional detonator. The explosive charge is designed to penetrate armor (concrete) and destroy durable barriers. To generate a narrow stream of high-density gases (several thousand atmospheres) during an explosion and direct it towards the armor, the charge in the front part has a funnel-shaped cumulative recess. In addition, between the bottom of the body and the cumulative funnel there is free space (without explosives), which provides the greatest armor-piercing effect of the grenade. The bursting charge consists of a main and an additional charge, between which a cardboard spacer is placed.
Before throwing a grenade, you need to take the grenade out of the bag, unscrew the handle, insert it into the body tube and screw the handle all the way. The firing pin is held by small balls in the firing pin housing, compressing the mainspring. The striker body is held from moving forward by large balls in a tube with a flange. The folding bar is connected with a safety pin to the movable clutch of the handle and the bent end to the hinged cap; its spring end is located in the groove of the movable clutch. The ends of the safety pin are spread apart and hold it firmly on the handle.
When throwing a grenade: the throwing grenade is taken by the handle in the hand, the safety pin is pulled out, and the grenade is thrown at the target. When the pin is pulled, the movable coupling and the hinged lid are released. When swinging to throw, the grenade body, together with the movable coupling, moves away from the handle body, compressing the spring of the movable coupling and releasing the ball and the spring end of the folding bar.
At the moment the grenade is separated from the hand, the body of the handle, under the action of the spring of the movable coupling, moves towards the body of the grenade and takes its previous (before throwing) position.
The hinged cap, under the action of its spring, moves back from the handle, turns the hinged bar, and, freed from engagement with it, is separated from the handle. The stabilizer spring pushes the stabilizer out of the handle, which, under the action of the wire feathers and the force of air resistance, opens and pulls out the movable tube, which releases the balls of the third fuse holding the rod. The rod, under the action of its spring, comes out of the firing pin (the third fuse has tripped) and releases the large balls, and therefore the firing pin body. The forward movement of the inertial weight and the firing pin body is prevented by a counter-safety spring and friction. Small balls, located in the walls of the striker body, do not allow the striker to move forward. RKG-3 during flight: 1 — stabilizer spring;
2 - movable tube; 3 — wire feathers; 4 — fabric cone; 5 — hinged cap with a strip; 6 — cap spring. When meeting a target (obstacle): at the moment the grenade hits the target (obstacle) with the bottom of the body or the side, the counter-safety spring is compressed under the action of an inertial weight, and the striker body moves forward until the small balls enter the groove of the tube with a flange and the drummer will not be released. The firing pin, under the action of a spring, sharply moves forward, pierces the detonator cap of the fuse, it ignites and causes an instant explosion of the grenade.
When a grenade hits an armored target, it explodes and destroys the armor, affects the crew, weapons and equipment, ignites fuel and can explode ammunition.
The grenade produces its most effective effect when it hits the target with its bottom.
Throwing a grenade can be done from any position, but only from behind cover.
The relatively light weight of the RKG-3 allows a trained soldier to throw an anti-tank grenade at 15 - 20 m.
The development of armored vehicle protection required increased armor penetration, for which the RKG-3 grenade at the Basalt enterprise was modernized and received the designations RKG-3E and RKG-3EM.
| RKG-3E |
The purpose, design and operation of parts and mechanisms of later samples of the hand-held cumulative grenade RKG-3E and RKG-3EM are similar to the RKG-3 grenade.
The difference is that the RKG-3E (RKG-3EM) grenades have a cumulative funnel made of copper. RKG-3EM
RKG-3 grenades (RKG-3E and RKG-3EM) are made of steel and duralumin.
Soldiers carry grenades in grenade bags, two in each. The fuses are placed in them separately from the grenades in the pocket of the bag, and each fuse must be wrapped in paper or a clean rag.
Grenades are delivered to the troops in wooden boxes. In the box, grenades, handles and fuses are placed separately in metal boxes. There is a knife for opening boxes. There are markings on the walls and lid of the box indicating: the number of grenades in the box, their weight, the name of the grenades and fuses, the manufacturer's number, the batch number of the grenades, the year of manufacture and the danger sign. All supplies of grenades and fuses, except those carried by soldiers, are stored in factory seals.
UPG-8
To train soldiers, a training anti-tank grenade UPG-8 was created, repeating the RKG-3 in shape and weight. The training and simulation anti-tank grenade UPG-8 consists of a body, a handle and a simulated fuse. A barrel is fixed in the bottom and cover of the case. The end of the barrel protruding from the body has: inside - a chamber for placing a fuse, outside - a thread for screwing on the handle. In the middle part of the barrel there are two holes for the release of powder gases in the event of a grenade falling bottom onto soft ground. The handle is used for the convenience of throwing a grenade. It consists of a housing, an impact mechanism, three fuses and a stabilizer. The body houses all parts and mechanisms of the handle. The impact mechanism consists of a support sleeve, a sting, a striker body, a weight, a threaded sleeve, a support washer, a safety spring, locking screws and a counter screw. The first fuse is a safety pin that holds the folding bar on the handle body, which ensures safety when handling the grenade. The second fuse ensures safety when throwing a grenade and turns off automatically during flight. He doesn't understand. The third fuse - the safety spring of the impact mechanism prevents the striker body from moving forward during the flight of the grenade. The stabilizer serves to direct the flight of the grenade with its bottom towards the target. It consists of a fabric cone, wire feathers, a ring and boats. A simulated fuse serves to simulate the sound and smoke effect of a live grenade exploding. It consists of a cartridge case, an igniter primer, a charge of black powder and wads. All parts of the training grenade, except for the imitation fuse, can be reused.
| Grenade weight, g | 1070 |
| Charge mass, g | 600 |
| Explosive type | TG-40 |
| Grenade length, mm | 400 |
| Grenade diameter, mm | 76 |
| Throwing range, m | 15 — 20 |
| Armor penetration, mm | 170 (RKG-3E) 220 (RKG-3EM). |
Unlike a combat training grenade, it can be used multiple times and, when triggered, only simulates sound and smoke effects.
The outer surface of the UPG-8 grenade is painted black.
RKG-3 type grenades were repeatedly used in combat.
Currently, the RKG-3 and its modifications are unable to reliably hit main battle tanks, but can be used in close combat against light armored vehicles, vehicles, and also to destroy particularly strong structures.
Copies of the RKG-3 were also produced in other countries - in particular, in Yugoslavia - M79 produced by SDPR and Egypt (a grenade with 120 mm armor penetration).
The Yugoslav analogue of the RKG-3 was widely used during all conflicts in the territory of the former SFRY and showed high effectiveness in urban battles and ambushes in mountainous areas.
Models
- RKG-3 Penetration
: 125 mm RHA.
Gross weight
: 1.07 kg. (2.35 lbs) - RKG-3M
(
-Modernized
, “Improved”) The model with a sleeve was replaced from steel to copper.
Penetration
: 165mm RHA.
Gross weight
: 1.1 kg.
(2.42 lb) East German made copies ( RKG-3Cu
). - RKG-3T
Model with improved copper liner.
Penetration
: 170mm RHA - RKG-3EM
Model with a larger warhead.
Penetration
: 220mm RHA
Gross Weight
: 1.7kg. (3.74 lbs) - UPG-8
(
Uchebnaya Antitankaya Grenada
, "Training Anti-Tank Grenade"). Black body with white markings. The reusable warhead contains a rechargeable black powder charge that primarily produces black smoke that escapes through holes in thick sheet metal. The new fuze and parachute can be quickly reloaded in the handle after use using special weapons tools. - M79
Copy of RKG-3EM from Yugoimport SDPR.
Copies are now produced in Serbia ( M79
) and Bosnia and Herzegovina (
RKB-M79
).
Filling:
400 g (0.88 lb) Hexolite,
Penetration
: 220 mm RHA, Gross Weight: 1.1 kg. (2.42 lbs).
How to throw RGD-5
Take it in your free hand and press the safety lever firmly against the body. With your other hand, unclench the antennae of the pins, insert your finger into the ring and pull it out. You can quit right away, or you can wait for the right moment.
To wait for the moment, you need to keep the bracket pressed to the grenade. In this position, the striking mechanism is held by a lever and you can walk like this indefinitely.
If you suddenly don’t want to throw a cocked projectile, the pin is inserted back through the fuse hole and the safety bracket ears. After releasing the lever, the percussion mechanism on the primer will fire with a loud bang. There are 3-4 seconds left before the explosion.
An experienced and strong soldier is able to throw a grenade at least 50 meters. You need to throw at an angle of 30-45 degrees.
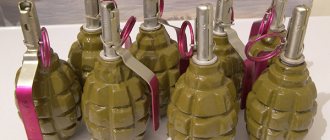
RGD-5 grenades
There should be no obstacles in the flight path such as wires, tree branches or tall grass.
When throwing into rooms through door and window openings, you need to be very careful and have the opportunity to take cover yourself.
If the throw is unsuccessful, the grenade may bounce back off the wall.
Accordingly, the sequence of application:
- Unscrew the plug and screw in the fuse (if not prepared for battle earlier).
- With your free hand, part the antennae of the checks.
- Place your index finger through the ring and pull it out.
- After waiting for the right moment, throw it at the target.
It is not recommended to approach unexploded shells. It is prohibited to deactivate explosive objects (explosive objects) without special knowledge and experience.
Links[edit]
Notes[edit]
- HMMWV attack video
- US Department of Defense Photo [ permanent dead link
] - Ismay, John. "A look at how the insurgents fought in Iraq". atwar.blogs.nytimes.com
. New York Times . Retrieved April 7, 2022. CS1 maint: discouraged parameter (link) - ↑
Chris Hernandez (September 19, 2022), Breach Bang Clear, https://www.breachbangclear.com/russian-rkg-3-anti-tank-hammer/
Notes[ | ]
- Textbook for basic military training. - Moscow: DOSAAF, 1971. - P. 173.
- ↑ 12
* Hand cumulative grenade RKG-3E. Management. - Moscow: Military Publishing House of the Ministry of Defense of the USSR, 1959. (The RKG-3EM grenade is also described in the same book). - Panzerhandgranate RKG-3 // ABC des Schießens. Schützenwaffen. l.Auflage. Berlin, Militärverlag der Deutschen Demokratischen Republik, 1983. p.28-30
- Type 3, Antitank
- RKG-3 Antitank Hand Grenade // North Korea Country Handbook MCIA-2630-NK-016-97. US Department of Defense, May 1997. page A-103
- Alexander Kish. Manual cumulative bomb RKG-3. One icon of the army in Iraq // “Arsenal” (Serbia), No. 34, October 2009. p.9
- “ Hand-held cumulative grenade RKG-3EM - 47 pcs.
» Order No. 999-r to the Cabinet of Ministers of Ukraine dated November 21, 2013. “About the confirmation of additional transfer of ammunition, which facilitates disposal”
Technical means of throwing
Technical means for throwing grenades have been used for a long time. Starting with the use of muzzle-loading mortars for throwing grenades, and later devices.
Thus, Russian officer M.G. In 1916, Dyakonov proposed a variant of a device for throwing grenades screwed onto the barrel of a Mosin rifle. In 1917, the invention was put into service, but was soon discontinued due to the demobilization of the army.
But the designer continued development and 10 years later, in 1928, the Dyakonov grenade launcher and rifle (or rifle) grenade entered service with the Red Army.
Armies around the world use anti-tank grenade launchers and their under-barrel versions attached to small arms.
Trends in design are associated with reducing the weight of weapons, increasing combat qualities and diversity in use. But the hand grenade still remains the faithful combat friend of the infantryman.
Literature[ | ]
- RKG-3 cumulative hand grenade. Management. - Moscow: Military Publishing House of the Military Ministry of the USSR, 1952.
- RKG-3E cumulative hand grenade. Management. - Moscow: Military Publishing House of the Ministry of Defense of the USSR, 1959. (The RKG-3EM grenade is also described in the same book).
- Training hand anti-tank grenade (UPG-8). Management. - Moscow: Military Publishing House of the Ministry of Defense of the USSR, 1959.
- Shooting manual. Hand grenades. - Moscow: Military Publishing House of the USSR Ministry of Defense, 1965.
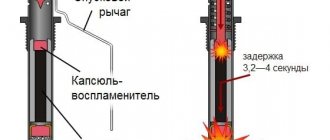
Operating principle of RGD-5
The antennae of the pins are bent in such a way as to prevent an arbitrary explosion. After straightening the antennae, you need to apply force to pull out the pin ring. The pin is held by the safety lever, and after it is pulled out, the lever is held by the hand of the grenade thrower, pressing it to the body.
The lever holds the striking mechanism. After the hand releases the lever, the firing pin, under the influence of a straightened spring, rushes into the igniter capsule.
RGD-5 grenades
The kinetic energy of the impact ignites the powder retarder charge. The moderator burns for a few seconds and ignites the detonator cap. The detonator detonates the main TNT charge. The released energy tears the body into a hundred fragments and creates a shock wave.
A smooth body without notches leads to completely random shapes of fragments and the direction of their scattering.
The defeat of the enemy depends on many factors. The destruction of an enemy that is directly close to the epicenter is not guaranteed. And a fragment at the end of its life can, perhaps, slightly hit a fighter.
Melee
The Second World War is not only the greatest catastrophe of mankind, but also the war in which urban fighting became the most widespread.
And here, when the opponents were sometimes separated by a couple of meters in neighboring rooms, grenades came in handy. However, the effectiveness of grenades in the imagination of the average person is slightly exaggerated. One Afghan veteran told me a tragically funny incident. The young fighter, who, in his opinion, was offended by the veterans, waited for the opportunity and threw the F-1 into the dugout where the offenders were. In a sad irony, only the thrower himself was killed. Everyone in the dugout was stunned, but the only fatal fragment flew through the door and killed the instigator.
But this does not mean that grenades are not needed by the troops. This means that this type of weapon requires improvement. And in the Russian army, grenades are being modernized. The new generation of grenades is the RGO and RGN, an offensive and defensive hand grenade.
Their concept differs little from the well-known F-1 and RGD-5. Since the offensive grenade is designed to be used on the move at an enemy position, its explosive charge is smaller to prevent the advancing infantryman from being caught in the blast range.
But the new grenades have a significant difference. This is the impact-remote principle of the fuse. In other words, the grenade is initiated like an artillery shell or mortar mine - the explosion occurs when it collides with a solid obstacle.
This is a significant change. Previously, grenade fuses were designed on the principle of slowing down the explosion. That is, after releasing the fuse - the checks - the fuse automatically went off after some time. Typically three to five seconds. This gave the enemy a chance to avoid defeat.
Veterans of the Stalingrad urban battles often recalled how a natural “volleyball” fight sometimes began between the opposing forces: a thrown grenade often returned to the “author”, precisely because of the delay.
For the Germans this generally became a big problem. Their grenades - Stielhandgranate, or as we called it “tolkushka” and Eihandgranate M39 - were initiated in a very original way. The idea of the German developers was as follows. The infantryman was unscrewing the safety cap, under which the cord was hidden. The soldier threw a grenade while holding a cap connected to this cord in his hand, and when the grenade flew away from the soldier at a safe distance, the fixed cord pulled out the pin.
This made the use of grenades safer, but very often the soldier either did not hold the safety cord or simply did not throw the grenade. According to the recollections of veteran sapper Pavel Yegorychev Sapronov, they spent six months collecting failed German grenades in the ruins of Stalingrad.
The Red Army did the opposite. Special grenades for scouts were produced with zero delay. But the use of these grenades was extremely dangerous and required considerable training.
It is these problems that are solved in the new Russian RGN and RGO grenades. The soldier does not need to worry about when and how they explode. The new grenades have a guaranteed safe self-destruction delay of over ten seconds, but they will go off when they hit a solid obstacle.
Now the Russian infantryman has real hand artillery.
Download original: “RGN and RGO grenades”
About the history of creation. How did it all begin?
In 1922, by order of the military leadership of the Red Army, an audit of artillery ammunition warehouses was carried out. At that time, the Red Army had seventeen types of grenades. Nevertheless, among the large assortment of defensive fragmentation models, there were no domestically produced products. The Red Army soldiers used grenades made according to the Mills system. At least 200 thousand units of such hand-held projectiles were stored in warehouses. French ammunition was also used - the 1915 F-1. However, this “pocket shell” had a very unreliable fuse. Since the cardboard case was not airtight enough, the detonation composition became damp, as a result of which French grenades often did not work or exploded in the hands of soldiers. The report to the military department of the Red Army indicated that the Soviet army was only 0.5% equipped with explosive devices of fragmentation-defensive type. In 1925, all explosive devices available in artillery depots were tested. The task of the expert commission was to choose the best option, which could later be used to design a Soviet grenade. After testing, the choice fell on the explosive devices of the 1914 Mills system and the F-1.
