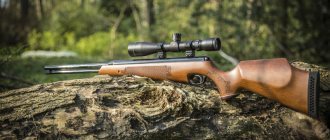
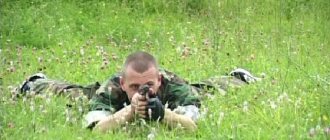
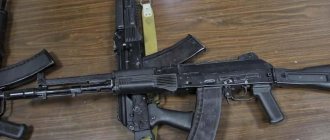
Assault rifles are the most popular type of modern small arms, and in Russia the most common assault rifle is the AK (Kalashnikov assault rifle). If a global military conflict occurs, then the technique of shooting with a machine gun will turn out to be a very useful skill not only for men, but also for women, so training in shooting with a machine gun should take place not only at shooting ranges, but also in conditions as close as possible to reality.
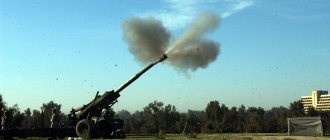
Techniques of shooting from a machine gun, in contrast to methods of shooting from other small arms, have one feature related to the fact that the rate of fire of a Kalashnikov assault rifle is very high. If the weapon is in technically good condition, and various delays when firing from a machine gun are practically eliminated, then the magazine can be completely emptied in 3 seconds. It is for this reason that tactical shooting from a machine gun is carried out, as a rule, in single-fire mode. The delay after each shot allows the shooter to prepare for a new shot, taking into account the changing situation. With this method of shooting, the consumption of ammunition is significantly reduced, and the overall accuracy of fire is increased.
Standards for shooting from a machine gun
To assess the shooter’s training, it is necessary to assess his compliance with the established standards. The following describes the existing requirements in this area. The most applied standards are described.
Getting ready to fire
This is about how quickly a soldier can prepare for different positions. There are several varieties of the standard under consideration. It must be confirmed for shooting standing, behind cover, prone or kneeling.
Execution occurs as follows. The shooter is located ten meters from the firing position. The machine is in the “belt” position. In this case, the prepared magazine with cartridges is in the bag.
The inspector gives the person being inspected some introductory information: indicates where the firing position is located, talks about the position from which it will be necessary to fire. The soldier must move to the shooting position, take a suitable position, load the machine gun and report to the commander that he is ready.
This exercise needs to be done within a few seconds. The standards are considered separately for each position in which fire is opened. For a machine, the standards are the same in different cases. If you need to shoot “standing”, “prone” or “kneeling”, then the readiness time is 7, 8 or 10 seconds. The first number corresponds to the rating “excellent”, the second - “good”, the third - “satisfactory”.
The video shows techniques that are used when shooting from a Kalashnikov assault rifle
Unloading a weapon
In this case, the starting position is when the soldier is holding a loaded machine gun in his hands. At the command of the manager, he must begin to discharge it. His task includes the following actions. The soldier takes out the magazine and removes the cartridges from it, then puts them in his bag. After this, he stands at a distance of 10 m from the place from which the fire will be fired.
The exercise is carried out for speed and accuracy of execution. If it took no more than 16 seconds, this corresponds to an “excellent” rating. If 17 is “good”, 20 is “satisfactory”.
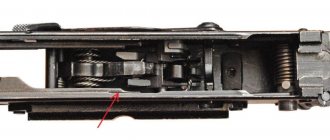
Incomplete disassembly of weapons
In order to keep the machine in order, it is necessary to disassemble it. It is used to inspect, lubricate or repair weapons. There is complete and partial disassembly and reassembly. In most cases, the first option is used. The second is usually necessary when the weapon is heavily soiled and thorough cleaning is required.
In order to evaluate the actions of the trainee, it is necessary that he complete the following. He stands in front of a clean table. The machine gun lies in front of him. The goal is to complete partial disassembly within a specified time. At the command of the manager, he strives to do it in the minimum time.
To get an excellent mark, it will be enough if he completes the disassembly in 13 seconds. 14 means “good”, 17 means “satisfactory”.
Incomplete weapon assembly
The starting point is this. That in front of the soldier there is a disassembled machine gun, the parts are laid out in the order they were removed. His task is to complete the assembly in the minimum amount of time. In order to receive an “excellent” rating, he must do this in no longer than 23 seconds. 25 is enough for a “good” rating, and 30 for a “satisfactory” rating.
Shop equipment
Before the test begins, the student stands in front of the table. In front of him are a scattering of cartridges. Next to them is an empty store. The task is to fill it completely with cartridges.
After the inspector's signal, the person begins work. He must do it in the shortest possible time. If it takes no more than 30 seconds, he will receive an “excellent” rating. Having loaded the magazine for 35, it will earn “Good”, and at 40 – “Satisfactory”.
Checking the battle
82. To check the combat, the shooter fires four single shots, carefully and uniformly aiming at the middle of the lower edge of the target (black rectangle). At the end of the shooting, the commander in charge of the battle check examines the target and, based on the location of the holes, determines the accuracy of the battle and the position of the midpoint of impact. Soldiers and sergeants performing shooting are not allowed to inspect the targets.
83. The accuracy of the combat is considered normal if all four holes or three (with one broken off) fit into a circle with a diameter of 15 cm. If the accuracy of the holes does not satisfy this requirement, then the shooting is repeated. If the shooting result is unsatisfactory again, send the machine gun to a repair shop to eliminate the causes of bullet scatter.
If the accuracy of the holes is considered normal, then the commander determines the midpoint of the impact and its position relative to the control point.
Rice. 47. Determination of the average point of impact:
a, b - along four holes; c - along three holes; d - determination of a detached hole
84. To determine the average point of impact using four holes you need:
- connect the two nearest holes with a straight line and divide the distance between them in half;
- connect the resulting point with the third hole and divide the distance between them into three equal parts;
- connect the division point closest to the first two holes with the fourth hole and divide the distance between them into four equal parts.
The division point closest to the first three holes will be the average point of impact of the four holes (Fig. 47, a)
The midpoint of impact can also be determined in the following way; connect the holes in pairs, then connect the midpoints of both straight lines and divide the resulting line in half; the division point will be the middle point of impact (Fig. 47, b).
85. If all four holes do not fit into a circle with a diameter of 15 cm, then the average point of impact is allowed to be determined by three more closely spaced holes, provided that the fourth hole is removed from the average point of impact of the three holes by more than 2.5 radii of the circle containing these three holes (Fig. 47, d).
88. To determine the average point of impact for three holes you need:
- connect the two nearest holes with a straight line and divide the distance between them in half;
- connect the resulting point with the third hole and divide the distance between them into three equal parts.
The division point closest to the first two holes will be the middle point of impact (Fig. 47, c),
87. During normal firing of a machine gun, the average point of impact should coincide with the control point or deviate from it in any direction by no more than 5 cm, i.e., not go beyond the small circle of the sighting target.
88. A machine gun, the engagement of which turns out to be abnormal during testing, is reduced to normal engagement in accordance with Art. 89
Techniques and rules of shooting from a machine gun
It is possible to use a weapon for firing from any selected position and place from where you can clearly see the target. When looking for a suitable location, you need to find one that allows you to have a good overview and have cover from enemy fire. It is important that this place has the opportunity to perform shooting techniques.
Usually the following positions are chosen: in a trench, trench, ditch, behind a stone or in other similar places. It is not recommended to take positions near objects that stand out. If you settle on the crest of a hill, the shooter will be at a disadvantage.
In order for a soldier to take a place to fire, you need to receive a command that sounds something like this: “The machine gunner should take such and such a place to fire, for battle.”
After this, the fighter begins to execute the command. He must act taking into account the characteristics of the terrain. Now you need to move to the starting position and get ready to fire.
Movement can be done by crawling, running, or rapid walking. Before this, to ensure movement, the machine must be set to safety. If the soldier chooses to move by crawling, he must hold the weapon by the belt near the front swivel. You can also hold it by the fore-end while moving.
General provisions
91. Firing from a machine gun can be carried out from various positions and from any place from which the target or area of terrain where the enemy is expected to appear is visible.
When firing from a standing position, the machine gunner assumes a shooting position while standing, kneeling, or lying down, depending on the terrain conditions and enemy fire.
While on the move, the machine gunner can fire on the move without stopping and from a short stop.
When traveling on an armored personnel carrier, car, tank, landing craft and skis, the machine gunner takes a position that is convenient for him to fire, observing safety measures.
92. In combat conditions, the machine gunner occupies and equips the shooting area at the commands of the squad leader or independently. In the command to occupy a firing position, the commander can also determine the time for equipment, the firing position, the firing sector, or the direction of firing.
To fire from a machine gun, you must choose a place that provides the best visibility and fire, protects the machine gunner from observation and enemy fire, and allows you to conveniently perform shooting techniques.
Depending on the situation, the place for shooting is chosen in a trench, trench, shell crater, ditch, behind a stone, stump, etc. In a populated area, the place for shooting can be chosen in a window of a building, in an attic, in the foundation of a building, etc. P.
You should not choose a place for shooting near prominent individual local objects, as well as on the ridges of hills,
93. When preparing a place for shooting in advance, it is necessary to check the possibility of firing in a given sector or direction, for which the machine gun is sequentially aimed at various local objects. For ease of firing, it is necessary to prepare a stop for the forend of the machine gun.
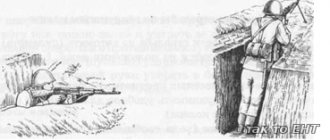
Rice. 48. Holding the machine gun while crawling on your belly
94. To occupy a place for shooting, a command is given, approximately; " So and so
(or to such and such a machine gunner),
the place for shooting is there - for battle
.” At this command, the machine gunner, applying himself to the terrain, quickly takes a place for shooting, prepares to fire and opens fire.
95. To change the place for shooting, a command is given, approximately: “ To such and such
(or a machine gunner like that), run over
there - forward
.” Following this command, the machine gunner outlines the route to advance to a new location, hidden places for stopping, and a method of movement, if it was not specified in the command.
Depending on the situation and the nature of the terrain, the machine gunner moves in battle by running, at an accelerated pace, and by dashing or crawling. Before moving, the machine is put on safety.
96. When running, at an accelerated pace and when dashing, the machine gun is held with one or two hands, as is more convenient.
When crawling, the machine gun is held with the right hand by the belt at the top swivel or by the forend (Fig. 48).
97. To successfully perform fire missions, a machine gunner must be fluent in the techniques of firing a machine gun.
Each machine gunner, guided by the general rules for performing shooting techniques and taking into account his individual characteristics, must develop and apply the most advantageous and stable position for shooting, achieving a uniform position of the head, body, arms and legs.
Depending on the physical characteristics of the machine gunner, it is allowed to fire from the left shoulder, aim with both eyes open, etc.
98. Firing from a machine gun consists of preparing to fire, firing (shot) and stopping shooting.
Prone shooting position
If a soldier is required to shoot from a prone position, he must consider the following:
- First, he must move his right hand, which holds the machine gun, slightly forward.
- At the same moment, the soldier takes the receiver with his left hand.
- Holding the receiver guard and the fore-end with your right hand, take a step with your right foot forward and at the same time slightly to the right.
- Continuing to bend, the person should slowly come to his left knee. He should rest his left hand on the ground.
- The fighter continues to gradually assume a prone position. To do this, he consistently lowers himself onto his left thigh, then leans on his left hand in the forearm area.
- The soldier lies on his left side and turns on his stomach.
When lying down, he keeps his legs spread, with his feet pointing apart. The machine gun is held by the fore-end with the left hand.
Now you need to charge the weapon and remove the safety. To do this, insert a loaded magazine into it. The interpreter is assigned to the type of fire that is needed: single or automatic. After this, the shutter is pulled all the way back, then released.
If immediate opening of fire is not expected, the weapon is put on safety again. Next, the right hand is transferred to the handle of the automatic weapon.
Getting ready to fire
99. The machine gunner is prepared to fire on command or independently. During training sessions, the command to prepare to fire can be given separately, for example: “To the firing line, march at a pace,” and then “Load.” If necessary, the firing position is indicated before the “Load” command.
100. Preparing for shooting includes taking the position for shooting and loading the machine gun.
101. To assume a prone shooting position, you must:
1) If the machine gun is in the “on the belt” position, move your right hand along the belt slightly up and, removing the machine gun from the shoulder, grab it with your left hand by the trigger guard and receiver, then take the machine gun with your right hand by the receiver lining and the fore-end with the muzzle part forward. At the same time, take a full step with your right foot forward and slightly to the right. Leaning forward, lower yourself to your left knee and place your left hand on the ground in front of you, fingers pointing to the right (Fig. 49, a); then, leaning successively on the thigh of the left leg and the forearm of the left hand, lie on your left side and quickly turn onto your stomach, spreading your legs slightly to the sides with your toes outward; At the same time, place the machine gun with the fore-end on the palm of your left hand (Fig. 49, b).
2) If the machine gun is in the “chest” position. With your left hand, take the machine gun from below by the fore-end and the barrel guard and, lifting it slightly forward and up, remove your right hand from under the belt, and then throw the belt over your head and take the machine gun with your right hand by the barrel handguard and the hand-guard with the muzzle part forward. In the future, the prone shooting position is assumed in the same way as from the “on the belt” position with the machine gun.
102. To assume a kneeling shooting position, you must: take the machine gun in your right hand (Article 101) by the barrel lining and fore-end with the muzzle forward and at the same time, putting the right yoga back, lower yourself onto your right knee and sit on your heel; the shin of the left leg should remain in a vertical position, and the hips should form an angle close to a right angle. Place the machine gun with the fore-end in your left hand, pointing it towards the target (Fig. 50).
Rice. 49. The procedure for taking the position for prone shooting:
a - the driver rests on his left knee and left hand;
b - the machine gunner is held by the forearm with his left hand
103. To assume a standing shooting position
necessary:
1) If the machine is in the “belt” position
. Turn half a turn to the right in relation to the direction towards the target and, without applying the left yoga, move it to the left approximately shoulder-width apart, as is more convenient for the machine gunner, while distributing the weight of the body evenly on both legs. At the same time, moving your right hand slightly upward along the belt, remove the machine gun from your shoulder and, picking it up with your left hand from below by the fore-end and receiver lining, vigorously push the muzzle forward towards the target (Fig. 51).
2) If the machine gun is in the “chest” position
. With your left hand, take the machine gun from below by the fore-end and the receiver lining and, lifting it slightly forward and up, remove your right hand from under the belt, and then throw the belt over your head.
| Rice. 50. Kneeling position | Rice. 51. Standing shooting position |
At the same time, turn half a turn to the right and, without placing your left foot, move it to the left approximately shoulder-width apart, as is more convenient for the machine gunner, and vigorously move the machine gun with the muzzle forward, towards the target side (see Fig. 51).
104. When taking a shooting position with a machine gun “on the chest,” it is allowed not to remove the belt from the neck, but to use it to more firmly hold the machine gun when shooting (Fig. 52).
105. To load the machine gun
necessary:
— holding the machine gun by the fore-end with your left hand, attach the loaded magazine to the machine gun with your right hand (see Article 7, paragraph 9 and Fig. 11), if it was not previously attached to it;
— put the translator on automatic fire (AB), if the machine gun is on safety;
- with your right hand, pull the bolt frame back as far as it will go by the handle and release it;
- put the machine gun on safety (Fig. 53), if there is no immediate opening of fire or the command “Fire” is not followed, and move your right hand to the pistol grip (see Fig. 49, b).
Rice. 52. Shooting position using a sling:
a - from the knee; b - standing
106. If before loading the machine gun the magazine was not equipped with cartridges or the cartridges were used up during shooting, then it is necessary to equip the magazine.
Rice. 53. The machine is put on safety
To equip the magazine, you need to take the magazine in your left hand with the neck up and the convex side to the left, and in your right hand - the cartridges with bullets to the little finger so that the bottom of the cartridge case rises slightly above the thumb and forefinger. Holding the magazine with a slight tilt to the left, press the thumb (Fig. 54) to insert cartridges one at a time under the bends of the side walls with the bottom of the cartridge case towards the rear wall of the magazine.
Rice. 54. Loading the magazine with cartridges
107. When preparing to fire an assault rifle with a folding stock, you must fold the stock down before loading the assault rifle. To do this, holding the machine gun with your left hand by the shoulder rest and fore-end, and with your right hand by the pistol grip, push down the locking cap with the thumb of your right hand, and tilt the rods slightly downwards with your left hand (Fig. 55). After this, take the machine gun by the fore-end and the receiver lining with your left hand, fold the rods back with your right hand until they are secured in the folded position with the butt clamps and place the shoulder rest perpendicular to the rods.
| Rice. 55. Folding out the folding stock | Rice. 56. Firing position with stock folded |
If there is no time to fold back the butt (in the event of a sudden attack by the enemy), the machine gunner prepares to fire (and fires) from the machine gun with the butt folded, pressing the machine gun with the back of the receiver and the pistol grip to the body (Fig. 56).
Production and cessation of shooting
To start shooting, you need to receive the appropriate command. It may involve direct shooting or set the task so that the fighter determines the moment for shooting in accordance with the situation.
The command to open fire must include the following information:
- Who exactly should open fire?
- A target for shooting is assigned.
- Instructions are given for working with the sight in its entirety. Indicate the aiming point.
If the firing range does not exceed 400 meters, then instructions for the sight may not be given.
Direct shooting includes the following operations:
- Accurate installation of the sight and rear sight. To do this, first bring the weapon closer to you. Use your index finger and thumb to squeeze the scope clamp. Next, it is moved so that its leading edge corresponds to the desired division. To install the rear sight, you need to pull the screw handwheel slightly to the right. In this case, you need to turn it so that the risk is aligned with the slot and the appropriate division.
- It is necessary to place the translator in such a way that it corresponds to the required fire mode. To do this, press the protrusion with your thumb from top to bottom and move it to the desired position. The first click corresponds to automatic shooting, and the second - single.
- The weapon is applied to the shoulder. You need to perform the action while keeping the target in sight. In this case, you need to rest the butt of the weapon firmly against your shoulder. As a result, it is important for the shooter to feel contact with it. The index finger with the first phalanx is placed on the trigger. Then the head is tilted slightly forward, pressing the shoulder against the butt.
- Aiming is underway. At the same time, cover the left eye, and the right one needs to look at the front sight in the sight slot. Aiming is carried out in such a way that the upper edge of the front sight is flush with the upper edge of the aiming bar and is in the middle of the notch.
- Then the trigger is released.
Next, you need to ensure that the weapon is held during shooting.
The firing is stopped in accordance with the received command. It may be complete or temporary. In the latter case, the commander gives the command “Stop” if shooting occurs from a certain position. If it occurs while moving, then the “Cease fire” command is used for this purpose.
When a fighter receives one of the commands to temporarily suspend firing, he stops pressing the trigger and removes his finger from it. Then the machine is put on safety. If necessary, the magazine is replaced with a fully charged one.
When a complete stop of shooting is needed, the following actions must be performed. After the command “Stop” or “Cease fire,” follow “Discharge.” To accomplish this, the soldier takes the following actions:
- The weapon must be put on safety.
- The sight clamp needs to be pulled back, placing it opposite the “P”.
- The weapon is being unloaded.
- If the machine gun has a folding stock, it is moved to the folded position.
If the command is received lying down, the sequence of command execution does not change. However, in front of them, you need to place the muzzle on your left hand, while placing the butt on the ground.
If fire is fired from a trench, then the weapon is placed on the parapet. In this case, the bolt handle should be directed downward.
You need to unload your weapon. To do this you need to take the following actions:
- Remove the magazine.
- You need to switch the weapon off safety.
- The fighter must move the bolt frame and take out the cartridge that will be in the chamber.
- Now the bolt frame is released. In this case, the cartridge is removed from the chamber.
- By pressing the trigger, the weapon is released from combat cocking.
- After the procedure is completed, the weapon is put on safety.
Further actions depend on where and from what position the shooting is taking place. If from a standing position, then the machine gun is taken on the belt. When shooting while lying down, the weapon is placed on the ground next to you. Next, you need to take all the cartridges from the magazine and insert the empty magazine into the machine gun. The cartridge that has been removed from the chamber must be picked up from the ground and placed in the bag.
If a soldier shot in a prone position, then he should rise together with the machine gun as follows:
- You need to place both hands at chest level, holding the weapon with your right hand by the receiver and forearm. You need to bring your legs together at the same time.
- By sharply straightening the arms, the chest is sharply lifted off the ground
- In this case, the right or left leg is brought forward. After this, they quickly get up and, if necessary, continue moving.
Sometimes, after the shooting has stopped, the commander commands: “Weapons - for inspection.” The actions differ depending on the position the fighter is in.
If he is lying down, he must separate the magazine and put it next to him. Removes the safety. Then he opens the bolt and holds the weapon in this position. After completing the inspection, you need to release the bolt, pull the trigger, put the safety on, and insert the magazine into the machine gun.
In the “standing” position, he takes out the magazine and holds it so that the hole is directed upward. With his left hand he presses him against the machine gun. Then he removes the safety from the machine gun and pulls the bolt back.
After completing the inspection, you need to release the bolt frame, pull the trigger, put the safety on the machine gun, and insert the magazine into place.
You can learn about shooting techniques from a machine gun by watching this video
General instructions
59. Shooting from a machine gun consists of performing the following techniques: preparing to fire (assuming a position for shooting, loading and installing the sight), firing and stopping fire (temporarily suspending shooting and changing the magazine).
60. The machine gunner fires at the commands of the commander or independently.
61. Shooting from a machine gun is carried out from a prone position, from a kneeling position, sitting and standing, from the hand, from a rest and on the move.
62. To load the machine gun, the command “Load” is given. On this command, the machine gunner loads the machine gun in the position in which the team found him.
If necessary, the firing position can be indicated before the "Load" command.
In a combat situation, the machine gun must be loaded in advance.
63. To open and conduct fire, a fire task is set or a command is given, which indicates the target, sight, aiming point (if necessary) and type of fire.
To open a single fire, the commander gives a command, for example: “Landmark 2 - a pile of stones, closer than 50 - a trench, along the loopholes, 10, single - fire.”
“Right on the arable land there is a trench, in the left corner there is a periscope, on the periscope, 20, single, 2 rounds - fire.”
To open automatic fire, the commander gives a command, for example: “Landmark 3 - dry tree, two fingers to the right in the bushes - a machine gun, on the machine gun, 20, two short ones - fire.”
“Right across the dash, 20, in the chest, short - fire.”
“At the attackers, long ones - fire.”
When firing in volleys on the command “Fire”, the machine gunner fires one short burst.
To temporarily stop firing, the command “Stop” is given, and for a complete ceasefire - “Unload”.
The machine gunner must perform all techniques quickly, without stopping observation of the target, with the exception of the time required to install the sight on a machine gun with a sector sight.
64. Each machine gunner, guided by the basic rules set out below for preparing for shooting, must, depending on his individual characteristics, develop the most advantageous and stable shooting position for himself, while achieving a uniform position of the butt in the shoulder.
Techniques for shooting from point-blank range from behind cover
Shooting from a rest depends on its height. Depending on this circumstance, the shooter chooses the appropriate position - “lying”, “kneeling” or “standing”. The machine gun can be held by the magazine or by the forend.
If the rest is low, then you can shoot from the rest from a prone position. In this case, the machine gun is rested with the fore-end against the obstacle. In the process of aiming, part of the physical load of holding the machine gun is reduced.
If a soldier is shooting from behind a vertical cover (for example, a tree), then he can choose the shooting position that is most convenient for him: it is possible to fire while standing, kneeling or lying down.
Shooting with a rest is done as follows:
- The handguard is placed on the stop.
- The fighter holds the weapon with his left hand by the fore-end or by the magazine.
- With his right hand he is ready to pull the trigger.
Sometimes it is convenient to soften the emphasis. In this case, a piece of turf, a roll of an overcoat, or another similar object is placed under the forend. If shooting must be carried out from behind the corner of a building, tree or similar obstacle, then the soldier should lean tightly against it, trying to provide himself with maximum protection.
If you need to fire from a trench, then you need to lean against the front wall and rest your elbows on the ground. You can fire without a rest, with a rest on the magazine or on the fore-end.
Seated shooting techniques
75. For shooting while sitting, one of the following techniques can be used (Fig. 64 and 65):
a) sit on the ground half-turned in relation to the target and firmly rest your heels on the ground; place your left hand on the thigh of your left leg, as is more convenient, and with this hand take the machine gun at gunpoint or by the magazine, or place the magazine on your left hand; open the bolt with your right hand, load the machine gun and set the sight, as when shooting while lying down;
b) cross your legs and tuck them under you so that the foot of the right leg is passed between the thigh and shin of the left leg, or so that the foot of the left leg is tucked under the shin of the right leg; put your left hand on the thigh of your left leg, as is more convenient, and with this hand take the machine gun at gunpoint or by the magazine; open the bolt with your right hand, load the machine gun and set the sight, as when preparing to fire while lying down.
| a Fig. 64. Seated preparation | b Rice. 65. Shooting while sitting |
When applying in a sitting position, rest the elbows of both hands on the knees or, if the fighter’s physique allows, lower them behind the knees.
Perform the remaining techniques for firing a shot and stopping fire in the same way as when shooting prone.
Shooting techniques on the move
Sometimes, in order to complete the mission assigned by the commander, it is necessary to fire while moving. In this case, you can shoot while walking or running without stopping. Sometimes, in order to aim more accurately, a soldier opens fire while stopping.
At the same time, he throws the belt over his shoulder. This is necessary in order to make it easier to hold the machine. With his right hand he clasps the neck of the butt, and with his left he holds the weapon by the fore-end or magazine.
If you need to aim more accurately, you need to raise the weapon to eye level. After this, aiming is carried out and shooting is carried out.
To perform offhand shooting, you need to do the following:
- You need to stop and put your left leg forward.
- At this moment, the butt must be firmly rested on the shoulder.
- When aiming with your right foot, do not place your left foot in front of you.
- Perform one or two short bursts. After they are completed, they lower the weapon down and continue moving.
You can shoot without stopping. However, in most cases, aiming is less accurate. At the same time, while moving, they raise the machine gun and shoot. After this, it is lowered and movement continues.
Standing shooting techniques
76. To shoot while standing, you need to turn half a turn to the right in relation to the target and, without placing your left leg, set it to the left shoulder-width apart, as is more convenient for the shooter, while distributing the weight of the body evenly on both legs; at the same time, remove the machine gun with your right hand, throwing the belt off your shoulder (from your neck), and move it forward with the muzzle towards the target, picking it up with your left hand from below (at gunpoint); With your right hand, pull the bolt back and grab the neck of the butt (Fig. 66).
Rice. 66. Shooting while standing
77. In relation to placing, aiming and shooting while standing, follow the instructions of Art. 67–70.
78. In tight shelters and in case of a sudden attack on the enemy from a short distance, use the following method for shooting while standing: take a machine gun, as indicated in Fig. 73, pointing the muzzle at the target, fire at it with an automatic weapon.
Shooting techniques while moving
Shooting while moving is possible in various situations. This can be done not only while walking or running, but also when performing other types of movements. Sometimes it becomes necessary to perform movements while holding the enemy at gunpoint. This can be done this way:
- Standing on your right knee, place your left foot forward. In this case, the thigh of the left leg should be located horizontally. In this position, the fighter can shoot accurately from the knee.
- To move, you need to move your front leg forward a little. And then move the back one. This movement is slow. But it allows you to carefully observe your surroundings and take careful aim.
Standing on one knee, you can somersault over your head forward, pressing the machine gun to your chest while moving. By making this movement quickly, the fighter remains in complete control of the situation.
With small movements, it is possible to use more complex tactics. For example, in certain circumstances, you can resort to moving backwards while maintaining control of the situation behind you.
To better aim while walking, experienced fighters recommend taking steps with your toes turned outward. In this case, the position during walking becomes more stable than when the foot is placed in the usual way. Another way to walk in a special way is to place your feet in one line when walking.
content .. 1 2 3 9 ..
Chapter IX
RULES FOR SHOOTING FROM A KALASHNIKOV AUTOMATIC (MACHINE GUN)
General provisions
148.
To successfully complete tasks in battle you must:
· continuously monitor the battlefield;
· quickly and correctly prepare data for shooting;
· skillfully fire at all kinds of targets in various combat conditions, both day and night; to hit group and most important single targets, use concentrated fire;
· observe the results of the fire and skillfully adjust it;
· monitor the consumption of ammunition in battle and take measures to replenish them in a timely manner.
Battlefield surveillance and target designation
149.
Observation is carried out in order to timely detect the location and actions of the enemy. In addition, in battle it is necessary to observe the signals and signs of the commander and the results of his fire.
Unless there are special instructions from the commander, soldiers conduct surveillance in the sector of fire indicated by him.
150.
Observation is carried out with the naked eye. When observing, special attention should be paid to hidden approaches. Inspect the area from right to left from near objects to far ones. Carry out the inspection carefully, since minor unmasking signs contribute to the detection of the enemy; such signs may be: shine, noise, swaying branches of trees and bushes, the appearance of new small objects, changes in the position and shape of local objects, etc.
If you have binoculars, use them only for a more thorough study of individual objects or areas of the terrain; At the same time, take measures to ensure that the shine of the binocular glasses does not reveal your location.
At night, enemy locations and actions can be determined by sounds and light sources. If the area in the desired direction is illuminated by a light socket or other lighting source, quickly inspect the illuminated area.
151.
Targets spotted on the battlefield must be immediately reported to the commander and their location correctly indicated. The target is indicated by verbal report or tracer bullets.
The report should be short, clear and precise, for example: “There is a wide bush straight ahead, a machine gun to the left”; “The second landmark, two fingers to the right, under the bush there is an observer.”
When designating targets with tracer bullets, fire one or two short bursts in the direction of the target.
Target selection
152.
For machine guns (machine guns), the most typical are living targets - crews of machine guns and guns, groups of shooters or individual figures firing from various positions, as well as manpower on cars, motorcycles, etc. In addition, fire from machine guns (machine guns) It is also carried out against air targets. Targets on the battlefield can be stationary, appear briefly, or move.
153.
A machine gunner (machine gunner) fires in combat, usually as part of a squad or platoon, destroying targets assigned to him by the commander. Therefore, he must listen carefully and accurately carry out all the commands of the commander.
154.
If a machine gunner (machine gunner) in battle is not given a target to hit, he chooses it himself. First of all, it is necessary to hit the most dangerous and important targets, for example: the crews of machine guns and guns, enemy commanders and observers. Of two targets of equal importance, choose the closest and most vulnerable one for shelling. If a new, more important target appears during shooting, immediately transfer fire to it.
Selecting a sight, aiming point and rear sight
155.
To select a sight, aiming point and rear sight, it is necessary to determine the range to the target and take into account external conditions that may affect the range and direction of the bullet. The sight, rear sight and aiming point are selected in such a way that when shooting, the average trajectory passes through the middle of the target.
When shooting at a distance of up to 400 m, fire should be carried out, as a rule, with a sight of 4 or “P” and entirely 0, aiming at the lower edge of the target or in the middle if the target is high (running figures, etc.).
When shooting at ranges exceeding 400 m, the sight is set according to the distance to the target, rounded to whole hundreds of meters, and the rear sight is 0. As a rule, the middle of the target is taken as the aiming point. If the conditions of the situation do not allow changing the sight setting depending on the distance to the target, then within the direct shot range, fire should be carried out with a sight corresponding to the direct shot range, aiming at the lower edge of the target.
156. The range to targets is determined by the eye. In this case, the range to targets and local objects is determined by sections of the terrain that are well imprinted in visual memory, by the degree of visibility and apparent size of targets (objects), as well as by a combination of both methods.
When determining ranges by (Terrain segments
it is necessary to mentally set aside some familiar range that is firmly entrenched in visual memory (for example, a segment of 100, 200 or 300 m) from oneself to the object (target).
When determining range by the degree of visibility and apparent size of objects (targets)
it is necessary to compare the visible size of the target with the visible sizes of this target imprinted in memory at certain distances.
If a target is detected near a landmark or local object, the range to which is known, then when determining the range to the target, it is necessary to take into account its distance from the landmark by eye.
At night, the range to illuminated targets is determined in the same way as during the day.
157.
When determining the range with an eye, the following must be taken into account:
· the apparent size of the same section of terrain gradually decreases as it moves away from the machine gunner or machine gunner (in the future);
· ravines, hollows, rivers that cross the direction of a local object or target conceal (reduce) the range;
· small objects (bushes, stones, individual figures) seem further away than large objects located at the same distance (forest, mountain, column of troops);
· a single-color, monotonous background of the area (meadow, snow, arable land) highlights and, as it were, brings closer the objects located on it, if they are colored differently, and a motley, varied background of the area, on the contrary, masks and, as it were, removes the objects located on it;
· on a cloudy day, in rain, at twilight, in fog, the distances seem increased, and on a bright, sunny day, on the contrary, they appear decreased;
· in mountainous areas, visible objects seem to come closer.
158. A significant deviation of external conditions from the table (normal) changes the flight range of the bullet or deflects it away from the direction (plane) of fire. The following shooting conditions are taken as the following: air temperature +15° C, absence of wind and terrain elevation above sea level, target elevation angle no more than 15°.
159. Deviation of air temperature from the table (+15° C) causes a change in the flight range of the bullet, increasing it when shooting in summer conditions and decreasing it in winter. The flight range of a bullet when shooting in summer conditions increases slightly, so you should not make adjustments to the sight or to the position of the aiming point. The flight range of a bullet when shooting in winter (at low temperatures) at a distance of over 400 m decreases by a significant amount (50-100 m), therefore, it is necessary to select the aiming point at the upper edge of the target at air temperatures above -25ºС, and at air temperatures below - 25°C increase the scope by one division.
160: Corrections to the sight installation for the elevation of the terrain4 above sea level and the elevation angle of the target are taken into account only when shooting in the mountains, if the distance to the target is more than 400 m.
161. Side wind has a significant effect on the flight of a bullet, deflecting it to the side. The amount of bullet deflection depends on the speed and direction of the crosswind and the distance to the target. The stronger the side wind, the closer to 90° the angle at which it blows, and the further away the target, the greater the amount the bullet will deflect away from the direction of fire. In this regard, it is necessary to correct for side winds. It is taken into account when shooting from a machine gun by setting the aiming point in target figures or meters, when shooting from a machine gun - by setting the rear sight in thousandths. If the situation in battle does not allow for adjustments to the rear sight, then correction for side winds when firing a machine gun is taken into account by moving the aiming point out. The correction for side wind is taken in the direction from which the wind is blowing. So, when there is wind from the left, the aiming point is moved (the rear sight is set) to the left, when there is wind from the right - to the right.
162. The values of corrections for moderate side wind (speed 4 m/sec) in meters, human figures and rear sight divisions are given in the following table.
Firing range, m
| Corrections for moderate side wind (4 m/sec) at an angle of 90° to the direction of fire (rounded) | |||||
| Machine | Machine gun | ||||
| in meters | in human figures | in meters | in human figures | in rear sight divisions | |
| 100 | 0,03 | — | 0,02 | — | — |
| 200 | 0,11 | — | 0,10 | — | — |
| 300 | 0,23 | 0,5 | 0,23 | 0,5 | 0,5 |
| 400 | 0,52 | 1,0 | 0,46 | 1,0 | 0,5 |
| 500 | 0,87 | 1,5 | 0,78 | 1,5 | 1,0 |
| 600 | 1,34 | 2,5 | 1,22 | 2,5 | 1,0 |
| 700 | 2,03 | 4 | 1,81 | 3,5 | 1,0 |
| 800 | 2.86 | 5.5 | 2,57 | 5,0 | 1,5 |
| 900 | 3,77 | 7,5 | 3,44 | 7,0 | 2,0 |
| 1000 | 4,92 | 10,0 | 4,42 | 9,0 | 2,0 |
The table corrections for strong winds (speed 8 m/sec) must be doubled, and for weak winds (speed 2 m/sec) they must be halved. When the wind blows at an acute angle to the shooting plane, take half the correction as when the wind blows at an angle of 90°.
Choosing the moment to open fire
163.
The moment to open fire is determined by the commander’s “Fire” command, and when firing independently, depending on the situation and the position of the target.
The most advantageous moments for opening fire: when the target can be hit suddenly at close range; when the target is clearly visible; when the target crowds, exposes the flank or rises to its full height; when the target approaches a local object (landmark), for which the sight setting is specified by shooting; when driving, when the vibration of the car is minimal.
A sudden fire attack on the enemy (especially from the flank) has a stunning effect on him and causes him the greatest defeat.
Conducting fire, monitoring its results and adjusting
164.
When firing, the machine gunner (machine gunner) must carefully monitor the results of his fire and adjust it.
The results of your fire are monitored by ricochets, bullet paths and the enemy’s behavior.
Fire adjustment is made by changing the position of the aiming point in height and lateral direction or by changing the installation of the sight and rear sight. The aiming point is set to the amount of deviation of ricochets or tracks in the direction opposite to their deviation from the target (Fig. 94). If the deviation of bullets from the target in range exceeds 100 m, then it is necessary to change the sight setting by one division. To adjust the fire along the routes, it is necessary that the shooting be carried out with cartridges with ordinary and tracer bullets in the ratio: for three cartridges with ordinary bullets, one cartridge with a tracer bullet, the first should be a cartridge with a tracer bullet. It is not recommended to use cartridges with a tracer bullet in clear weather (bullet traces are poorly visible). Firing only cartridges with a tracer bullet leads to increased wear on the bore.
| Rice. 94. Removing the aiming point when adjusting fire | 165. Signs indicating the reality of friendly fire can be: enemy losses, his transition from dashes to crawls, dismemberment and deployment of columns, weakening or cessation of enemy fire, his withdrawal or retreat to cover. Shooting at stationary and emerging targets 166. Fire at a single clearly visible target in short or long bursts, depending on the importance of the target, its size and distance to it. The more dangerous or the further away the target, the longer the queue should be. The fire continues until the target is destroyed or disappears. |
167. To hit an emerging target, it is necessary, having noticed the place of its appearance, to quickly prepare to shoot and open fire. Quickly opening fire is critical to hitting a target. If the target disappeared during preparation for shooting, when it reappears, clarify the aiming and open fire.
When shooting at a repeatedly appearing target, you should keep in mind that it may appear in a new place, so defeating it will depend on attentiveness during observation, the speed of preparing to fire and opening fire.
Hit the emerging target with bursts, quickly following one after another.
168. Fire at a group target, consisting of individual, clearly visible figures, in bursts, sequentially transferring fire from one figure to another.
169. A wide target, consisting of unclearly visible figures or a camouflaged one, and a single camouflaged target, should be fired with bullets scattered along the front of the target (mask) or with a sequential transfer of the aiming point from one flank of the target (mask) to the other.
170. Shoot at attacking enemy personnel at a distance of 200 m and closer in long bursts with bullets scattered along the front of the target.
The dispersion of bullets along the front when firing is achieved by angular movement of the machine gun (machine gun) along the horizon. The speed of angular movement of an assault rifle (machine gun) when firing with bullets scattered along the front of the target depends on the firing range and the required fire density. In this case, the fire density in all cases should be at least two bullets for every meter of the target front.
Shooting at moving targets
171. When the target moves towards or away from the shooter at a distance not exceeding the range of a direct shot, fire with the sight set corresponding to the range of a direct shot. At a distance exceeding the range of a direct shot, fire with the sight set corresponding to the range at which the target may be at the moment of opening fire.
172. When shooting at a target moving at an angle to the direction of fire, the aiming point must be chosen in front of the target and at such a distance from it that during the flight of the bullet the target will move this distance. The distance that the target moves during the bullet's flight to it is called lead. The lead for target movement is taken in target figures or in meters.
When firing from a machine gun, lead can be taken before the start of shooting using the rear sight, while the rear sight moves in the direction of the target's movement and aiming is done at the middle of the target. If shooting conditions do not allow the rear sight to be installed, then the lead is taken in target figures or in meters.
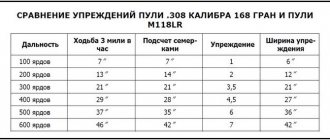
173. To determine the lead when firing from an assault rifle (machine gun) at a target moving at an angle of 90° to the direction of fire, use the following table.
| Firing range, m | Target running at 3 m/sec (approximately 10 km/h) | Motorized target moving at a speed of 20 km/h (approximately 6 m/sec) | |||
| Lead (rounded) | |||||
| in meters | in human figures | in rear sight divisions | in meters | in rear sight divisions | |
| 100 | 0,34 | 0,5 | 1.5 | 0,63 | 3,0 |
| 200 | 0,72 | 1.5 | 2,0 | 1,34 | 3.5 |
| 300 | 1.16 | 2,5 | 2,0 | 2,14 | 3,5 |
| 400 | 1,66 | 3.5 | 2,0 | 3,06 | 4,0 |
| 500 | 2,24 | 4,5 | 2,0 | 4,15 | 4,0 |
| 600 | 2.91 | 6,0 | 2,5 | 5,39 | 4,5 |
| 700 | 3.70 | 7,5 | 2,5 | 6,85 | 5,0 |
| 800 | 4,63 | 9,5 | 3,0 | 8,56 | 5.5 |
| 900 | 5,62 | 11,5 | 3,0 | 10,40 | 6,0 |
| 1000 | 6,74 | 13,5 | 3,5 | 12,48 | 6,0 |
When the target moves at an acute angle to the direction of fire, the lead is taken to be half that indicated in the table.
When the target moves at a speed greater (smaller) than indicated in the table, the lead increases (decreases) in proportion to the change in the speed of the target.
174. Fire at a target moving at an angle to the direction of fire is carried out by tracking the target or by waiting for the target (fire attack).
When firing by tracking a target
The machine gunner (machine gunner), taking the required lead and moving the machine gun (machine gun) in the direction of the target's movement, at the moment of the most correct aiming, fires in short or long bursts, depending on the firing range and the speed of the target.
When firing by waiting for the target
(fire attack) the machine gunner (machine gunner) takes aim at a point chosen in front of the target, and as the target approaches this point by one and a half to two table leads, firmly holding the machine gun (machine gun), fires a long burst; then, if the target is not hit, selects a new aiming point in front of it, takes aim, and when the target approaches it by the amount of the required lead, fires a long burst again, etc. If, when firing from a machine gun, the lead is taken using the rear sight, fire opens when combined equal front sight with the middle of the target.
175.
The use of tracer bullets when shooting at moving targets provides better observation of the shooting results and the ability to refine the lead.
Shooting at air targets
176.
Fire from machine guns (machine guns) at airplanes, helicopters and paratroopers is carried out as part of a squad or platoon at a distance of up to 500 m with the installation of a 4 or “P” sight.
Open fire on airplanes and helicopters only at the command of the commander, and on paratroopers - on command or independently.
177.
At an aircraft diving towards the shooter, fire with continuous fire with a 4 or “P” sight, aiming at the head of the target or aiming a machine gun (machine gun) down the barrel. Open fire from a range of 700-900 m.
178. At an aircraft flying to the side or above a machine gunner (machine gunner), fire is carried out in a barrage or accompanying manner.
Barrage fire is fired at low-flying aircraft with a flight speed of more than 150 m/sec.
When firing in a defensive manner
The fire of a squad or platoon is concentrated at the command of the commander in the direction of movement of the approaching aircraft (Fig. 95).
| Rice. 95. Firing defensive fire at an aircraft: a - walking along the front of the platoon position; b - walking at an angle to the front line of the platoon position | In the direction indicated in the command, the machine gunner (machine gunner) gives the machine gun (machine gun) an elevation angle of approximately 45° and opens fire, holding the machine gun (machine gun) in the given direction. Shooting is carried out with continuous fire until the aircraft leaves the fire zone. If the machine gunner clearly sees the direction of the tracks of his machine gun (machine gun) near the target, then he is allowed, without stopping firing, to slightly move the machine gun (machine gun) towards the target, achieving alignment of the tracks with the target. When adjusting fire along the tracks, it should be borne in mind that the tracks directed at the aircraft appear to the shooter to be above the aircraft and somewhat ahead of it. At slow-flying air targets - helicopters, transport aircraft - fire is carried out in an accompanying manner. Lead is determined and counted in the visible dimensions of the target (in figures). When firing in an accompanying manner, the machine gunner (machine gunner) maintains the aiming line in front of the aircraft (helicopter) by the amount of the required lead and fires a long burst. |
179.
To determine the lead when firing at air targets, use the following table.
| Target and its speed | Firing range, m | |||||
| 100 | 300 | 500 | ||||
| in meters | in target buildings | in meters | in target buildings | in meters | in target buildings | |
| Helicopter, 50 m/sec | 6 | 1 | 21 | 3 | 39 | 5 |
| Transport aircraft, 100 m/sec | 13 | 1 | 43 | 3 | 79 | 5 |
Note. The length of the aircraft body is assumed to be 15 m, and that of the helicopter – 8 m.
180.
The paratroopers are fired upon in long bursts. Place the aiming point in the direction of the parachutist's descent by the amount indicated in the table. The lead is counted from the middle of the parachutist’s figure (Fig. 96).
| Rice. 96. Taking out the aiming point when shooting at a parachutist | Firing range, m | 100 | 200 | 300 | 400 | 500 |
| Removing the aiming point in parachutist figures | Under your feet | 1 | 2 | 2 | 3 |
Shooting in the mountains
181.
In the mountains, when shooting at ranges over 400 m, if the terrain altitude exceeds 2000 m, the sight corresponding to the target range should be reduced by 1 division due to the reduced air density; if the terrain altitude above sea level is less than 2000 m, then do not reduce the sight, but select the aiming point at the lower edge of the target.
When shooting in the mountains from bottom to top or top to bottom at ranges over 400 m and target elevation angles of less than 30°, the aiming point should be selected at the lower edge of the target, and at target elevation angles of more than 30°, the sight corresponding to the target range should be reduced by 1 division .
Shooting in low visibility conditions
182.
Shooting at illuminated targets at night is done in the same way as during the day. While illuminating the area, the machine gunner (machine gunner), having discovered the target, quickly sets the sight, takes aim and fires a burst.
| Rice. 97. Aiming when shooting at a target that reveals itself in flashes of shots, using the front sight safety and the aiming bar | Rice. 98. Aiming when shooting at night using self-luminous attachments: a - having luminous points; b – having luminous stripes; 1 - rear sight; 2 — front sight; 3 — luminous points; 4 — luminous stripes; 5 - flashes of shots |
When the target is illuminated for a short time (for example, the area is illuminated by illumination cartridges), fire must be fired with a 4 or “P” sight, aiming at . target if the range to the target is no more than 400 m, and to the top of the target if the target is at a distance of more than 400 m.
To avoid temporary blindness, do not look at the light source.
183. Shooting at a target at night, revealing itself by flashes of shots, is carried out with the sight set to 4 or “P” in long bursts. Fire opens at the moment when flashes of shots are visible in the center of the front sight fuse and on the engraving of the sighting bar (Fig. 97). In cases where the front sight safety and the sighting rib are not visible, the machine gun (machine gun) is aimed at the target along the barrel.
If a device for shooting at night with luminous dots is used, then aim according to the flashes of shots, as shown in Fig. 98, a. When using a device for shooting at night with luminous stripes, when aiming, take an even front sight, which is combined with the flashes of shots (Fig. 98.6).
184. To shoot at a target whose silhouette is visible against the sky, the glow of a fire, or snow, you need to point the machine gun (machine gun) next to the target against a light background and take an even front sight (Fig. 99). Then, moving the machine gun (machine gun), place the aiming line in the middle of the silhouette and open fire. Shooting is carried out in long bursts. When shooting at targets visible against a dark background (forest, bushes), the machine gun (machine gun) is aimed at the barrel.
| Rice. 99. Method of aiming in silhouette | 185. In advance preparation for firing at night from a machine gun, a trench is cut out in the parapet in such a way that the machine gun placed in it is aimed at the line where the enemy is likely to appear; the skids of the bipod legs of the machine gun are limited by pegs, so that they can make the necessary longitudinal movements; the lateral movement of the machine gun (machine gun) in a given sector is limited by pegs; The height position of the machine gun is fixed with a layer of turf (dense snow, a board with cutouts, etc.) placed under the pistol grip. |
186.
To better adjust fire when shooting at night, it is advisable to use cartridges
with
tracer bullets.
187.
Firing at targets located in close proximity to the machine gunner (machine gunner) and detected by sound is carried out in long bursts with the machine gun (machine gun) directed down the barrel in the direction of the sound.
188.
Shooting at targets located behind a smoke screen or mask is carried out in long bursts with bullets scattered along the front.
Shooting in conditions of radioactive, chemical and biological contamination
189.
Shooting in conditions of radioactive, chemical and biological contamination is carried out in personal protective equipment. Shooting while wearing a gas mask is carried out in long bursts. If during shooting the slot of the aiming bar and the front sight are not visible, the machine gun (machine gun) is aimed along the barrel.
When firing in areas contaminated with radioactive, poisonous or biological agents, you should first protect from them those parts of the machine gun that come into contact when firing.
The shooting rules are the same as for shooting under normal conditions.
After leaving the contaminated area, at the first opportunity, it is necessary to decontaminate (degass or disinfect) the machine gun.
Shooting while a machine gunner (machine gunner) is moving
190. Shooting while a machine gunner (machine gunner) is moving on foot, on an armored personnel carrier, infantry fighting vehicle and other means is possible from a short stop and on the move (on the move).
From a short stop, aimed fire is conducted according to the same rules as when shooting from a place. It is necessary to prepare for shooting, install the sight and aim while the vehicle is moving and braking. At the moment of stopping, check that your aim is correct and open fire.
Shooting on the move when operating on foot (on the move when operating in vehicles) due to significant and constant vibrations of the machine gun (machine gun), is usually carried out within the range of a direct shot in short bursts. The sight is set according to this range and may not change during shooting.
The aiming point in height is selected at the level of the lower edge of the target, and in the lateral direction - depending on the speed and direction of movement of the vehicle and on the nature of the target (appearing or moving). When firing over the front (rear) side or at an angle of no more than 30° to the direction of movement of the vehicle, as a rule, the aiming point at emerging targets in calm weather should not be moved beyond the target.
If fire is directed towards the right (left) side when the vehicle is moving at a speed of 10 km/h, the aiming point must be moved 4 thousandths (rounded) in the direction opposite to the movement of the vehicle. When shooting at manpower, you can remember the following rule: move the aiming point to the right (left) when firing from the right (left) side by a number of figures (rounded) equal to the number of hundreds of meters to the target. When the machine moves obliquely, reduce the corrections by half.
The placement of the aiming point into the side wind and the lead to the target's movement should be taken into account in the same way as when shooting from a standstill.
When the vehicle is moving over uneven terrain or in the presence of large waves, shooting is carried out in long bursts with the machine gun (machine gun) aimed at the barrel without using a sight.
To better adjust fire, use cartridges with tracer bullets.
Helicopter shooting
191. When firing from a helicopter, it is necessary to take into account the direction, speed and altitude of the helicopter’s flight, the direction and speed of the wind and the movement of the target.
192. When firing from a helicopter flying at an altitude of up to 50-70 m at a ground target, when the target elevation angle does not exceed 30°, the sight is selected according to the slant range to the target.
When shooting at a higher altitude, the sight setting must be reduced (correction for the target elevation angle):
· at a flight altitude of up to 200 m and a slant range of up to 300 m - by half a division;
· at a flight altitude of up to 200 m and an inclined range exceeding 300 m - by one division; The vertical aiming point is usually chosen at the bottom edge of the target.
Considering the very limited time for firing from helicopters in possible sectors of fire, fire can be conducted at ranges of up to 500 m and altitudes of up to 200 m with a constant sight setting.
193. The aiming point in the lateral direction is selected taking into account the distance of the bullet under the influence of the helicopter's flight speed and the deflection of the bullet under the influence of the lateral (in relation to the direction of flight of the helicopter - headwind or tailwind) wind, as well as the direction and speed of the target.
The linear magnitude of the bullet's drift under the influence of the helicopter's speed in meters is equal to the product of the helicopter's speed in m/sec and the bullet's flight time in seconds.
The linear amount of bullet deflection under the influence of a side wind and the amount of lead on target movement when shooting from a helicopter are determined by the same rules as when shooting on foot. Correction for side wind must be taken into account when the wind speed is more than 5 m/sec, and lead when the target speed is more than 10 km/h.
In a rounded manner, the aiming point in the lateral direction, when firing from a helicopter at the most effective firing ranges (200-400 m), should be moved from the middle of the target in the direction opposite to the flight of the helicopter (or when firing from the left side - to the left, and from the right side - to the right), by the amount in meters:
a) when shooting at a stationary (appearing) target:
· in calm weather - by one tenth of the helicopter’s cruising speed; for example, with a helicopter cruising speed of 200 km/h, the aiming point must be moved to 20 m (200: 10);
with a headwind (tailwind) - by one tenth of the ground speed; for example, with a helicopter cruising speed of 200 km/h and a headwind of 30 km/h, the aiming point must be moved to 17 m; the direction and speed of the wind are determined by local objects (by the movement of smoke, dust, the tilt of trees, etc.);
b) when shooting at moving targets:
· to the amount of offset of the aiming point determined for shooting at a stationary target, the lead is added when the target moves in the opposite direction and is subtracted when it moves in the same direction; for example, to fire from a helicopter at a speed of 200 km/h at infantry in a car moving towards the helicopter’s flight at a distance of 300 m, at a speed of 50 km/h and with a tailwind of 30 km/h, the aiming point must be placed at 28 m, where 5 m is the lead for target movement, taken from the lead table.
194.
Fire from a helicopter is usually carried out in long bursts (10-15 shots) and at a high tempo. To monitor the results of shooting and adjust fire, it is necessary to make wider use of cartridges with tracer bullets. Shooting can be carried out by tracking the target or by fire attack (waiting for the target).
When firing in a manner similar to target tracking, it is necessary to continuously move the weapon in the direction opposite to the helicopter’s flight (backward), by the amount of lateral correction, and at the moment of the most correct aiming, fire a long burst; clarify the amount of offset of the aiming point and fire the next burst and, during the shooting process (if necessary), bring the burst routes to the target.
When firing in a manner similar to a fire attack, it is necessary to select a point at a distance from the middle of the target by the amount of one and a half to two lateral corrections and, when aligning the aiming line with this point, firmly holding the weapon, fire a long burst, while firing (if necessary) bring routes to the goal.
Ammo supply and consumption in battle
195.
Submachine gunners (machine gunners) carry a supply of ammunition in magazines and clips placed in bags.
The provision of ammunition to submachine gunners (machine gunners) in battle is carried out by cartridge carriers assigned by the unit commander.
When half of the carryable reserve has been used up, the machine gunner (machine gunner) reports this to the squad commander.
One magazine for a machine gun and three magazines for a machine gun, loaded with cartridges, must always be with the machine gunner (machine gunner) as an emergency reserve, which is consumed only with the permission of the commander.
content .. 1 2 3 9 ..