1.4. Test firing exercises[2]
Shooting from a spot at emerging targets
The interval between target displays is 10-20 s.
Range to targets, m:
| Type of weapon | Range to targets, m | ||
| Target No. 10a | Target #8 | ||
| On the far side | At the close line | ||
| 5.45 mm AK74, 7.62 mm RPK | 250-300 | 250-300 | 150-200 |
| 5.45 mm AKS74U | 200-250 | 250-300 | 150-200 |
| 7.62 mm AKM and carbine | 200-250 | 250-300 | 150-200 |
| 5.45 mm RPK74,7.62 mm PC (PKM) | 300-350 | 300-350 | 200-250 |
| Sniper rifle | 400-500 | 350-400 | 250-300 |
Features of the exercise.
Shooting from a machine gun and a machine gun is carried out with automatic fire. The shooting position is determined by the inspector (shooting director).
Ammunition for a machine gun, light machine gun and sniper rifle is loaded into two magazines; as the ammunition is consumed, the magazine is changed independently.
Shooting from a spot at emerging targets with changing firing positions
Range to targets, m:
| Type of weapon | Goals | ||
| Dismounted infantry | Attacking (retreating) infantry group | Lying down infantry | |
| 7.62 mm machine gun | 350-450 | 300-400 | 200-300 |
| 5.45 mm machine gun | 400-500 | 300-400 | 200-300 |
| 7.62 mm light machine gun | 450-550 | 400-500 | 250-350 |
| 5.45 mm light machine gun, 7.62 mm Kalashnikov machine gun, 7.62 mm sniper rifle | 450-550 | 400-500 | 300-400 |
| 40mm grenade launcher | — | — | 250-350 |
Range to target when throwing a hand grenade
20 - 30 m.
Shooting position
: standing from a trench from a point of view.
When performing an exercise with a machine gun with an under-barrel grenade launcher, a hand grenade is not thrown.
Firing from a machine gun with an under-barrel grenade launcher is carried out: from a machine gun - at dismounted infantry and an attacking (retreating) group of infantry;
from an underbarrel grenade launcher - according to two arrows located in the clearance.
Source
UUS AK-74. Shooting from a place at emerging and moving targets with changing firing positions
Shooting from a place at moving targets.
Targets: machine gun crew (target no. 10a) appearing on 20
seconds;
When performing an exercise with an under-barrel grenade launcher, a shooter (target No. 7) is added to the machine-gun crew; both targets are located 10 m in front and 20 m in depth and appear for 15 seconds.
appearing target - two shooters: target No. 7 on the near line, target No. 8 on the far line, simulating the movement (approaching or moving away) of the target, while the near shooter appears on 10
seconds, and the far one for
15
seconds, with an interval of
15-20
seconds.
Shooting position
: from behind cover:
From a machine gun - lying with your hand;
From an underbarrel grenade launcher - from the knee.
Grade
: “excellent” – hit three targets;
“good” – hit two targets, including a machine gun crew;
“satisfactory” – hit one target.
The score for completing the exercise is reduced by one point if the student, when shooting at targets hit by automatic fire, made two or more single shots, not counting the last one.
Evaluation when performed with GP-25
: “excellent” – hit 2 moving ones and hit the target with a target grenade;
“good” – hit 1 moving one and hit the target with a target grenade;
“satisfactory” – hit 1 moving or
hit the target envelope with a target grenade.
Features of the exercise
- shooting is carried out from 2 firing positions
-type of fire – at the choice of the shooter
- when executed from an AK with a GP-25, fire from a machine gun at a moving target, and from a GP-25, fire at the machine gun crew and the gunner in size.
Range to targets (in meters):
| 2 UUS AK-74 | 2 UUS AK-74 with GP | 2 UUS PKM | 2 UUS SVD | |
| Pool. calculation | 300-250 | 350-250 | 350-300 | 350-300 |
| Gr. infantry (close range) | 200-150 | 250-200 | 250-200 | |
| Gr. infantry (far line) | 300-250 | 350-300 | 350-300 |
ammunition
8 (of which 2 are tracers) pieces (for SVD -5 of which are 2 tracers)
for AK with GP-25 additionally - VOG-25 -3 pieces
For SVD, PKM, the exercise conditions, with the exception of ranges, are the same!!!!!!!!!
Perform 1 grenade throwing exercise. Throwing grenades from a place.
Targets: three attacking shooters - life-size figures (target No. 8), installed in a designated area in an open area along a front of 10 m and a depth of 5 m.
The dimension is divided into 3 parts in depth:
central - 1 meter deep, near and
the far one is 2 meters deep. Targets are installed: two on the side edges of the central part and one in the middle of the far part.
Range to targets: 25 m to target.
Number of grenades: 1 training, training and simulation grenade.
Time: no more than 30 seconds from the command “Grenade – fire” until the grenade explodes.
Throwing position: standing from a trench from a step.
Grade:
“excellent” – hit the central part of the gauge;
“good” - hit the far side of the clearance;
“satisfactory” - get into the next one.
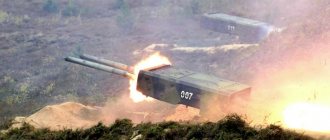
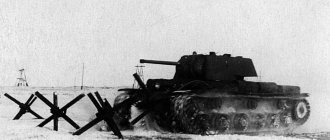
UUS RPG-7V.
Shooting from a position at a frontally moving target.
Target:
tank (target No. 12), moving twice (forward and backward) with an interval of 10-20 seconds. at an angle of 15-25 degrees to the firing plane at a speed of 15-20 km/h over a distance of: when firing from hand-held anti-tank grenade launchers - 100 m; when firing from mounted grenade launchers - 150 m.
Shooting position:
from a hand-held anti-tank grenade launcher: during the day - from behind cover from two positions - lying down, kneeling or standing at the choice of the shooter; at night at the choice of the shooter;
from an easel grenade launcher: from an unprepared firing position or from a trench at the choice of the platoon commander.
Grade:
“excellent” – hit the target with two grenades;
“good” – hit the target with the first shot;
“satisfactory” – hit the target with the second shot.
Range to targets
300-250 meters
.
Ammunition quantity
: 2 regular shots.
SHOOTING EXERCISE FROM BMP-2
Firing from a BMP weapon from a standing position at emerging targets.
Goals:
infantry fighting vehicle (target no. 14), appears for 50 seconds
attacking shooter - target No. 8 appears for 40 seconds;
hand-held anti-tank grenade launcher (target No. 9), appearing for 40 sec.
Ammunition quantity
:
for arming the BMP-2: guns - 10 rounds with armor-piercing tracer (AP) shells; coaxial machine gun - 20 rounds, 5 of them with tracer bullets;
Time to shoot
: limited by the time of movement and display of targets.
Motor resources
: 0.5 km.
Score: for performing an exercise using BMP-2 weapons
:
“excellent” - hit all targets;
“good” - hit two targets, including infantry fighting vehicles;
“satisfactory” - hit the BMP.
RANGES to targets for exercise 1
| No. | Type of combat vehicle | Firing conditions | Range to targets (in meters): | |
| BMP | №8 | Anti-tank hand grenade launcher | ||
| BMP-2 | during the day | 1200-1400 | 500-400 | 500-300 |
Shooting techniques on the move
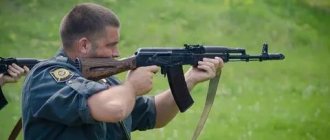
123. Shooting on the move is carried out from a machine gun offhand or with the butt pressed to the side.
124. Shooting offhand
can be driven from a short stop and on the go (without stopping).
For shooting offhand from a short stop
you need to stop and at the moment of placing your left foot on the ground, simultaneously rest the butt on your shoulder (throw up the machine gun); without placing your right foot, take aim, fire one or two bursts (shots), lower the machine gun, continue moving.
For offhand shooting on the move
(without stopping) raise the machine gun to your shoulder, point it at the target and, continuing to move, open fire.
125. Shooting with the butt pressed to the side
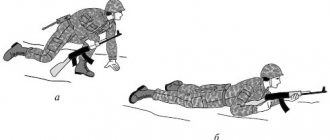
, is carried out without stopping. To do this, press the butt against your right side with your right hand (Fig. 71). If the stock is folded, press the machine gun with your right hand to the side with the receiver and pistol grip; hold the machine gun by the fore-end with your left hand.
Rice. 71. Position for shooting on the move with the butt pressed to the side
126. When shooting on the move, reload the machine gun without stopping the movement.
1.1. Equipment for trenches for machine gun shooting
Rules for carrying traumatic weapons 2021
To conduct fire, observe and protect against weapons of destruction, the personnel in the occupied positions first arrange single trenches for shooting while lying down, then deepen them for shooting from the kneeling and standing.
Single trench for shooting from a machine gun while lying down
Before opening a trench, each soldier approaches the terrain, positioning himself so as to have a good view and fire in a given sector and not be visible to the enemy.
The soldier then opens a single trench for prone shooting and clears his view and fire if local objects interfere with him.
Single trench for prone shooting.
A single trench is a recess with an embankment in front and on the sides, providing convenient placement of weapons and soldiers when firing and protection from enemy weapons. In a single trench for prone shooting, a recess is made 60 cm wide, 170 cm long and 30 cm deep so that the soldier in it is completely hidden.
Excerpt from a single trench under enemy fire
For ease of shooting, a threshold 25-30 cm wide is left in the front part of the recess, 10 cm above the bottom of the trench, providing support for the elbows. The earth removed during the lifting is thrown forward (towards the enemy) and forms an embankment called a parapet.
When firing from a trench towards one of the flanks, the height of the parapet of the trench on the enemy side (from the front) is 20 cm greater than in the firing sector. The volume of excavated soil is 0.3 m3. 0.5 people required per device. hour.
An excerpt from a single trench for prone shooting under enemy fire is performed as follows:
- lying in the chosen place, the soldier places the machine gun to his right at arm's length with the muzzle facing the enemy;
- turning on his left side, pulls the shovel out of the case by the tray with his left hand, clasps the handle with both hands and cuts the turf or the top compacted layer of earth with blows towards himself, marking the boundaries of the excavation in front and on the sides;
- After that, he intercepts the shovel and turns the turf away from himself with blows, puts it in front and begins to tear it out.
During work you should:
- drive the shovel into the ground with the corner of the tray, not vertically, but obliquely;
- cut thin roots with the sharp edge of a shovel;
- to form a parapet, throw the turf and earth forward towards the enemy, leaving between the edge of the excavation and the parapet a small area called a berm, 20–40 cm wide;
- keep your head close to the ground, without ceasing to observe the enemy.
When the required depth is reached in the front part of the trench excavation, the soldier, moving back, continues to cut the excavation to the required length to cover the torso and legs.
At the end of the passage, the parapet is leveled with a shovel and disguised to match the appearance and color of the area with available material: grass, branches, arable soil, etc.
Each soldier, without waiting for orders from the commander, deepens the trench for prone shooting, creating a single trench for kneeling shooting, and then for standing shooting at the bottom of the ditch.
Single trench for kneeling and standing shooting.
A single trench for kneeling and standing shooting is constructed by digging into the depth of a single trench for prone shooting up to 60 cm and 110 cm, respectively. When the trench is pulled out, the soil is thrown forward and to the sides, creating a parapet 40–60 cm high. In the firing sector, the height of the parapet decreases up to 30 cm, forming a recess with gentle slopes - an open loophole.
Single trench for firing from a machine gun from the knee
Single trench for shooting from a machine gun while standing
The volume of excavated soil when equipping a single trench for firing from a machine gun from the knee is 0.8 m3; 1.2 people are required per device. hour. The volume of excavated soil when equipping a single trench for firing from a machine gun while standing is 1.4 m3; the construction of this trench requires 1.5 people. hour.
A single trench for standing shooting at the bottom of a ditch reduces the radius of the affected area by one and a half times when exposed to atomic weapons compared to placement in open areas.
Trenches from aerial surveillance are camouflaged with camouflage fabric woven into it with grass, branches and other available material.
What not to do?
There is also a list of prohibited actions:
- Assembling/disassembling weapons, as well as removing or unsheathing weapons, unless permission has been previously obtained from the supervisor.
- Loading a weapon with cartridges or firing shots without first receiving the appropriate command from management.
- Pointing the muzzle of a weapon at any living beings or in the direction where they may appear. Such actions are prohibited, regardless of the state of charge the weapon is in at the moment.
- Firing from a weapon that is subject to repair, as well as after a ban on this action has been issued by management by voicing the command “Stop” or in the presence of a raised white flag.
- Leaving military weapons in a place that is accessible to unauthorized persons, or voluntarily transferring them.
Shooting techniques while moving
132. For shooting from an armored personnel carrier, car and from landing craft
any convenient positions are used to ensure the stability of the machine and the safety of neighbors. In this case, the backs of the seats and other structures inside the body of the armored personnel carrier are used as support for the arms, forearms, sides and legs. The machine belt must be placed under the forend.
When firing through the loophole of an armored personnel carrier, move the barrel of the machine forward so that the barrel goes beyond the loophole and the buildings do not interfere with the movement of the bolt handle.
When taking a position for shooting over the side, you must stand with both feet on the bottom of the armored personnel carrier, slightly bending them at the knees, or with your left knee on the seat and move the muzzle of the machine gun over the side.
Production and cessation of shooting
Fire from a machine gun can be fired either independently or on command. It depends on how the fighter performs the assigned task, as part of a group or independently. If the work is carried out in a group, then on the command “Open fire on the infantry!” The machine gunner can choose the target himself if the commander does not specify one.
The cessation of shooting can be either complete or temporary. If the machine gunner is required to temporarily stop firing, then the command “Stop” or “Cease fire” is given if the shooting is in motion. After this command has been sounded, the machine gunner must stop pressing the trigger, put the weapon on safety, and if necessary, then replace the magazine.
If a complete cessation of firing is required, then the machine gunner, after the command “Cease fire,” is given the command “Unload.” After the machine gunner hears this command, he must perform the following actions:
- Put your weapon on safety;
- Install the sight by pulling the clamp back to the “P” position;
- Unload the machine gun;
- If the machine you are using has a folding stock, then you need to fold it.
In order to carry out the procedure for discharging the machine, you need to follow the following algorithm of actions:
- Disconnect the magazine;
- Remove the machine from the fuse;
- Pull the bolt frame back and remove the cartridge from the chamber. After this, the bolt frame must be released;
- Pull the trigger;
- Put the fuse on the machine;
- Remove cartridges from the magazine;
- Attach the empty magazine back to the machine.
Checking the SVD combat
The sniper rifle is checked and brought into normal combat with an open sight, after which the optical sight is aligned and test shooting with an optical sight is carried out personally by the sniper to whom it is assigned. Shooting is carried out without a bayonet with cartridges with a steel core bullet or sniper cartridges taken from a hermetic closure and one batch. Firing range 100 m, sight “3”. The shooting position is lying down. Shooting is carried out at a test target. The aiming point is the middle of the lower edge of the test target, cut along the second horizontal line. The CT from the aiming point is at a height of 16 cm.
Checking the rifle's combat
When checking the combat of a rifle, it is necessary to separate the optical sight and the butt cheek. Four shots are fired. At the end of the shooting, the leader inspects the target and determines the accuracy of the battle and the position of the STP. Snipers shooting are not allowed to walk towards the target. The accuracy of a rifle is considered normal if all four holes fit into a circle with a diameter of 8 cm. If the accuracy of the holes is unsatisfactory, the shooting is repeated. If the shooting result is unsatisfactory again, the rifle is sent to the workshop. With normal rifle accuracy, the leader determines the STP and its position relative to the CT. The rifle's engagement is considered normal if the STP coincides with the control point or deviates from it in any direction by no more than 3 cm. Bringing the rifle to normal engagement If the STP deviates from the CT in any direction by more than 3 cm, the position must be changed accordingly flies. The deviation values of the STP when moving the front sight are given in table. 1. The correct movement of the front sight is checked by repeated shooting. After bringing the rifle to normal combat, the position of the front sight according to the risks is recorded in the form.
Alignment of the PSO-1 optical sight
After checking the combat of the rifle or bringing it to normal combat, the optical sight is aligned. To do this you need to: – attach an optical sight and a butt cheek to the rifle; by rotating the handwheels, set the sight to division “3” and the lateral correction scale to “0”; – secure the rifle in the sighting machine and aim it along the open sight, placed at the “3” mark, at the aiming point on the test target, then cover the lower part of the test target with a white strip of paper 2 cm wide; – look into the optical sight and notice the position of the sight square; if it is directed towards the middle of the lower edge of the test target, then the optical sight is considered verified; – if the main square of the sight reticle is not aligned with the TP, it is necessary to loosen the locking (side) screws of the handwheels one or two turns, and then by rotating the end nuts, bring the tip of the main square of the reticle under the aiming point and carefully screw in the locking screws of the handwheels until they stop; — check whether the sight square has not moved when screwing in the locking screws; if it has moved, re-align the sight in the sequence described above. After aligning the optical sight, carry out test shooting with an optical sight under the same conditions as when checking the combat of a rifle with an open sight, only the control point is now marked at a height of 14 cm from the TP. If, as a result of test firing, all four holes fit into a circle with a diameter of 8 cm, but the STP deviated from the CT by more than 3 cm, the deviation of the STP should be determined, the locking screws of the handwheels should be released and appropriate adjustments should be made to the settings of the end nuts. Moving the end nut by one division of the additional scale when shooting at 100 m changes the position of the STP by 5 cm. After making amendments to the settings of the end nuts, it is necessary to shoot again. If, upon repeated shooting, all four holes fit into a circle with a diameter of 8 cm, and the STP coincided with the CT or deviated from it in any direction by no more than 3 cm, then the rifle is considered to be in normal combat.
Safe learning rules
During training and educational activities, the following rules must be observed:
- If the training is carried out using headphones, which exclude the possibility of sound penetration from shots fired, then before any manipulation with them you must first put down the weapon. It is prohibited to adjust them, put them on or remove them while the weapon is in the shooter’s hands.
- When any exercises are carried out to improve accuracy and sharp somersaults, turns or jumps are performed, the weapon must be kept on the safety guard at all times, and its muzzle must be pointed in the safest direction. You can remove it from the safety and take aim only after the shooter turns towards the target.
- During any exercises or any manipulations with a weapon in your hands, as well as when maintaining pauses between shots, the muzzle must always be directed at the target.