Rate this post
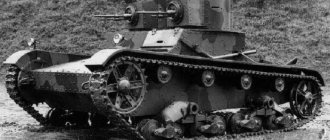
By the mid-30s of the last century, it became quite obvious that the further development of armored vehicles through constant modifications of tanks designed on the Christie basis was an erroneous and dead-end path. If you review the history of the development of the production of military equipment in the USSR, then, perhaps, none of the equipment has passed as many tests as the T-34 passed. Before becoming a mass-produced tank, the T-34 overcame a long and thorny path. Finally, after agreeing on all controversial issues, serial production of the armored vehicle model began on March 31 at the Kharkov and Stalingrad factories. By 1940, it was planned to produce about 600 copies of the T-34.
The founder of the T-34 is considered to be Mikhail Koshkin together with the Kharkov Mechanical Engineering Design Bureau. Dozens of films have been made about this combat vehicle, and hundreds of books have been written about it. This is the most popular tank of the Second World War and the post-war period. The development of the T-34 had a serious impact on the course of the Great Patriotic War and on the further development of the armored field. But, like any other equipment, the T-34 is not ideal from a technical point of view; the four-speed gearbox was the most criticized.
4-speed gearbox T-34
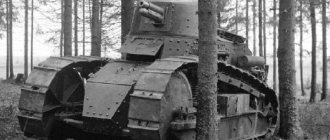
Initially, the tank was equipped with a 4-speed gearbox, made according to a scheme with moving gears. This design was generally accepted at that time and generally did not cause any complaints. Its main advantages boiled down to a small number of gear pairs, structural simplicity, ease of maintenance and repair. In the 30-40s of the 20th century, a similar gearbox scheme could be found, for example, on GAZ-AA and GAZ-MM cars, as well as on tractors of the ChTZ-60 type. The main reproaches towards the four-speed gearbox were caused by the fact that to change gears, sometimes the help of a radio operator was required (force on the rocker), the stages were not switched, so the speed of the car had to be reduced by engine speed and the main clutch with brakes. These gearbox shortcomings made it very difficult to control the combat vehicle. Most of them were eliminated with the development of a 5-speed gearbox.
They tried to find a solution by processing the shafts, cutting teeth along the edge, and knurling the side surface of the gear. However, such technological improvements brought little effect. Over time, it became clear that the perfectly working gearbox and clutch on trucks and tanks of the BT series could not cope with the tasks assigned to it on the heavier T-34 combat vehicle.
In addition to the fact that the driver was forced to apply a force of about 50 kg on the rocker, the engine was out of the optimal operating range, and gearbox breakdowns were considered a normal and common occurrence.
Due to severe shock loads, the housing collapsed, bearings failed prematurely, and teeth crumbled. Another problem area of the car was the main clutch, in other words, the clutch. It was manufactured using the “steel on steel” principle, since at that time there was an acute shortage of friction materials. The length of the working stroke and the gap were so small that they required applying serious forces to the clutch pedal. In total, the mechanism consisted of 21 steel discs. Incomplete opening of the discs caused the clutch to not fully disengage, which greatly complicated the transition from one gear to another.
CHAPTER FIVE TANK TRANSMISSION A tank transmission is a set of mechanisms for transmitting torque from the engine to the drive wheels. It consists of the main clutch, gearbox, side clutches with brakes and final drives. MAIN FRICTION The main clutch is mounted on the toe of the engine crankshaft. It is designed to: 1) disconnect the engine from the gearbox when changing gears; 2) smooth transfer of load to the engine - when starting the tank; 3) protecting transmission and engine parts from damage - when there is a sudden change in the speed of the crankshaft, engine, or when there is a sudden change in the speed of the tank (sudden stop). The main clutch transmits engine torque to the gearbox. In addition, its leading part, together with the fan installed on it, is the engine flywheel. Main clutch design The main clutch is a multi-disc release friction clutch (Fig. 83). It is divided into driving parts connected to the engine crankshaft, driven parts connected to the gearbox drive shaft, and a shutdown mechanism. The driving parts include: flywheel or drive drum 6 (Fig. 53), drive friction discs 21, pressure disc 7 and release disc 23. The driven parts include: driven drum 8, driven friction discs 20 and driven drum hubs 9. Mechanism parts The shutdowns are: a fixed shutdown cup 26, a separator 29 with three balls and a drive box 30. The driving parts The flywheel is mounted with a hub on the slotted toe of the engine hall and centered on it with two bronze split cones, front 32 and rear 18, which jam the flywheel hub when screwing in plug 16 into the toe of the shaft. To prevent self-unscrewing, a cone 28 is inserted into the plug, expanding its split shank and tightly pressing the thread of the plug to the internal thread of the toe of the engine shaft. To prevent the spacer cone from turning while tightening the nut, a pin is inserted into it, the protruding part of which fits into the cut of the plug. On the inner surface of the flywheel groove, there are teeth, with which the teeth of the drive disks 21 engage. Thanks to this connection, the drive disks rotate with the flywheel as one unit. There are eleven driving disks in total. The discs have teeth located on the outer surface. On the pressure disk 7 there are sixteen holes in which the threaded ends of the fingers 4 are secured with nuts. Adjusting washers 5 are installed between the shoulders of the fingers and the pressure disk. The release disk 23 is put on the ends of the fingers of the pressure disk protruding from the holes of the flywheel with the holes in it, and they are secured nuts screwed onto the threaded ends of the fingers. The pin nuts are locked with lock washers. Between the flywheel and the release disk, springs 3 are placed on the fingers, compressing the friction disks. A fan 1 is mounted on the flywheel on the engine side, and a gear 2 is mounted on the gearbox side, designed to rotate the engine shaft when starting it with an electric starter. There is a graduation on the cylindrical part of the ring gear, which serves to set the engine gas distribution. The ring gear is mounted on the flywheel in a strictly defined position, namely so that the pin, when screwed in, fits into a special hole in the flywheel. The fan is attached to the flywheel with through bolts, 24 of which simultaneously secure the ring gear; Thus, when the ring gear is removed, the fan remains secured with three more bolts. A ball bearing 24 is installed in the socket of the release disk 23, into the inner ring of which a drive box 30 is pressed. The ball bearing 24 is closed by a cover 13 with an oil seal. Rice. 83. Main clutch. 1— fan; 2— ring gear; 3— spring; 4—finger; 5—adjusting washers; 6— flywheel; 7—pressure disk; 8— driven drum; 9— driven drum hub; 10— ball bearing; 11— coupling teeth; 12— spacer ring; 13— oil seal cover; 14— flange; 15— plug; 16— plug; 17— key; 18— cone; 19— MTK oiler; 20— driven friction disks; 21—driving friction disks; 22—thick driven disk; 23— release disk, 24— ball bearing; 25— sealing ring; 26—fixed shutdown cup; 27—adjusting shims, 28—spacer cone; 29— separator. with balls; 30— drive box; 31— MTK oiler; 32—cone. Rice. 84. Main clutch (old design): 1—fan; 2— ring gear; 3— spring; 4—finger; 5— flexible hose; 6— flywheel; 7—pressure disk; 8— driven drum; 9— driven drum hub; 10—locating pin; 11— coupling; 12— drive box: 13— cone; 14— flange; 16— plug; 16— plug; 17— MTK oiler; 18— cone; 19— separator; 20— driven disk; 21—drive disk; 22—thick driven disk; 23— squeezing disk; 24— spacer cone; 25— sealing ring; 26—fixed release cup Driven parts On the cylindrical part of the flywheel hub there is a ball bearing 10 (see Fig. 83), on which the driven drum 8 is mounted. It has teeth on the outer surface with which the teeth of the driven disks are connected. Thanks to this connection, the discs rotate together with the drum as one unit. There are eleven driven disks in total, of which disk 22, installed directly at the wall and flywheel, has double thickness. The driven disks are installed in such an alternation with the leading ones: master-slave-master, etc. A hub 9 is bolted to the driven drum, the cylindrical part of which has teeth. The driven part is held against axial displacement by a flange 14, secured with a nut at the end of the shank of the spacer cone 28. The driven drum of the clutch is connected by a gear clutch to the drive shaft of the gearbox. The gear coupling consists of two halves 11, connected to one another by tight-fitting bolts. One half of the coupling is put on the teeth of hub 9, and the other half is put on a gear with a spherical tooth profile, put on the splines of the drive shaft of the gearbox. Note. In the first releases of T-34 tanks, the internal drum of the main clutch was installed on two supports: a cylindrical roller bearing (instead of ball bearing 10) and two radial ball bearings located inside the toe of the engine shaft. The axial run of the coupling is limited by a special spacer ring 12 located between two rubber gaskets placed on the hub recess and the drive shaft plug. Due to the presence of a gap between the gears and the clutch teeth, as well as the spherical surface of the teeth on the gear of the gearbox drive shaft, some misalignment of the gearbox axis with the axis of the engine crankshaft is allowed. Shutdown mechanism The fixed shutdown cup 26 is attached with studs to the end of the engine crankcase. On its end surface it has three inclined spherical grooves. The same grooves, but directed with an inclined surface in the opposite direction, are in the ring riveted to the drive box 30. In the recesses of the grooves there are three balls enclosed in a separator 29. When the clutch is turned on, there should be a gap between the balls and the holes of these grooves within 0. 9…1.1 mm, ensuring the clutch operates without slipping for a long period of time. This gap is regulated by selecting the thickness of the gaskets 27; it can also be increased during operation by removing the spacers installed on the shoulders of the fingers under the pressure plate. Drive box 30 is pressed into the inner ring of the ball bearing. The latter allows it to remain motionless when the squeezing disk 23 rotates together with the leading parts of the clutch. In addition, the bearing connects the drive box with the release disk during axial movements of the drive part. Operation of the main clutch The clutch can be either in the on state, when the engine torque is transmitted to the gearbox, or in the off state, when the torque is not transmitted to the gearbox. If the balls fit freely in the grooves of the rings (when the axial clearance is 0.9 ...1.1 mm), then springs 3 (Fig. 84), resting against the flywheel, press the release disk towards the engine. This disk, through fingers 4, pulls pressure disk 7, which transmits the force of the springs to the driving and driven disks. The disks are assembled in this way , that one driving disk is placed between each two driven disks. The driven disks, due to the friction developing on their surfaces, rotate together with the driving ones as a whole. Torque is transmitted from the engine crankshaft to the flywheel and driving disks and through the driven disks coupled with the driving ones to the driven drum, and from it to the drive shaft of the gearbox through a semi-rigid coupling 11. When the drive box 30 is turned, the axial clearance in the balls is selected, and they begin to move along the inclined surfaces of the grooves of both rings. In this case, the flood box moves to the flywheel and presses the release disk through the ball bearing. The release disk, compressing the springs, moves the pressure disk away from the drive and driven disks through fingers 4. The discs are released from the force of the springs, the driving and driven parts are separated - the clutch is turned off (the engine torque is not transmitted to the gearbox). When the driver removes his foot from the pedal, the release disc moves towards the engine under the action of springs until the pressure disc compresses the friction discs - then the clutch is engaged again. Main clutch control drive The main clutch is turned off using the control drive. The control drive (see Fig. 85) consists of the following parts: pedal 1, inclined rod 2 with two forks 10, support lever 3, longitudinal rod 4 and 5 with turnbuckle 9, double arm 6 and transverse rod 7 with two forks 11 When you press pedal 1, the force through the inclined rod 2 is transmitted to the longitudinal rod 4, connected to the short arm of the lever 6. The long arm of the lever 6, connected to the transverse rod 7, transmits the force to the lever of the flood box 8, which rotates in the bearing 24 {see. pic: 83). When you turn the drive box 8 (see Fig. 85), the balls of the main clutch release mechanism roll along the inclined planes of the grooves in the release rings, squeeze out the drive box, and with it the release disk and pressure plate, and the clutch is turned off. The main clutch drive is adjusted using turnbuckle 9 and forks 10 and 11 on the rods (see “Adjusting the main clutch and its drive,” page 138). The turnbuckle 9 and forks 10 and 11 are protected from unscrewing by locknuts and locking washers. Rice. 85. Main clutch control drive: 1— pedal; 2— inclined rod; 3—supporting lever; 4— front part of the longitudinal rod; 5— rear part of the longitudinal thrust; 6—two-arm lever; 7— transverse thrust; 8— drive box; 9— turnbuckle; 10 and 11 are forks. Assembling the main clutch When installing the main clutch on the toe of the engine crankshaft, it is necessary (if the engine was not removed from the tank) to turn the gearbox with the neck up (Fig. 66). The procedure for completely assembling and adjusting the clutch on the engine shaft in the tank is as follows: 1) Inspect all parts to be installed, checking for rust, cracks and other defects. Lubricate all rubbing surfaces, except friction disks, with constalin. Wash the bearings in kerosene and blow with compressed air. Boil the felt seals in aviation oil for an hour at a temperature of 30...40°C. If new felt seals are to be installed, they should be driven to the parts of the part where they should be placed so that the felt fits snugly around the entire circumference of the part. 2) Wash the friction discs in kerosene and wipe dry. 3) Install the spring ring on the stationary release cup 26. 4) Press ball bearings 10 and 24 (see Fig. 83) into the sockets of the driven drum 8 and the release disk 23. 5) Install the oil seal cover 13 on the release disk. 6) Fasten the fingers 4 in the release disk (they should fit into the holes of the release disk under light blows of the hammer), and then check their parallelism by putting on the pressure disk 7 (the pressure disk must fit onto the fingers freely, without jamming). 7) Check the passage of friction disks 20, 21 and 22 along the teeth of the flywheel 6 and driven drum 8 (the disk must pass through the teeth freely) - from its own weight. (It is allowed to file the teeth of the jamming disks.) Check the fastening of the balls of the shutdown mechanism in the separator 29. The balls should rotate freely without falling out. If the balls fall out, open the edges of the holes in the separator. 9) Press drive box 30 into ball bearing 24. 10) Select a set of disks - 11 driving and 11 driven. The thickness of the disk set should be within 73.1…74.1 mm. Check the thickness with the discs compressed. The difference in the thickness of a set of disks when measured at diametrically opposite points (along the largest diameter) is allowed within no more than 0.3 mm. Note. The friction disks of the main clutch are not interchangeable with the friction disks of the side clutch. Install only discs with the inscription “For the main clutch.” 11) Press ball bearing 10 onto the flywheel hub together with driven drum 8. 12) Place the release disk 23 fingers up and put springs 3 on the fingers. 13) Install flywheel 6 on the release disk so that the fingers pass through the guards of the flywheel. 14) Place the previously selected set of friction disks into the flywheel in the following order: first, the thick driven disk 22, and then, alternating: drive - driven - drive, etc. 15) Place two washers 0.5 mm thick each on the shoulders of your fingers and put pressure disk 7 on your fingers. 16) Secure the pressure disk on your fingers with four nuts. pre-compressing the springs. 17) Place adjusting rings 2 (Fig. 87) and a bronze cone 32 (see Fig. 83) onto the motor shaft to approximately a total thickness of 4 mm - with the thickened end towards the motor. 18) Place the separator with balls, generously lubricated with constalin, into the stationary cup of the shutdown mechanism and put on the sealing spring ring 25 (see Fig. 83) 19) Install the fan on the bottom of the housing, pushing it through the toe of the engine crankshaft. 20) Install the flywheel on the toe of the crankshaft in a strictly defined position (this is necessary due to the presence of a graduation on the ring gear to determine the TDC of the engine). The installation of the ring gear on the flywheel is also carried out in a strictly defined position, which is checked by matching the pin on the ring with the hole in the flywheel. Rice. 86. Gearbox with neck facing up Fig. 87. Toe of the engine shaft before installing the main clutch: 1— stationary cup of the activation mechanism; 2—adjusting ring; 3—cone, 4—keyway For proper installation of the flywheel on the toe of the engine shaft, there is a double spline groove in the flywheel hub, which must coincide with a special pin screwed between two splines on the toe of the engine shaft. Before installing the flywheel, be sure to check the presence of this pin. When installing the flywheel on the shaft, you need to be careful not to break the sealing spring ring in the stationary release cup, and to do this, before pushing the flywheel hub onto the cone, you need to compress the spring ring using screwdrivers. 21) Stop the bronze cone at the end of the shaft, securing it from turning with a key (on tanks of previous production). 22) Insert a spacer cone into the plug securing the flywheel and tighten it with a nut so that there is no gap between the cones and the plug, but at the same time the plug fits freely into the shaft. Lubricate the threads of the plug with graphite lubricant. 23) Screw the plug with a spacer cone into the end of the shaft. 24) Attach a special wrench to the plug with two bolts to tighten the plug. The bolts securing the key must not go through, otherwise the bronze cone may be damaged. 25) Tighten the plug completely. Tighten it with the efforts of two people, putting a piece of pipe 1.5...2 m long on the key. In this case, the tightening process is carried out by tapping the flywheel hub and plug with a copper hammer, followed by tightening the plug, doing this until the plug, and after tapping, is no longer will be able to be reached. The most serious attention must be paid to tightening the plug, since only reliable fastening of the flywheel to the shaft ensures reliable operation of the entire clutch. To prevent the flywheel and crankshaft from rotating while tightening the plug, you need to insert a bolt or rod into the hole for the fan mounting bolts and rest a bar against it (preferably a crowbar from a jack). The second end of the bar should rest against the angle formed by the bottom and the wall of the starboard suspension shaft. 26) Adjust the gap between the balls and grooves of the release mechanism rings, for which: a) After final tightening of the plug, measure the gap with a feeler gauge (Fig. 88) between the end of the drive box facing the engine and the end of the toe of the engine crankcase (in the plane of the connector). Let us denote the size of the resulting gap by the letter a. b) Unscrew the nuts securing the pressure plate to the pins. At the same time, the springs will begin to push the squeezer disk and the engine side until the shutdown grooves are elated to the balls and the axial gap between the balls and the grooves of the shutdown rings B) again measure the sight between the ends of the leash box and the crankcase connector. We denote this gap with the letter b. The difference between A and B and gives the actual axial gap in balls, i.e. The gap between the balls and the surfaces of the grooves in the rings of the shutdown mechanism. If the value of a certain gap is not in the range of 0.9 ... 1.1 mm. It is necessary to change the thickness of the set of adjusting rings so that the difference between A and B is within the specified limits. Example. a = 4; B = 2; a - b = 4 - 2 = 2 mm. This means that it is necessary to reduce the thickness of the set of rings by 1 mm then a = 3, b = 2, a - b = 3 - 2 = 1 mm. d) after the determination of the thickness of the set of adjusting gaskets 27, fix the pressure of the pressure disk on the fingers, after which, turning the cork attaching the flywheel, remove the flywheel from the shaft. e) selecting the thickness of the adjusting gaskets for the calculated size, install them on the engine shaft and put the flywheel in place, again measuring the gap after that. 27) Fall the plug with a spacer cone. To do this, tighten to failure with a normal key on the slot on the shank of the cone. 28) install and fix the flange 14 on the shank of the spacer cone (see Fig. 83), fixing the driven part of the freez on the hub of the flywheel. The pin, screwed into the flange, should be in one of the holes of the plug 16. 29) attach to the driven drum 8 hub 9. 30) install the gear crown 2 on the flywheel so that the crown pin enters the corresponding hole of the flywheel. 31) Strengthen the fan 1 and the gear 2 on the flywheel. Under the heads of the bolts, put the pucks of Crover and stall the bolts with wire. 32) Put the couplings on the gear of the hub and the leading shaft of the gearbox. 33) install in place and fix the gearbox. 34) Put the rubber gaskets and the prostate ring 12, 35) connect the coupling with prize bolts. 36) Connect the hose to the oil 31 and to the fitting of the flood box 30. 37) Connect the lever of the leading box with the thrust of the control drive of the main fritzion. Rice. 88. The place of measurement for determining the gap between the balls and the grooves in the mechanism of turning off the main clutches (shown conditionally on the incompletely assembled friction) disassembly of the main friction clutch for disassembling the friction: 1) remove the grid over the blinds. 2) Having rejected the rods, remove the blinds of the transmission department. 3) remove exhaust pipes. 4) Turning away the bolts, throw the stern sheet of the body on the plumbing on the hinges so that the sheet lay horizontally. 5) Remove the rear partition. 6) Turn the transmission change box upwards. The procedure for disassembling the freeze in the reverse order of the assembly. When disassembled, it is necessary: a) before turning off the plug 16 (see Fig. 83) to release the nut on the shank of the spacer cone 28 and a light blow of the hammer, swim the cone inside; b) remove the bronze cone at the end of the shaft using a special device consisting of a bar with two holes for bolts and two bolts entered into special threaded holes; On the tanks of the previous issues before the excavation of the cone, remove the wedge -shaped key 17; In the absence of the device, remove the bronze cone, gently clogging a small screwdriver into its incision; c) when removing the friction from the engine installed in the tank, remove the gear crown 2, then the flywheel 6 and remove the fan 1. Note remaining on the bottom of the case. It is impossible to remove the details of the clutture assembly, since. This is hindered by the partition of the case. The flywheel is also removed from the engine shaft using the device. Replacing the friction disks of the main friction disks of friction disks for the main friction disks is made without shifting the gearbox. In order to take out the friction discs of the main friction, you need. 1) Remove the blinds of the blinds and, turning away the bolts, remove the sheets of the blinds 2) by turning away the nuts (push the prize bolts from the half -wire coupling 11 (see Fig. 83). Put the couplings so that one of them rests on the freeza hub and the other - In the lid of the leading roller of the gearbox box. 3) Remove the prostate ring 12 and the rubber rings 4) unscrew the nuts of the mounting disk and push it towards the gearbox. 5) make a 3 ... 4mm wire with a diameter of two small hooks and, clinging to them with friction disks, remove the latter from the flywheel. 6) Passing the disk between the ends of the hub of the inner drum of the friction and the leading rollers of the gearbox, remove it from the tank. The installation of new friction disks is made in the reverse order. Adjusting the main friction and its drive is the adjustment in the following: by clicking on the pedal 1 (see Fig. 85), check the free course of longitudinal traction. The free move is the value of the traction during the period of choosing a clearance between the balls and the grooves of the rings of the mechanism of turning off the main friction; This corresponds to the movement of the drive pedal from the extreme rear position until the movement of the pedal with a slight effort of the hand is difficult. In the axial gap between the balls and the grooves of the grooves of the shutdown mechanism within 0.9 ... 1.1 mm, the free stroke of the longitudinal traction should be 20 ... 25 mm. The dimension of the idle traction should be frozen on the bottom in the combat compartment of the tank. Pressing the pedal with his foot so that it rests on the axis of the axis of the front skating rink, check the squeezing of the main friction clutch (the stroke of the pressure disk). If when the pedal is stopped in the front pipe, the squeezing of the squeezes will be less than 6 mm, then with the help of forks, traction is shortened 2 or in extreme cases - with the help of a double coupling 9, rods 4 and 5 are shortened, or transverse rod 7 forks 11. If the squeezing of the squeezes is more than 7 mm, lengthening traction 2 or thrust 4 and 5 should be extended. When adjusting the main frictional control drive, make sure that the ends of the rods are visible in the control openings of the forks and couplings. As the friction discs is worn, the axial gap between the balls and the hollows of the grooves of the shutdown mechanism decreases, and therefore the idle stroke of the longitudinal traction of the drive also decreases. The complete absence of the axial clearance in the balls will lead to a slipping of the friction. To restore the axial clearance in the balls, and therefore the free stroke of the longitudinal traction, it is necessary if the free rod of the thrust becomes less than 12 mm, remove one spacer puck from each finger of the springs, and then install and fix the pressure disk again. The idle passage can also be checked by a free turn of a leash box when pressing the pedal with your hand. The minimum allowable stroke of the leash box, frozen at the tube on which the düshite hose is put on, 8 mm. With the same set of friction discs, the idle rod can be restored twice, according to the number of executive goals installed on the fingers under the pressure disc, if it is necessary to adjust for the third time, you should replace the set of worn -out friction disks with new ones and put the previously removed seams under the pressing disk. Washes in the absence of a set of new friction disks are adjusted by adjusting gaskets for the cone in the same way as when installing the friction clock on the engine shaft. The lubrication of the main freezion of the main friction clutch is lubricated with consteline for daily maintenance. Lubricate bearings and balls of the shutdown mechanism in it. Lubrication is brought from two points. Through the butter, strengthened on the engine crankcase, the lubricant along the diet hose is led to the rings of the shutdown mechanism and through the gaps between the separator and the shutdown rings enters the ring gap between the leash box and the flywheel, and from there to the puer disk ball bearing. On a fixed shutdown ring to prevent the flow of lubrication from the shutdown cups, a sealing ring is installed. The flow of grease from the ball bearing is prevented by the seals installed: one directly in the back of the squeeze disc, and the other in the lid of the oil seal, mounted to the squeezing disk. To the bearing of the driven drum, the lubricant is brought through the oil on the hub of the driven drum. To protect the lubrication from the driven part of the clutch, the hole in the hub is closed by a plug. The lubricant that penetrated the gap between the driven drum and the hub of the flywheel is thrown out of centrifugal force through special drilling in the driven drum, without falling on the friction disks.
5-speed gearbox T-34
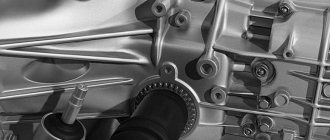
The five-speed gearbox was developed even before the armored vehicle was put into mass production. The tank's transmission required an additional gear in order to reduce fuel consumption, increase dynamics and maneuverability. The gearbox was distinguished by a modern layout, which involved constant mesh gears with clutches. The production of such a box became possible thanks to the presence of the best machine park at UZTM. The purchased Klingelnberg gear cutting machines significantly expanded the production capabilities of the plant. It was possible to process twice as many gear pairs. Since there was no need to redesign the main clutch and housing, a box with clutches is the best solution in difficult conditions. Otherwise, the design bureau would have to develop a new tank with the necessary engine mounting dimensions, a new body and clutch.
Perhaps the only serious drawback inherent in a 5-speed gearbox is the need to produce a complex and expensive unit - a bevel gear with spirally cut teeth. The new box turned out to be demanding on the quality of component parts and required high-precision roller bearings. The problem was solved quite quickly, and it was possible to get rid of the bevel gear due to the transverse placement of the power unit. For these and many other successful engineering solutions, members of the design bureau were awarded the Stalin Prize for 1942. The design of the transmission and gearbox in particular was so successful that it was subsequently used for 30 years on other tanks and combat vehicles weighing up to 38 tons.
Gearbox
(Fig. 22-24)
The T-V Panther tank has a seven-speed manual gearbox with gears that are in constant mesh. The gears are engaged using claw clutches equipped with synchronizers. Cam clutches are engaged using a system of levers driven by the gear shift lever. All shafts and gears of the gearbox are located in a closed housing. The gearbox parts are lubricated with oil supplied to the rubbing surfaces by a gear oil pump, as well as by splashing.
The hollow first input shaft 1 (Fig. 22), through which the shaft passes, driving the parts of the rotating mechanism, is in constant communication with the second input shaft 2 through gears, of which gears 3 and 6 are rigidly connected to the shafts, and 4 and 5 freely mounted on the secondary rail. On the first input shaft, in addition to the rigidly seated gear 3, the following gears are freely seated: IV gear 7, V gear 8, VII gear 9 and VI gear 10. On the second input shaft, in addition to the rigidly seated gear 6, gears II 11 and I 12 are freely seated gears and reverse gear 13. The reverse gear has the ability to move longitudinally on the shaft, as it is mounted on splines.
Bevel gear 14 and gears are rigidly mounted on the secondary shaft: IV, I gears and reverse, V gear 16, VII gear 17, VI gear 18 and III gear 5, sitting freely.
On the reverse shaft 19, gear 20 is mounted on splines, which meshes with gear 13 of the second input shaft, and gear 21, which meshes with gear 15 of the secondary shaft, is freely mounted. Gearbox
| Rice. 22. Diagram of the gearbox and tank turning mechanism | Rice. 23. Longitudinal section of the gearbox |
| click on image to enlarge | |
All gearbox shafts rest on ball and roller bearings. The free-standing gears on the shafts also have ball bearings. The gears are engaged using claw clutches. The clutches for gears from second and higher are equipped with synchronizers. The jaw clutch (Fig. 23) has a cage 1; on the outer surface of the cage there is a slot into which the legs of the lever that moves the cage fit. There are slots on the inner surface of the cage. The cage is put on coupling 2, which is connected to the shaft using splines. On the outer surface of the coupling there are splines along which the cage slides when moving along the shaft axis, and a locking device consisting of a ball 4 and a spring 5. The side surfaces of the coupling on both sides have a cone 3.
When the gear is engaged, the cage, moving to the right or left, with the help of a locking device, guides along the shaft splines and the coupling until the coupling cone is tightly pressed against the cone on the gear; At the same time, the friction forces arising on the surface of the cones slow down the gear and thereby ensure synchronization of its rotation with the clutch. With further movement of the outer race, the stopper ball, leaving the socket, will allow the race to move further so that the splines of the race will engage with the teeth on the gear hub, and then the gear, being rigidly connected to the shaft, will transmit torque from the engine to the secondary shaft.
To prevent the possibility of engaging two gears at the same time, the gearbox has special locks and a lock. The gears and bearings of the gearbox are lubricated primarily by spray oil poured into the gearbox housing. Some of the gears are lubricated with oil supplied through tubes from the gear oil pump. Simultaneously with the lubrication of the gearbox gears, the oil poured into the crankcase also lubricates the gears of the Panther tank’s turning mechanism. For pouring oil into the crankcase, there is a neck in the upper crankcase cover. The oil level is checked with a dipstick. The diagram of the lever positions when changing gears is shown in Fig. 24.
Rice. 24. Diagram of the gearbox shift lever positions.
To engage reverse gears, as well as 6th and 6th gears, as well as 6th and 7th gears, you need to lift the latch on the gear shift lever. The speedometer is rotated using a worm mounted on the secondary shaft, while the speedometer drive cable is retracted from the column installed in the upper cover of the gearbox. Torque from the gearbox to the final drives is transmitted through a pair of bevel gears and a planetary system for the tank's turning mechanism.
What's the result?
Often people interested in gearboxes and engines on historical vehicles ask the question: why was it impossible to achieve easy gear shifting on the T-34, since there were no problems with this on trucks? The main problem was, as mentioned above, in the main friction – the clutch. It had a serious design flaw - the lack of ability to completely disconnect the flow of engine power from the transmission. And, as we have already been able to find out, reworking the clutch would be the worst of all possible solutions to the problem.
The new five-speed gearbox was good in size and fit into the tank body like a glove. Already on the T-34-85 modification, it was this that was the main one and successfully demonstrated itself in combat conditions. The Germans themselves, who had an unknown tank in their hands, were surprised by its characteristics and abilities. On Hitler's instructions, a commission was created whose task was to fully study the advantages of the machine over analogues that existed at that time. Without exaggeration, we can say that the T34 is the best tank of the Second World War, which was awarded the title of “twice winner”, not only for its success on the battlefield, but also for its difficult history of creation.
Tank T-34-85
T-34 and tank landing
March 17, 1940 - first tests of the T-34
Gearbox of the T-34 tank
edit this post
Tank turning mechanism
The turning mechanism (Fig. 25) of the tank consists of planetary clutch and brake systems. The turning mechanism is controlled by two levers. The levers act simultaneously on the mechanical drive and the hydraulic servomechanism. The tank turning mechanism includes a camshaft, which consists of shafts 22 (Fig. 22), transmitting torque from the engine to the tank turning mechanism, a system of cylindrical gears 23, 24, bevel gears 25 , planetary gears 26, clutches 27 and brakes 28, 29. The distribution gear transmits torque from the engine to the sun gears of the planetary gears of the turning mechanism.
Clutches serve to connect and disconnect sun gears from the timing gear. Brakes 28 keep the sun gears stationary when moving in a straight line. Onboard brakes 29 serve to slow down the propulsion unit during sharp turns and when braking the propulsion unit in parking lots. Single-disc clutches are mounted in brake drums. The drive disk with friction linings is connected to the timing gear, the driven disks are connected to the brake drum.
Rice. 25. Longitudinal section of the tank turning mechanism:
1 - bevel gears and transverse shaft (main); 2 - bevel gear and shaft; 3 — planetary gears; 4 — clutches; 5 — brake pads; 6 — clutches for engaging friction clutches; 7 - shafts that transmit torque to final drives.
The clutch is activated by a hydraulic press. In the disengaged state, the clutch is held by a spiral spring, which, like a hydraulic press, is connected on one side to the brake body, and on the other side to the release clutch lever. The brakes used to hold the sun gears stationary are shoe brakes. The brake drum is connected to the clutch, and the pads are connected to the tank body. When the tank moves along a straight block, the brakes are applied. The brake is turned off only while the tank is turning.
Onboard disc brake; Its inner disk is double, sliding, placed in a drum. When braking, the inner disk, moving apart, fits its planes tightly to the planes of the drum. Cooling of the onboard brakes is forced, air. Air from the drum casings is sucked out by engine fans. When the tank moves in a straight line, the control levers are lowered down; in this case, the clutches 27 are turned off, and the brake drums connected to the sun gears of the planetary gears are clamped by the blocks, due to which the sun gears are motionless. When any gear is engaged, the secondary shaft of the gearbox rotates, causing the transverse shaft to rotate, and with it the epicyclic gears.
Epicyclic gears drive the satellites into rotation. Since the sun gears remain stationary, the carriers connected to the satellites will rotate and transmit torque to the final drives, and from them to the drive sprockets. To turn the tank to the right or left, you need to pull the corresponding lever towards you. In this case, at the first moment the brake drum is released, and the sun gear is able to rotate freely; When the lever moves further, the clutch is activated. When the clutch is engaged, the timing gear, rotating the sun gear in the direction opposite to the rotation of the epicyclic gear, will slow down the speed of rotation of the carrier, as a result of which the speed of rotation of the driving sprockets of the propellers will become different, and the tank will begin to smoothly turn towards the raised lever. To quickly turn the tank, you need to raise the reduction lever even higher than with a smooth turn; in this case, the activated brake 29, holding the carrier shaft, will stop the drive sprocket of the propeller, and the torque from the engine will be transmitted only to the propeller of the opposite side of the tank, which will achieve a quick turn.
Lubricant for the turning mechanism parts is supplied from the general lubrication system of the gearbox. Oil is supplied through tubes from the pump to the rubbing surfaces, and then, flowing to the bottom of the crankcase, is collected in the oil sump. The oil is pumped out from the oil sump by a pump, passed through a filter and again supplied to lubricate the parts.
Tank rotation mechanism control drive
The control drive for the tank turning mechanism is combined, mechanical, with a hydraulic servo mechanism. The drive consists of hydraulic pumps, a lever system and four piston presses. In the control compartment opposite the driver's seat there are three levers; the right lever acts on the right brakes and the right clutch of the turning mechanism, the left one - on the left brakes and the left clutch of the turning mechanism, and the lever located to the left of it, near the side armor plate, acts on the side brakes when braking the tank in parking lots. Two hydraulic pumps installed in the fighting compartment under the turret floor are driven by a propeller shaft. They are mounted in a common block.
The pumps are connected by suction tubes to a reservoir, which contains the amount of liquid required for operation, and discharge tubes to a system of hydraulic presses. From the hydraulic pump, the oil flows through a system of tubes to the presses, two of which act on the brake system, and the other two on the clutches. A hydraulic press consists of a cylinder, a piston, a valve system, levers with adjusting screws and springs. The press body is attached to the tank body on a special bracket. When raising the tank rotation control lever, the screw, pressing on the oil inlet valve rod into the cylinder, tears it off, allowing oil to flow into the cylinder. Under oil pressure, the piston, moving, presses the rod on the arm of the lever attached to the shaft and turns it.
The shaft that drives the clutches and brakes is composite; it looks like three shafts. The internal shaft operates the onboard brakes; it can be turned with the leftmost lever. For braking in parking lots or using one of the turn levers (right or left) when turning the tank. When the inner shaft is turned using the leftmost lever, it activates (brakes) both on-board brakes. When you operate the right or left lever to turn the tank, the right or left brake is applied accordingly. The outer shaft consists of two parts, one of which is connected to the left steering lever and the left hydraulic press, the second - to the right lever and the right hydraulic press. On the outer surface of the shaft there are levers and cams that transmit forces to the lever systems of shoe brakes, hydraulic presses for engaging clutches and on-board brakes.
When the right or left tank turning lever is raised, the right or left part of the outer shaft turns, respectively. The free play of the lever at the end of the handle is 25-30 mm. With further movement of the lever, the roller, rolling along the profiled brake release lever, turns it off, and the clutch activation lever, resting against the valve stem of the hydraulic clutch activation press, turns on the clutch. In this case, using a system of levers and rods, a hydraulic press is activated, turning the shaft. By its action, the hydraulic press significantly reduces the effort required from the driver to control the tank.
Brilliant diesel: from T-34 to T-90
Battle of concepts And yes, he was a diesel. In fact, the T-34 was far from the first tank with a diesel engine; Japanese tank builders used diesel engines especially actively in the pre-war years. But the T-34 is considered the first tank designed specifically for a diesel power plant, which allowed it to “capitalize” its advantages as much as possible. But German tanks remained faithful to multi-cylinder carburetor (gasoline) engines for a very long time, and there were many reasons for this, for example, a shortage of non-ferrous metals, and later a shortage of diesel fuel. Soviet engineers relied on diesel. By the way, the V-2 engine made its debut on the BT-5 tank even before the start of the Great Patriotic War, but it gained its main fame, of course, in the engine compartment of the T-34. Diesel had several advantages. Less fire hazard is one of them, but far from the only one. No less important was fuel efficiency, which affects the autonomy of the tank, that is, its ability to devour kilometers without refueling. Let's say, the T-34 could travel about 400 km along the highway, the German Pz IV - about 300 km, and the Soviet tank was one and a half times more powerful and almost as fast. Diesel created less interference for radio electronics (no ignition system), and could also run on any fuel, including gasoline and aviation kerosene. In war conditions, this was an important advantage: roughly speaking, having found a barrel with some kind of liquid hydrocarbon of the required viscosity, the soldiers could use it as fuel by adjusting the fuel pump rack. Running a diesel engine on gasoline is harmful to the engine, but in critical situations, the ability to move the tank takes precedence over resource issues. Over time, the diesel concept won out, and today the use of heavy fuel for tanks is the norm.
The secret of longevity Diesel V-2 is associated with the T-34 tank, although already during the war it was used on many other combat units, for example, another victorious tank - the heavy IS-2. Over time, the power and designations of the motor changed. Thus, the classic V-2-34 engine for the T-34 developed 500 hp, the version for the IS-2 was called V-2IS and produced 520 hp, for the KV-2 tank the same engine was boosted to 600 hp. With. Even during the war, attempts were made to increase power, including through supercharging, for example, the prototype V-2SN with a centrifugal supercharger developed 850 hp. But they started boosting the engine seriously after the war. Thus, the T-72 tank received a naturally aspirated version of the V-46 with a power of 700 hp, and modern T-90 tanks have a turbo version of the V-2 engine with a power of 1000 hp. (for example, V-92 series engines). Even during the war, the V-2 engine began to be used on self-propelled guns, tractors and other equipment, and after that they were actively used for peaceful purposes. For example, the diesel-electric tractor DET-250 received a modification of the B-31. In addition to the classic V-shape with 12 cylinders, the B-2 family has spawned lines of engines with a different number and arrangement of cylinders, including for use on ships. For BMPs, “flat” six-cylinder versions of the B-2 with a large cylinder angle were developed. Of course, the V-2 engine and its modifications had many “competitors” who tried to displace the T-34 engine from the engine compartments of later tanks. You can recall one of the most incredible tank engines, the 5TDF for the T-64 and T-72. The two-stroke five-cylinder diesel engine with ten pistons, two crankshafts and double supercharging amazed the imagination with its sophisticated design, and yet the descendants of the V-2 engine won the evolutionary race. Why did he turn out to be so tenacious? Its creators “guessed” the basic parameters and layout, which ensured the efficiency of the design and a large margin for growth. Perhaps this is how technical genius manifests itself: fulfilling not only immediate requirements, but also thinking about the next steps. T-34-85 model 1944 on a pedestal in Kursk:
Humble heroes And now is the time to pay tribute to the people who created and developed the V-2 family of engines. Its development was carried out in the 1930s at the Kharkov Locomotive Plant under the leadership of Konstantin Chelpan, and in the later stages - Timofey Chupakhin. Ivan Trashutin took part in the creation of the B-2, who later became the main engine driver of Tankograd, a tank production facility in Chelyabinsk. The V-2 engine began to be produced in Kharkov, then in Stalingrad and Sverdlovsk, but the bulk of the engines were produced by the Chelyabinsk Tractor Plant, which arose after the evacuation of several tank production facilities to the rear. It was at ChTZ that the lion's share of V-2 engines was assembled during the war, and the same plant was involved in the development of the concept in the post-war period, including under the leadership of the famous designer Valentin Chudakov.