Installing an optical sight
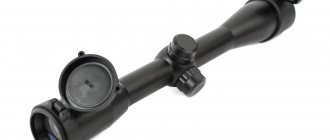
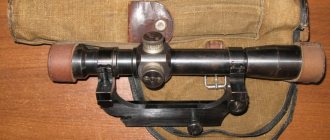
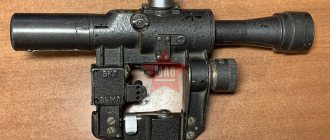
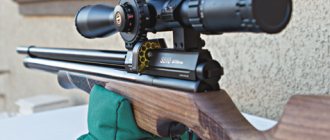
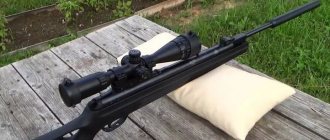
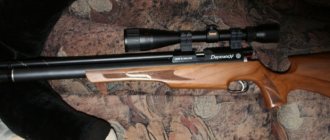
A rifle is taken and an optical sight is carefully installed on it. It is fixed using the fasteners located on it. They must match the recoil that a particular rifle produces.
This is an important parameter, since if it is not observed, serious inconveniences may occur.
Sometimes there is a danger that the scope may become dislodged or fall off the rifle, which can result in injury to both the gun owner and those around him.
You need to make sure that the sight is securely fixed. It should not move or conform to the volume of any part. If problems arise, you need to use a special sealant with a fixing function for the screws.
Precautionary measures
To prevent zeroing pneumatics from leading to unfortunate situations, it is strongly recommended to follow basic safety rules that will protect not only the shooter, but also bystanders:
- treat any weapon as if it were loaded - you should not play with a rifle;
- it is allowed to charge the aircraft only if there is no one at the firing line;
- if a shot does not occur when you press the trigger, you should exercise extreme caution;
- for shooting at a short distance it is worth using personal protective equipment;
- before going to the sighting target, you should turn the barrel to the side;
- if you hear any rustling or voices, you should put the rifle down;
- Before shooting from an air gun, you need to make sure its barrel is clean.
Zeroing a Remington 700 ADL Air Rifle
Zeroing an air rifle is a process that should not cause difficulties even for a novice hunter. If you encounter any difficulties with adjusting the optics or rear sight, or you cannot find a suitable place outside the city, then you should not neglect the opportunity to go to the nearest shooting range, where specially trained people will help not only in word, but also in deed.
Necessary materials
Before starting work, you need to purchase the following products:
Rifle pad
- A lining for giving a comfortable position to the rifle while zeroing the optical sight. It is necessary to protect the external surface of the rifle from scratches, as well as to ensure maximum comfort for humans when in contact with the weapon.
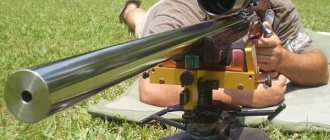
- Rifle machine . If it is not possible to purchase it, you need to put bags of sand or other material. The stand is needed to achieve maximum stability and reduce the likelihood of an erroneous shot.
- Pack of at least one hundred rounds of ammunition.
- Laser sight. It is necessary for cold shooting. You can purchase it for as little as $20. This element is optional, but it serves for convenience and helps to facilitate the shooting process.
- Screwdrivers . With their help, the optical sight is adjusted.
- Any targets. You can purchase them in a special store, but to begin with, you are allowed to use unnecessary household items.
- Binoculars.
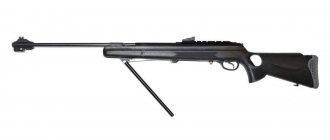
- The screw bipod is used to mount the rifle. It can be purchased upon request. If a person plans to work with it, then it is advisable to purchase it immediately in order to get used to one type of stand.
Cold shooting
You can adjust the accuracy of the sight without optics using a special laser, which is inserted into the muzzle channel of the rifle. This technique does not require a large amount of ammunition, and its noiselessness allows it to be used immediately before hunting.
A special muzzle attachment is purchased. They consist of a cartridge used as a target designator and special attachments with an adjustable tail section - it is adjustable for various calibers. The attachment is attached to the front of the gun barrel. By rotating the tail part, you can adjust the device and align its axes.
The laser is installed in such a way that its point is aligned with the front sight and fore-end. After adjusting the open sight, it is recommended to fire a test shot at the target, first removing the laser from the barrel of the rifle. In addition to the muzzle attachment, you can use a laser cartridge.
Pointing an air rifle through the bore
- Targets are brought to the shooting range. They need to be placed from the rifle at a distance of 25 m or 100 m.
- The rifle is mounted on a bipod. If it is not there, any other tall and stable objects are used to fix the rifle in a stationary state while zeroing. All parts of the weapon must not be placed on hard material. You need to make sure of this before you start shooting.
- If the rifle is equipped with a sliding bolt, then before using it you need to remove it, and then align its position relative to the target, adjusting the position through the channel equipped in it.
- The bolt must be opened if a single-shot rifle is used.
- It is not possible to adjust air guns through a channel.
Aiming the sight - The rifle is positioned in such a way that when looking through the breech, the target is in the center of the hole, although it is 100 m from the weapon.
- The crosshair of the sight is set with visibility on the same target , while the remaining parts of the weapon cannot be moved.
- If all parameters match, the rifle becomes zeroed.
Features of zeroing with optics
The main difference between this procedure and the previous method is that zeroing begins from a distance of 20 meters and above (depending on the magnification of the optical device). To fix the rifle, you will need to get a special sighting machine or go to a shooting range that definitely has one. At the same time, adjusting the optics at a distance of 200 meters or more will be almost useless, since at such a distance the force of wind and gravity begins to act on a small 4.5 mm bullet.
Shoot at 100 meters
The rifle barrel must be completely cold. The weapon must be mounted as firmly as possible. The person sits comfortably and makes 3 neat shots with a rhythm that is comfortable for him. You need to make sure the hits are correct , to do this you should evaluate them using binoculars.
To ensure maximum range, you need to adjust the scope slightly higher than the middle of the target. Then, when fired at the central point, the bullets will fly about 7-8 cm higher.
Test shot
As a rule, a test shot does not even have to be fired at the target, because it is not carried out in order to determine the difference between the aiming point and the impact point, but in order to make sure that the weapon is working. Perhaps you have not secured the optical sight properly and will notice this after a test shot. This procedure also allows you to verify the accuracy of cold zeroing. As an impromptu target, you can use any bottle, jar or medium-sized object that you wouldn’t mind breaking.
Ceasefire
Any rifle must be completely unloaded. Be it the performance characteristics of Mosin rifles, Russian-made small-caliber rifles, Gama air rifle or any other. You need to keep your eyes on the target when using binoculars. The largest possible sequence of successful shots is detected in order to set the sight as correctly as possible.
This trend can be traced . If the largest group of impact marks is in the upper right corner, you need to point the target down to the left. Before completing the preparations, you should read the instructions that came with the specific scope upon sale.
It is necessary to perform a large number of repetitions until each bullet is fired with high accuracy and hits the central area of the target.
Video: How to zero an optical sight
Additional tips on video:
Preparatory activities
Before you begin the zeroing process, it is worth carrying out a number of preparatory procedures that will save not only ammunition, but also precious time. In the following sections, you will learn how to mount a scope on an air rifle, as well as what cold zeroing is and what it is used for. Follow all the recommendations, and then you will be able to configure the airborne optics as correctly as possible and in a short time.
Tips for setting up and adjusting
Reactivation of weapons
This procedure is performed before zeroing. It consists of removing the conservation grease. After purchasing the device, a large amount of lubricant is found in the compressor. If you refuse to carry out this operation, the barrel gradually becomes dirty, and the spring resource reduces its performance.
It is preferable to choose the following sequence of actions:
Reactivation of weapons
- Complete disassembly of the rifle.
- Removing the piston.
- Elimination of grease. To do this, you can use household appliances: a thin rag and solvent. If possible, purchase a lubricant that can be used to treat any part of the weapon except the barrel.
- Cleaning the compressor with a dry cloth so that the internal structure dries faster.
- Removing Vaseline from the piston.
Preparing to fire shots
Controlling the location of the front sight. Ideally, it should be absolutely flat. Severe distortions or unevenness should be leveled out. To make sure there are no deviations from the norm, you need to look at this detail from different angles. If the axis of the front sight coincides with the line of the barrel, then these elements are installed correctly.
Sometimes there is a need to adjust the point of impact when moving the rear sight. If instead of the intended target the bullets fly up, then it needs to be lowered a little, and if the bullets move down, raise it.
The difference with the front sight is that the latter must be additionally moved in the direction opposite to the point of displacement, but the rear sight does not need this. The so-called “sniper injury”, namely a broken eyebrow from the recoil of a scope, can most often be found among all pneumatics in the Hatsan 125 model air rifle.
Measuring distance
If a person is not yet experienced, it is necessary to start zeroing the weapon from the shortest distances. As skills improve, the distance increases.
The larger it is, the more noticeable are any inaccuracies in aiming the sight.
Initially, zeroing can begin even from 15 meters from the target, but usually a distance of 25 meters is used, and then it is gradually increased.
The maximum can be up to 300 meters or more.
Pneumatic bullets
They are selected by listening to the recommendations in the instructions for a particular rifle. The weight criterion is important. Bullets that are too heavy will be inappropriate in an airgun not intended for this purpose. The speed of their departure will be as low as possible, so the accuracy of the hit cannot be guaranteed.
Bullet selection
Bullets that are too light are also not recommended, since they slow down very quickly in flight, which also causes inconvenience in hitting the target.
Preparing the shooting area
There should be no living creatures where the bullets will fly. It is necessary to make sure that the passage of people or animals is excluded in the designated area.
Targets are often made on shields , usually filled with plain paper. Much attention is paid to equipment. For proper shooting, you need to set up a rest in advance, that is, a stand for the rifle. To achieve its most even position, you need to ensure that it touches a solid base, that is, the forend. Supporting using the entire trunk is considered erroneous.
Center of impact
To accurately determine and correct the midpoint of impact, the rifle is carefully zeroed. To follow all the recommendations on how to zero an air rifle with an optical sight, 3 shots are fired at once. In this case, a person is obliged to aim the sight exclusively at one point.
The very first mount
Let's start with the history of this mount. The receivers of the first guns had the simplest form, designed mainly for the simplicity of the mechanisms for feeding a bullet into the barrel, but not for the installation of sights. Many guns with a long history still force amateurs to come up with different solutions for installing sights. In general, the sight body also has the shape of a cylinder. That is, we need to connect the cylindrical shape of the sight and the receiver. This is how small grooves appeared on the first guns, which when cut looked like a trapezoid. This figure was very similar to that same swallowtail. Such a fastening is not an innovation, since something similar exists in the connection of logs.
How to use a weapon correctly
- You cannot store a rifle in a state ready to fire, as this can result in injury or death to the owner or others.
- Firearms can cause a lot of damage to its owner or others if used ineptly. If you are not confident in your own abilities, you can sign up for weapons safety classes or courses for novice hunters. This will help you be confident in your abilities and calmly shoot in the presence of other people without the risk of injuring them.
You cannot point the rifle where it is prohibited. - You cannot point a loaded rifle where shooting is prohibited.
- Don't keep your finger on the trigger unless it's time to shoot. The hand may tremble, which will lead to unpleasant consequences.
- When zeroing an air rifle, it is necessary to use the same bullets that will be needed when going hunting or competing.
- In order not to make a mistake with a shot, you need to confirm their correctness whenever you change the rifle settings with three shots at one target.
- You should not rush into shots to avoid unnecessary hits. You should breathe calmly and make measured movements so as not to injure yourself or your fellow travelers.
- Before firing a shot, you need to make sure that the barrel is completely cold. If there is an increased temperature, you should wait until it cools completely. This will help keep the weapon safe, since if it gets too hot, it can jam.
- Do not neglect rifle zeroing exercises. If this procedure is carried out correctly, hitting accuracy is ensured if you have shooting skills.
All these warnings apply to the SVLK 14c sniper rifle, and to the ataman air rifle, as well as to the Barrett m107.
Alignment of correction drums
There is a smaller tube inside the scope that contains the crosshairs and wraparound lenses. When we adjust the drums, we actually move this tube and this changes the relationship between the reticle and the target image. A scope is optically centered when this inner tube is completely aligned within the scope body. This means that the mechanical and optical axes coincide, and this position gives the least amount of optical errors and image distortion. Another important reason for centering the scope is the fact that if the wrap system is positioned at its extreme positions in any direction, it may touch the main tube and we may not be able to use the full range of adjustment or may even move the reticle horizontally while adjusting the elevation.
This means that we always have to center the scope, then align it roughly with the bracket and only fine adjustments (within a few clicks) can be made with the drums.
Centering the scope, as is usually done, the middle of the turret adjustment range is used, but it is not accurate and can damage the scope mechanism.
The correct way to center a sight is by "rotating" (even the Schmit-Bender factory uses this method to center their sights). You secure the rifle and place the scope in the open rings of the mounts, aiming at highly detailed targets (to guide the offset). It is worth placing strips of paper between the mount and the scope to avoid damaging the coating of the scope.
Sight rotation
Then rotate the tube slowly, pressing it down, in half rings, so that the sight does not rise, but simply rotates around its own axis:
Estimate where the center of the resulting arc is located (marked in red in the pictures) - set the reels so that the crosshairs move approximately along this arc. Repeat this several times until the crosshairs begin to point in the same place as you rotate the scope. The sight is now optically centered. Mark the position of the drums for later use.
