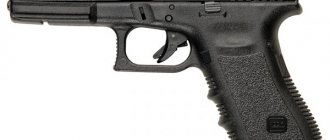
The TT pistol is the first army self-loading pistol of the USSR. It was developed in 1930 by the Soviet designer Fedor Tokarev. The gun has a simple design - and, as a result, low production costs and ease of maintenance. One of its advantages is the cartridge of high power and high penetrating ability - in this property the bullet is superior to the bullet of the 9x19 Parabellum cartridge.
The pointed TT bullet is capable of penetrating an army helmet and light body armor. However, its stopping effect is less than that of a 9x19 cartridge bullet. However, the TT combat pistol can be used with 7.63x25 mm Mauser cartridges with bullets that have an increased stopping effect. The TT pistol is also comfortable to carry thanks to its flat body.
Crosman C-TT Air Pistol Review
Crosman is an American company that produces high-quality air guns. In this case, the S-TT pistol was no exception. It is an almost complete copy of the original, with the exception of only a few small details. However, in this case the bolt frame does not move during the shot, which is why there is no feeling of a real weapon. This solution allows you to make more shots from one cylinder.
It is also worth noting the all-metal body and the weight and size of the weapon close to the original. The pistol fires using canisters of compressed CO2 gas, and it is installed in the pistol grip, as in most similar pistols.
Technical characteristics of the TT pistol
The external characteristics of the TT pistol are as follows. Its weight is just under a kilogram - 854 g without cartridges and 940 g loaded. Length – 195 mm, height – 130 mm, barrel length 116 mm. This is a pistol with a single-stack box magazine that holds 8 rounds, an open non-adjustable sight and a sighting line length of 156 mm. “Working” technical characteristics of the TT pistol: sighting range – 50 m, initial bullet speed – 420 m/s. The weapon has a high maximum bullet flight range - 800–1000 m. The zeroing distance of the pistol is 50 m.
The mechanism of the Tokarev TT pistol includes 45 parts. The operating principle of the pistol is to use recoil energy with a short barrel stroke. Locking is carried out by engaging the protrusions of the bolt casing with the grooves on the barrel. When the barrel moves away, it is lowered by a movable earring onto the breech, resulting in the disengagement of the barrel and the bolt. For protection, the trigger is placed on the safety cock. All parts of the impact mechanism are combined into one block, which ensures ease of use. The trigger in the pistol is designed according to the sliding principle.
Device
The gas-cylinder pneumatics themselves have a fairly simple design, which also applies to this pistol. The bolt carrier consists of two parts, namely the frame itself and the front plug that holds the spring. Also on the upper part inside the frame (at the level of the front sight) you can find a piston with a firing pin. The body itself includes a trigger with a spring and a rod that connects to the trigger, a metal chamber with a valve and a BB cylinder, a ball feed mechanism with a feeder, as well as the barrel itself. The copan includes a needle with a return spring, a washer and a rubber pad.
Video review of the Crosman C-TT air pistol:
Disassembly
The disassembly process for the Crosman C-TT model occurs in the following order:
- First you need to remove the plastic covers on the pistol grip and remove the gas cylinder, and then unload the pistol. The magazine also needs to be removed. After this, you can proceed to further disassembly.
- On the front of the gun, you need to knock out two pins that hold the plug.
- Now, holding the plug, move the frame to the rearmost position. Hold the frame and remove the plug with the spring. Then lift the back of the shutter up and remove it through the front.
- Now use a screwdriver to unscrew the piston and firing pin, which are located on the inside of the bolt frame.
- On the right side of the gun you need to unscrew the 7 bolts that hold the halves together. They remove this very half.
Disassembly process for the Crosman TT model:
Disadvantages of the Tokarev pistol
The disadvantage of the Tokarev pistol is its controversial ergonomics - it has a small angle of inclination of the handle, its shape does not contribute to the comfort of holding the pistol. Also among the “disadvantages” of this weapon is the insufficiently good fixation of the clip. It should be noted that there is no full-fledged safety lock, which requires increased attention when handling the Tula Tokarev pistol.
Tokarev created the famous pistol for a competition in 1929, which was held with the aim of obtaining a new army pistol. It was supposed to replace the Nagan revolver and a number of foreign revolvers and pistols with which the Red Army was armed by the mid-1920s. The standard cartridge was the German 7.63x25 mm Mauser cartridge. The place where the TT pistol was created was the design bureau of the Tula Arms Plant.
In 1931, the weapon was put into service. In order to improve the manufacturability of production in the 1930s, the pistol was subjected to a number of modifications. In 1939, a version was created that had a more massive handle and a 12-round clip. After the start of the war, at the end of 1941, the equipment for the production of the Tokarev TT pistol was moved to Izhevsk, to machine-building plant No. 74.
In 1944, another modernization was carried out - the magazine capacity was increased to 16 rounds. The TT pistol was produced until 1952, when the 9-mm Makarov pistol was adopted. Until the early 1960s and mid-1970s, respectively, it was replaced by the PM in the army and police. After the war, the Tokarev pistol became widespread in criminal circles, since many weapons were not included in the bullet case.
Tuning
To make the gun look more believable, it is necessary to erase all the inscriptions from the barrel. This can be done using fine-grained sandpaper. Buy the finest one and rub very carefully so as not to damage the base paint.
After disassembly, it is necessary to remove debris; if any, the threaded connections can be sealed with FUM tape. Remove all excess grease.
You can drill out the hole on the valve a little to get an increase in speed. This is not recommended, since such an operation will only lead to an increase in gas consumption, and will also significantly reduce accuracy due to excess gas at the outlet of the barrel.
To make it yourself, you need to buy a 5-cc syringe with a rubber seal. We cut off the conical part from it and sand it. Next, remove the elastic band and cut off approximately 0.05 mm from the back. We pierce a hole and put a piston on the needle. There is no need to remove the retaining ring.
Complete/partial disassembly of the Gletcher TT NBB pistol
Many of the owners of pneumatic guns, I believe, are familiar with such a wonderful pistol as the Gletcher TT NBB, some have simply heard it well, some bought it for themselves, some had the opportunity to see/hold it in their hands, looking at it in a store or in a friend’s collection.
Wandering through the pages of our beloved site, I repeatedly read comments from users that, they say, I completely disassembled the pistol, but now I can’t put it back together, help.
Actually, I myself encountered such a problem during the first disassembly, but, fortunately, reason and logic are not distant concepts for me, and the explosion diagram on the box was enough for me to disassemble everything and put it back together without any trouble.
However, I provide an article with relatively detailed instructions for disassembling and assembling the product below.
(To my great shame, I don’t know the anatomy of gas-cylinder pneumatics very well, so I will name some of the parts not in accordance with the terminology, but either according to the description in relation to the photograph, or by giving my own names and indicating them in the photographs)
Actually, the patient himself. We will need: tweezers (optional, I find it more convenient to use them to pick up small parts), an awl (another thin hard tool), a small Phillips screwdriver, straight hands.
Before starting work, BE SURE TO REMOVE THE CYLINDER AND MAGAZINE. Remove both cheeks of the handle.
Step 1. Using an awl, press out the pins located in front of the barrel. Remove and set aside separately.
Step 2. Holding the plug, move the bolt to the rear extreme position. Be careful, the plug may be pushed out with force under the action of compressed spring 1. Carefully move it away, remove it from the bolt body, remove spring 1. Holding the bolt in the rear extreme position, lift its rear part, then slide it forward in the direction of the barrel and remove the bolt.
Partial disassembly completed. To view the reverse process (from partial disassembly to reassembly), scroll to Step 27 below.
Step 3. Using a Phillips screwdriver, unscrew the bolts and remove the part.
Place the bolts together with the part separately from other parts.
Step 4. On the right side of the gun, unscrew the 7 fixing bolts. Set aside separately from other parts.
Step 5. Carefully detach the upper (pictured on the right) part of the gun body from the lower (pictured on the left).
Trigger mechanism (trigger, trigger spring, trigger rod). Pay SPECIAL ATTENTION to the position in which spring 2 is located relative to the trigger rod.
Assembling and disassembling the TT pistol
Regarding the TT pistol, partial and complete disassembly can be used. In the first case, you should start by removing the magazine and making sure that the cartridge is not in the chamber of the pistol. Next, press the tip of the return spring using a 7.62 mm cartridge bullet or other improvised object, and remove the tip from engagement with the bolt guide sleeve. After this, with a simple force, the bolt guide sleeve is rotated 180 degrees and removed along with the return spring and tip. Then, using a handy object (the lower part of the magazine), you need to move the bolt stop plate spring and release its rod.
Afterwards, press on the end of the bolt stop rod that has been released from the spring and remove it; move the bolt forward and remove it and the barrel from the frame. The guide rod is removed from the bolt. Next, you need to remove the barrel by the muzzle through the hole in front of the bolt, and remove the firing mechanism block from the frame. To reassemble the TT pistol, perform all steps in reverse order. To properly connect the barrel to the bolt, the earring should be folded to the rear position. Before installing the bolt on the frame, recess the trigger block so that it does not interfere with the bolt. To secure the delay, move the bolt back slightly so that the hole in the frame coincides with the hole in the barrel shackle.
Complete disassembly is incomplete disassembly and a number of other actions. To disassemble the trigger, you need to pull the trigger back, knock out the sear axis and remove the sear and disconnector. Then push out the trigger axis and separate the trigger and spring. To disassemble the frame, turn the shank of the left cheek plate and separate the latter. We do the same with the right cheek. Then press the lid catch up and separate the latch and release spring. Afterwards, press the head of the magazine latch pin and push it out of the frame and base, separate the base from the frame and remove the latch spring from the pin. Then you need to move the trigger forward and remove it from the socket. Then the trigger plate spring is separated.
When disassembling the return spring, you need to separate the guide rod and tip from it. When disassembling the bolt, you should knock out the firing pin and remove the firing pin and spring; just remove the ejector and spring. When disassembling the magazine, use a pointed end (pin or cleaning rod) to press down the magazine cover lock, slide it forward, and holding the lock and spring, remove the cover. Afterwards you need to remove the spring and the clip feeder. To assemble a completely disassembled TT pistol, repeat all steps in reverse order. Then check the functionality of the weapon.
We repair the gun in half without the help of electrical tape.
All pneumatic TT replicas are not very good.
MP-656 - no self-cocking, huge price. It has some historical value (but almost everything there has been sawn and the frame with the shutter has different numbers)
Smersh H51 is terrible. There is no self-cocking, the bolt is motionless, there is no replica, the safety function is performed by the 3Z.
Gletcher TT and Crosman TT - the SK rod breaks, the frame bends in the valve area, low-quality alloy. Also, in the version with BlowBack, the firing pin can fly out into the eye with a large shot.
You can overclock the Gletcher TT by sealing the holes in the valve (which are there for BlowBack to work). MP-656 - boring the valve, installing a stopper in the magazine and sealing all cracks.
I answer 1) to shoot 2) Nice try, FSB
I will most likely make a carbine out of it later. That's why I took it.
I would be glad, but it is a) illegal b) expensive
PS: I'm on my way too))
Eh. At one time I wanted this particular pistol, but I realized that there would be no profit from it.
Trigger pull. Anything can be repaired. It depends where it broke. If it's not too much trouble, please send photos of both parts. In most cases it is possible to restore. If I figure out how, I’ll write to you under the photo of the halves of the parts. By the way, this rod is very sensitive to pressure and easily unbends, so you shouldn’t press it hard when the gun is on safety. And also - in auto mode - most likely I lost one small detail. When you take it apart, check them using my photo. Either the part is missing or there is a spring.
A friend has had the pistol for a long time; spare parts for this pistol were used to repair an airsoft Beretta.
You confused IZH-671 (in the second photo) with MP-651.
MP-651 comes in two modifications - MP-651KS and MP-651K. They differ in the diameter of the bypass in the valve and frame (it is smaller in the KS). Also, the old MP-651KS has an 8g valve. cylinders (nowadays they put a valve at 12 degrees for everything). Externally, except for the inscriptions, they are indistinguishable.
Now it is better to buy MP-651KS and drill the bypass to 3.5 mm. (since the MP-651KS has a certificate that it is not a weapon, accordingly 20.13 of the Code of Administrative Offenses is much more difficult to solder).
As for the used cans, they can be used as targets for a rifle.
Some people make refillable cylinders using a regular car nipple, but they don't last long (and are even dangerous).
You can also make an adapter and power the weapon directly from a fire extinguisher or paintball cylinder (but with a 60 atm reducer)
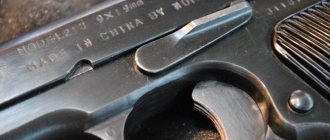
The TT pistol (Tula, Tokarev) was designed by V.F. Tokarev (1871-1968). The TT pistol was not inferior in technical characteristics to the best pistols of that time, and in some respects it even surpassed them. It is distinguished by the simplicity and reliability of the device. The automatic pistol operates on the principle of using recoil energy with a short barrel stroke. The design of the main components was copied from the Colt pistol mod. 1911. Locking of the barrel is ensured by the engagement of the recesses of the bolt casing with the protrusions of the barrel. The barrel, like a Colt pistol, is connected to the frame by a movable earring. When the barrel, coupled with the bolt casing, moves away, the earring releases the breech of the barrel and ensures its disengagement from the bolt, thereby ensuring reloading of the pistol. The pistol does not have a safety. Safety is carried out by placing the open trigger on the safety cock. A pistol loaded and put on the safety cock requires careful handling, since when dropped on the trigger, the safety cock or sear breaks, which leads to a shot (the Chinese-made TT pistol “model 213” is free from this drawback, since it has a non-automatic safety that blocks the trigger ). A special feature of the pistol is the combination of all parts of the impact mechanism into one block and the placement of the mainspring inside the trigger. In 1933, the pistol underwent partial modification. The shape of the barrel was simplified, minor changes were made to the trigger mechanism, and the rear wall of the handle was made solid, without a detachable cover. The small angle of the handle makes it inconvenient to shoot from the stomach and offhand. At the same time, thanks to good balancing and a fairly large aiming line, even novice shooters rarely miss with it. The pistol performed well during the Second World War 1939-45. It was in service in 30 countries in Europe and Asia. About 1 million 740 thousand copies were produced in the USSR. Produced in Hungary, China, North Korea, Poland, Yugoslavia. In the CIS countries, it has been preserved since the Second World War, and is also delivered through smuggling (mainly of Polish and Chinese origin). Due to its low cost (about $60 abroad) and high muzzle energy, it is very popular among criminals. In approximately 30-35% of all cases of pistol use in the CIS countries, these are TTs.CHARACTERISTICS
Caliber - 7.62 mm Weight without cartridges - 0.85 kg Weight with loaded magazine - 0.94 kg Pistol length - 195 mm Barrel length - 116 mm Pistol height - 130 mm Muzzle velocity - 420 m/sec Magazine capacity - 8 cartridges Rate of fire - 30 rpm Sighting range - 50 meters Constant sight Ammo used - 7.62x25 mm
DEVICE
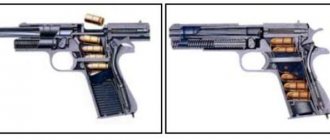
1 - bolt-casing, 2 - barrel, 3 - earring, 4 - firing pin, 5 - trigger mechanism box, 6 - trigger, 7 - mainspring, 8 - disconnector, 10 - trigger rod, 11 - trigger spring, 12 - handle cover, 13 - magazine, 14 - magazine latch, 15 - frame, 16 - return spring, 17 - guide sleeve
DISASSEMBLY AND ASSEMBLY OF THE PISTOL
INCOMPLETE DISASSEMBLY
1. Remove the magazine. 2. Use the end of the magazine cover to move the bolt stop spring back and, holding the bolt, press on the freed end of the bolt stop rod and remove it. 3. While supporting the return spring, remove the bolt and barrel from the frame. 4. Turn the bolt with the return spring up, press the head of the guide rod to remove it from the bolt and separate it along with the rod and tip. 5. Separate the bolt guide sleeve by rotating it 180 degrees relative to the bolt. 6. Disconnect the barrel from the bolt and remove it by the muzzle. 7. Remove the trigger block, holding the frame by the handle.
Partial disassembly of the pistol is completed. The pistol is reassembled in the reverse order. To connect the barrel to the bolt, the barrel must be inserted into the bolt, tilting the earring back. When installing the bolt on the frame, the trigger block should be recessed so that it does not interfere with the free movement of the bolt. To attach the bolt stop, move the bolt back a little so that the hole in the barrel mount aligns with the hole in the frame.
COMPLETE DISASSEMBLY
Before complete disassembly, it is necessary to partially disassemble the gun. Further disassembly is carried out as follows: Disassemble the trigger block: 1. Pull the trigger back, knock out the sear axis and remove the sear and disconnector. 2. Using the disconnector rod, push out the trigger axis and separate it together with the spring. It is necessary to hold the spring and ensure that it does not fly out when the load is released.
To disassemble the frame: 1. Using the long feather of the USM block, turn the tail of the fastening bar of the left cheek and, pressing on it from the inside, separate it. Repeat the same with the right cheek. 2. Push the cover catch upward and, pressing from the inside, separate the release spring and latch from the cover. 3. By pressing the split head of the magazine latch pin, push it out of the base and frame. Separate the base from the frame and remove the magazine latch spring from the pin. 4. Remove the trigger from the frame socket, moving it forward.
To disassemble the return spring: 1. Separate the guide rod from the return spring. 2. Separate the tip from the return spring by turning it in different directions.
To disassemble the bolt: 1. Knock out the firing pin and remove the firing pin with the spring. 2. Repeat a similar operation with the ejector.
To disassemble the magazine: 1. Press the pointed end of a match or pin into the magazine cover delay, move it forward and, holding the delay with the spring, remove the cover. 2. Remove the spring with the feeder.
Complete disassembly of the pistol is completed. Reassemble the pistol after complete disassembly in the reverse order. When assembling the magazine, after inserting the feed spring, a delay is applied to it with the bent end outward and forward. By pressing it, the delay should be recessed flush with the bottom edge of the magazine and, holding it in this position, slide the lid onto the magazine. After assembly, it is necessary to check the functionality of the gun.
CARTRIDGE TT 7.62X25 Cartridge length 34.85 mm Case length - 24.7 mm. Cartridge weight - 10.2-11 g. Bullet weight 5.52 g, charge weight - 0.48-0.52 g. Muzzle energy 508-576 J. Initial speed 424-455 m/s.
Based on materials: “Encyclopedia of Arms of Cyril and Methodius.” “TT, MAKAROV, PSM” O. ALEXEEV, F. MIKHAILOV. “What they shoot from in the CIS” reference book, ed. A.E. Taras
Information and reference site “Safety for all”
Source of increased danger. angle grinder
The “grinder” or angle grinder has long been known and popular. We also use it at work.
Moreover, glasses are always worn to protect the eyes. All adults, adequate. However, we have one machine, when working with it, sawdust flies into the face and, what’s more, into the eyes. There have been two cases recently. I also had a chance to use this device. When turned on, a stream of air from the engine cooling impeller hit my face from the ventilation holes, and with it, something incomprehensible flew into my face. Since I’m not an expert on power tools, I didn’t immediately realize that something was wrong here. A little later, it “flew into my eyes.” Moreover, I myself am a bespectacled person and put on safety glasses over it - it didn’t help. ok, at least I washed my eyes and it worked out.
Now a photo of the device. Mainly used for cutting metal.
At first glance, nothing unusual. The ventilation holes are just positioned abnormally. There is something to compare with. There are several more angle grinders in operation, but all of them have the exhaust positioned forward. Here's an example:
It’s not clear at all, I had to go on the Internet and look at the original picture. Then it dawned on me - the grinder had been opened earlier and assembled incorrectly. In the picture, the exhaust should go from the engine down!
We reassembled the tool, lubricated it, turned the housing with the gearbox 90 degrees, at the same time serviced the commutator, and replaced the brushes.
Everything works great, everyone is happy. It’s a pity that earlier there was a specialist who, out of ignorance or inability, or maybe purposefully assembled the tool this way.
As a result, working with this grinder led to increased risk and injury.
So be careful. Sometimes a problem arises out of the blue.
Well, I did.
The washing machine broke down. It’s not even like it broke straight, but a crunching sound and vibration began during operation. It’s clear - the bearing is falling apart. My diploma says “engineer”, but definitely not for washing machines, so I called a specialist through an ad on Avito.
A guy about 35 years old came and diagnosed the same problem. He spent about 5 hours disassembling the washing machine, removed the tank, at the same time tearing off my bathroom sink, and said that he would take the tank with him and come back in a couple of days.
He said that the tank is non-separable, so it needs to be cut, and then, after replacing the bearing, welded again.
He looked at the tank, pointed his finger at the clamp - “it’s collapsible, right there!” The master scratched his turnip and muttered, “Well, yes, that means it will be cheaper.”
Then I became wary again
, but my bathroom was littered with spare parts from the washing machine and it was too late to retreat. As the master was leaving, as if remembering at the last moment, “oh yes, you have an advance payment of half the cost of the repair.” At this point I scratched my butt - a stranger wants to take half the washing machine and money with him without a receipt. What's the point of him coming back? This is an excellent business plan. In short, I didn’t give any money.
Yesterday this guy came, spent half a day assembling the washing machine, then he called me and said:
— I almost assembled the machine, but I’m not sure that I connected the electrics correctly. Call a mechanic to finish assembling it. I'll give you the cost of calling a technician.
- I have already called the master, you.
- Well, I changed the bearing.
- Why do I need a bearing for a child to play with? I need a washing machine! Do you want half the cost of a new washing machine for a half-done job without any guarantee of work?
In short, I didn’t give any money. We agreed that I would call a new master and give that guy the difference from the cost of the work. And now I’m sitting and thinking, what if he assembled it incorrectly? So I’ll call a new master, he’ll do something. What if when I launch it I get boom-barabum? What if not right away? Who will I ask?
I feel like in the picture. It would be better if I bought a new one.
