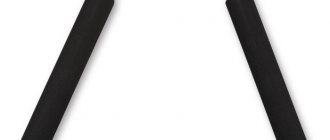
There is probably no person who has not seen on TV or in reality how martial arts masters train, demonstrating skillful use of some kind of sticks connected by a rope or chain. These devices are called combat nunchucks; they are a type of Japanese bladed weapon with impact, shock-crushing and suffocating effects.
There is a myth that Japanese peasants, to protect themselves from samurai attacks, used a device for threshing rice - a flail - against them. But in reality this is really a myth; the true story of the appearance of the nunchuk is different.
"Nunchakumania"
The mass Western audience learned about the existence of such a dangerous type of weapon as the nunchaku in 1972, when the second major film with Bruce Lee, “Fist of Fury,” was released. In it, the main character Chen Zhen, played by Li, fights against the bad Japanese while standing up for the good Chinese.
The bad Japanese first kill the main character's teacher, a kung fu master named Ho, and then try in every possible way to prove that Japanese bushido is stronger than Chinese kung fu. Of course, Chen defeats everyone, even the Japanese boss Suzuki. He does this, among other things, with the help of nunchaku, skillfully throwing opponents to the corners of the screen. Lee was a virtuoso of nunchaku-jutsu in life; he could even play nunchaku in table tennis.
Safety precautions
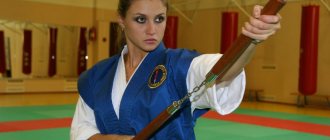
In order to learn how to use nunchucks, you need to master the basic technique under the strict supervision of a competent master in the gym. If you plan to train without the supervision of a trainer, you need to follow safety precautions. Using a weapon without proper training may result in injury.
- Buy a nunchuck for training. In stores you can find weapons made from soft materials (for example, foam). During training, the implement will often hit sensitive areas of the body, and the hard rods may leave bruises or cause serious contusions. Wooden weapons can be used only after mastering basic techniques and bringing them to automatism.
- Choose comfortable clothes. It should be free and in no case restrict movement. The optimal solution is a leotard without a T-shirt.
- Prepare the study room. It is necessary to free up space from furniture, taking into account the length of the weapon. Experts recommend starting your workouts outdoors rather than indoors so that you have more room to maneuver.
- Warm up before your workout. Before you begin the exercises, be sure to stretch the muscles of your torso and arms.
Training in a specialized gym together with a master allows you not only to maintain your health, but also to keep things, furniture and other valuables completely intact, since during training there is a possibility of damage to such items.
"Nunchaku"
The generally accepted name “nunchucks” is an adapted Russian version. All over the world they know “nunchaku” or “nunchaku”. It is significant that the Japanese language does not even have a word for nunchaku, since the population of Okinawa in the Middle Ages was not only Japanese.
To designate this type of weapon in Japan, either the notation “nu-n-cha-ku” in the katakana syllabary alphabet is used (the Japanese usually use it to write foreign words), or the Chinese character for “two-member club” (“two-link flail”), read in Chinese as "shuang-tse-gun", in Okinawan - as "nun-cha-kun", in Japanese - as "so-setsu-kon".
HOW TO MAKE AN ORDER?
Select the product you are interested in and add it to your cart. Next, open your cart and edit your order if necessary, be sure to indicate the platform you are playing on (iOS or Android). If everything is correct, click the place your order button. Indicate your First and Last Name, email address, link to your VK account or phone number for contact in WatsUp or Telegram.
After you have completed placing your order, click on the “confirm order” button. After this, you will be redirected to the payment system page, where you can choose the payment method that is most convenient for you. We accept payments from all popular electronic wallets - Qiwi, Yandex money, Web Money and PayPal, as well as from bank cards. If you do not find one suitable for you among the available payment methods, write to the manager and he will offer you alternative payment options.
For residents of Ukraine and other countries, the optimal payment method is PayPal, since regular card payments often fail. To pay via PayPal, you need to register on their website and link your card to your account.
Origin
It is significant that in the film “Fist of Fury,” Japanese students from the Bushido school look at the nunchaku, the technique of which Bruce Lee’s character demonstrates, with fear and even surprise. This is no coincidence. The origin of nunchaku is still controversial.
The Japanese insist that the ancestor of the nunchaku is a flail for threshing grain, but in shape it only vaguely resembles the nunchaku - it has a long handle and a short working section. If it were the size of a standard nunchuck, Okinawan peasants would have broken their backs during agricultural work.
The Chinese insist that the nunchaku is their invention. The Chinese origin of the nunchaku can be indicated by the fact that in kung fu, sectional weapons are widespread, there are a variety of flails, combat whips, and three-sectional nunchaku.
This dispute will probably be endless, but it is possible to come to the following compromise: the Chinese nunchaku that came to Japan were able to conquer the world precisely in their Okinawan version.
Basic exercises with nunchucks
Learning to use nunchucks. The first basic exercises that help you master the art of handling nunchucks.
SHOULDER GRIP TRAINING
The shoulder grip in the technique of working with one nunchaku is most convenient and fast if the fighter is fighting with the active use of both hands. Depending on the specific technique or combination of movements, the free handle of the nunchaku can be taken into a position of tight control using the lead shoulder or free hand, and can also go through a dead-center shoulder grip position when in contact with the shoulder or palm of the free hand.
Exercise 1
— shoulder grip training in a fixed position with rigid handles.
Before starting to practice the shoulder grip with a free grip, it is useful to practice securing the grip without releasing the weapon. To do this, take the position of rigid handles stretched in front of you (1). With your right hand, make a short movement with your forearm inward, as with a block or uppercut, the left hand remains in front and moves slightly to the right (2). With your arms crossed in front of your chest, move the nunchaku all the way over your right shoulder (3). The right hand is raised up and the elbow is facing forward, and the left hand is located under the right shoulder in the armpit area. Having fixed the position of the shoulder grip, after a while return to the starting position.
Exercise 2
- shoulder grip training from hanging from below.
In the starting position, the fully extended nunchaku hangs along the leg (4). Throw the free handle along a vertical path upward (5), throwing it over your shoulder and taking it with your free hand from below under your armpit (6). Hold this position for a moment, then return the weapon to its original hanging position along your leg in a vertical downward motion.
Exercise 3
— shoulder grip training from a rigid handle position.
In the initial position, the nunchaku is stretched at the left hip (7). Release the free handle from your left hand and, along a diagonal path from bottom to top, throw it over your right shoulder (8), taking the free handle of the weapon with the palm of your left hand under your right shoulder (9). With a reverse movement, return the nunchaku to its original position. This exercise also includes practicing the move of the free handle into the position of the rigid handles at the side.
Exercise 4
— shoulder grip training from a folded weapon position.
Note.
The folded weapon position is discussed in detail in a separate chapter below. In the starting position, the nunchaku is folded in one hand (10). Release the free handle and throw the nunchaku upward into a shoulder grip position using your free hand (11). Then, with a reverse movement, return the weapon to the original position of the folded handles. The exercise also allows you to practice gripping the nunchaku in a folded weapon position.
Exercise 5
- shoulder grip training from the axillary grip position.
It is useful to start this exercise after the axillary grip has been well developed. From the starting position, with a short vertical movement, throw the free handle of the nunchaku up into the shoulder grip position, and then throw it with a short downward movement into the starting position of the underarm grip.
Exercise 6
- shoulder grip training with free hand interception.
In the starting position, the nunchaku is in a shoulder grip position using two hands (12). Release the handle from your right palm and in a short upward arc, throw it over the opposite shoulder (13). The leading handle is in the left hand, the free one is caught in the right palm under the left armpit (14). When alternating interceptions during an active change of hands, try to achieve maximum speed of the exercise, but not at the expense of the accuracy of the free handle. Note.
Next, train all exercises first on one side, then on the other. Perform exercises that involve training alternately on both sides after the movement has been mastered on each side separately.
AXILLAR GRIP TRAINING
The underarm grip is fixed, but very often it is used as a dead point, giving rise to new movements of the free handle.
Exercise 1
- training of axillary grip from hanging from below.
In the starting position, the nunchaku hangs along the leg, fully extended. With a slight movement of your hand, throw the free handle up, trying to catch it in the correct underarm grip position. Then release the grip and return the nunchaku to its original position.
Exercise 2
— training the axillary grip from the shoulder grip position.
From a two-handed shoulder grip, with a short vertical movement, throw the free nunchaku handle from top to bottom into an underarm grip position. Having fixed the grip for a moment, return the weapon to its original position with a reverse movement.
Exercise 3
- training the axillary grip from the shoulder grip without using the second hand.
This exercise also allows you to practice the shoulder grip without using the second hand, which is most often used in working with two nunchaku. The sequence of movements is the same as in the previous exercise (15-17).
Exercise 4
— training of the axillary grip from the same position.
In the initial position, the free handle of the nunchaku is already in the armpit grip. With a short movement, send the free handle forward from top to bottom. The free handle rotates 360 degrees and returns under the armpit in front.
Exercise 5
— training of an axillary grip with a free handle pick-up.
In the initial position, the nunchaku is in a shoulder grip using two hands (18). Throw the free handle down into an underarm grip position (19-21). Immediately release your grip and grab the free handle with your left palm (22). Move the weapon to the left side into the shoulder grip position (23). Repeat the movement on the other side. Achieve maximum speed during the exercise.
TRAINING THE POSITION OF RIGID HANDLES
Exercise 1
— training a single interception in front of you.
In the starting position, the fully extended nunchaku is held in front of you at chest level (24). Release the free handle from your left palm and make a full rotation (360 degrees) from outside to inside in a horizontal plane (25). Place the free handle in your left palm again (26). Repeat this movement with one hand, changing the level of rotation of the free handle. Then practice receiving the weapon with your right palm. Then perform alternating interceptions with both hands, changing the level of rotation of the free handle during the exercise.
Exercise 2
- training of a single interception from the side with a return to the starting position.
In this exercise, the beginning is the same as in the previous one, only the free end of the weapon is not caught in front of you, but is taken to the side opposite the leading hand (27). After this, the nunchaku returns to its original position of full extension in front of the chest. Train each hand separately and then alternate with quick changes.
Exercise 3
— training the position of rigid handles from the shoulder grip with a return to the starting position.
From the starting position of the shoulder grip, release the free handle of the nunchaku and direct it in an arc from the upper right corner inward to the lower left corner (27). Place the free end of the nunchaku in your left palm near your left side. With a reverse movement, return the nunchaku to its original position.
TRAINING THE FOLDED GUN POSITION
Exercise 1
— training the position of a folded weapon from a hanging position from below (with the usual raising of the arm).
In the starting position, the fully extended nunchaku hangs along the leg. Begin to raise your forearm upward, bending your elbow until the free handle of the weapon connects with the lead handle and is accepted by the palm into a folded weapon position.
Exercise 2
— training the position of folded weapons from the position of rigid handles in front of you.
This exercise aims to train the position of a folded weapon through the usual transfer of the free handle to the palm of the leading hand. In the initial position, the nunchaku is stretched out in front of you (28). Turn your body slightly to the right and pass the free handle into the palm of your leading (in this case, right) hand (29, 30). Return to the starting position by taking the free handle from your dominant hand using a regular grab. Repeat the exercise first on one side, then on the other for the other hand. Then practice alternating passes, maximizing your speed and dexterity.
Exercise 3
— training the position of a folded weapon from a shoulder grip.
From the shoulder grip position (31), throw the free handle of the nunchaku in a vertical downward direction. Place it in the palm of your leading hand (32, 33). Then return the weapon in a reverse motion to the original shoulder grip position.
When working with any flexible weapon, and with nunchaku in particular, the return technique is of great importance. There is practically no technical action using whips when, after an attack, it is not necessary to take control of the weapon. In some straight swings, when after contact with the target the free handle hangs in the dead center position, the movement can be considered complete, but in this case further actions will require returning the weapon under control. As we already said in one of the first chapters, every attacking movement of the free handle requires its optimal starting position, allowing you to use the nunchaku with maximum efficiency. To implement the technique one hundred percent, we must know how the free handle will behave after an impact. We must know at what point we need to take control of it in order to continue the attack. Moreover, ignorance and inability to control the weapon at all stages of its movement may result in the free end of the nunchaku causing injury to the performer of the technique. The free handle is controlled at all stages of its movement through the leading handle through very fine wrist movements. When working with one weapon, control of the free handle is in most cases carried out using the free hand and the shoulder of the same name (for example, an underarm grip). When working with two nunchaku, control of the free handle is carried out by taking the weapon in one hand or by means of popliteal grips. If we consider the technique of returns in relation to the starting and final positions of the weapon, confusion will arise in the classification, especially since returns and interceptions of the weapon represent practically the same movement, the same section. Therefore, in this book, returns are classified by movement trajectories, and weapon interceptions by their position. Let's look at each topic separately. Classification of returns according to movement trajectories:
— horizontal return (from inside to outside); — horizontal return (from outside to inside); — vertical return from bottom to top; — vertical return from top to bottom; - diagonal return from bottom to top.
These are the so-called straight returns without wrist twists. Twist returns are classified as more complex movements, but their trajectories are in most cases identical to the trajectories of straight returns. The advantages of returns with wrist twists are obvious - in fact, such a return of the free handle can be used as an attacking whip. The straight return can also be used as an attack move, but in this case the weapon cannot be controlled due to the ricochet; the free handle will have to be moved to the dead center position. Wrist twists completely solve the problem of ricochets.
Horizontal return outward on opposite side
In Fig. Figure 1 shows the starting position for training the named return. The right arm is bent at the elbow at an angle of 90 degrees, the fist faces forward, the back side down. This hand holds the leading handle of the nunchaku. The left hand is located under the right elbow, palm up, holding the free handle. The weapon is taken with a normal grip, the cord facing outward. In Fig. Figure 2 shows how the left hand released the free handle, and the right hand, through a slight wrist reverse, directed it behind the back to the dead center position along a horizontal path from the outside to the inside. Having felt the moment of contact with the body and not giving the free handle the opportunity to lose tension and fall, with a slight jerk of your right hand, send the free handle back along the same trajectory. At this time, the left hand smoothly shifted to the original position of the right hand. In Fig. Figure 3 shows the reception of a free handle in the left palm. Practice this exercise on both sides until you can keep the cord taut all the time. In addition to controlling the position of the dead center, the exercise develops the simplest skill of gripping a free handle when receiving, and also trains short wrist jerks. Progression in the exercise will be to continuously perform the movement with the dead center on the receiving palm.
Horizontal return outward on the same side
The starting position for starting training of the named return is the same as in exercise 1 (4). Release your left hand and point the free handle behind your back in a short horizontal swing using a slight wrist reverse of your right hand (5). Having checked the dead point, return the weapon to its original place with a reverse movement. Catch the free handle with your left palm under your right elbow (b). In this exercise, the trajectory of movement of the free handle is slightly longer than in the previous one. This allows you to train not only the return technique, but also the horizontal swing technique inward. At first, focus only on the return movement to develop a stable arm reflex.
Horizontal return out behind the back
At the beginning of this exercise, the right hand is in almost the same position as in the previous example, but the forearm is more to the side. Left hand behind back (7). Unclench your left palm, releasing the free handle. With your right hand, as in exercise 2, make an inward swing movement with the dead center of the waist (8). Return the free handle of the nunchaku back to its original position, placing it in your left palm behind your back (9). In this exercise, the trajectory of the free handle is longer than in the two previous returns. This last return can be used as an outward swing. In this case, the free handle cannot be grabbed “cleanly” by the left hand, but must be taken to a dead center position behind the back on the right side. As you can see, the greater the amplitude of movement, the better the conditions for several successive attacks: on the right with an inward swing and on the left with an outward swing (for the right hand).
Horizontal return inward behind the back
In the starting position, the arms are crossed in front of the chest, the nunchaku behind the back is fully extended. The leading right hand is lower than the left. She holds the lead handle at her left side and her left hand holds the free handle at her right side (10). Unclench your left palm, releasing the free handle, and make a not very wide movement from the inside out. This is a horizontal swing (or return), as in the previous exercise (11). The free handle reaches the air dead center position and immediately goes back. It is placed behind the back with the left palm at the right side (12). Perform all the movements of the exercises given here without any tension, without force. The speed should be such that you can only keep the cord taut. Concentrate all your attention only on training returns and developing grasping reflexes. Please note that in this exercise the attack may not be an inward swing, but an outward swing, unlike the previous example. We want you to see the difference between these two returns and know when they can be used.
Horizontal return inward through the neck
From the point of view of the return technique, the difference between this exercise and the previous one is that the leading hand at the moment of receiving the free handle is located not under the receiving hand, but above it (13). Another difference is the lack of a straight swing. To direct the free handle back to the grip position behind the neck, it must first be twisted with a wrist reverse, ensuring an even horizontal return path (14, 15). In any case, the behind-the-neck return is easier to perform and more mobile in attack technique than the behind-the-back return.
Vertical return from bottom to top
The starting position for the next exercise is a shoulder grip using two hands (16). Unclench your left palm and release the handle located below. With your right hand, make a slight downward movement, guiding the free handle deep under your armpit so that it hangs over your shoulder (17). Here, catch it with your left palm (18). Release the handle again, opening your left palm, and use your right hand to move it upwards back into the shoulder grip. It will take some time to become comfortable with this return. There are several points here. The first is that if you are too afraid that the free handle will hit you in the back of the head, it will certainly do so. The movement must be performed at such a speed that the inertia of the free handle allows it to “braid” the shoulder completely with a cord, and not hit the hand with the upper end or even the middle of the handle. To do this, the leading arm must be bent as much as possible, bringing the fist closer to the armpit. It is advisable to practice this bending first without a weapon. Do not try to protect your head from a possible blow by tilting it to the side. Concentrating on something other than hand technique will definitely lead to injury. If the movement is performed as required, you have nothing to fear for the back of your head; the free handle of the nunchaku will never hit your head.
Vertical opposite return upward direction
The starting position for another exercise is the same as for the previous one - shoulder grip (16). Also release the free handle with your left palm, but now point it towards your left armpit (19). Take the free handle of the nunchaku with your left palm over your left shoulder (20). Then release the free grip again and return the weapon to the original right shoulder grip position. A typical injury when learning this return is bruising the fingers of the receiving hand. To avoid this, you must perform the return confidently, placing the lead handle deep under your left shoulder. In this case, its trajectory will not be disrupted, and you will avoid a blow to the head. Keep the palm of the receiving hand fully open. Let the free handle fall into it on its own. Once you can control the correct freehand grip and receiving hand position, begin working on your quick grip. Ideally, you can achieve such a speed in both last returns that it will seem that the nunchaku is in constant rotation.
Vertical return from bottom to top with wrist twist
In the section on basic concepts, we mentioned inward or outward twisting of the wrist. A true return is an outward twist of the wrist. In this exercise we can very quickly return the free handle of the weapon to the shoulder grip. To practice the return, take the position of a fully extended weapon—nunchaku—at your left side (21, A). Release the free end from your left palm and perform a horizontal outward swing with your right hand (22, B). When the nunchaku reaches the plane of your right hand, twist the leading handle clockwise with wrist reverse (23, C). The free handle will change direction from horizontal to vertical (24). Throw it up into a shoulder hold using your second hand (25, 26, D) or shoulder hold (27).
Nunchaku movement diagram in exercise 8
Vertical return from top to bottom
This is a fairly simple movement that can be performed in four variations. It is practiced from the shoulder grip (28). The first option - the free handle should be moved to the position of the armpit grip (29-31), the second option - to the position of the folded weapon in one hand, the third option - to the position of “hard handles” (29a, 30a) and the fourth option - the position of the grip between the legs with by holding the free handle behind your back (29b).
Opposite diagonal return behind the back
In Fig. 35 and A shows the starting position for practicing the opposite diagonal return in the upward direction. The Nunchaku is fully extended behind the back. Hold the leading handle with your right hand on the side of your left shoulder, and the free handle is in your left hand on the side of your right side. Release the free handle and swing outward with your right arm (36, B). From the air dead center, send the weapon back along a diagonal path and catch the free handle again at the right side (37, C). In this return, in order not to hit yourself on the back with the free handle, the leading hand must be carried very deeply behind the shoulder. The receiving palm of the left hand should already be at the right side. As with most other returns, the point of the technique is to grab the free handle in time, which comes to a dead center position in a tense state, but in the next moment loses it. If you miss and are unable to take the free handle, continue the movement with your lead hand, swinging outward again.
Diagonal return of the same name behind the back
In Fig. Figure 38 shows the starting position for practicing the diagonal return of the same name from bottom to top. The right leading arm is bent over the right shoulder and the left receiving arm is bent behind the back; the nunchaku is in a fully extended position. Release the free handle and make an inward diagonal swing motion with your right hand. The free handle comes to a dead center position at waist level (39). From here, send the free handle back along a diagonal path and return it to its original position behind your back (40). A true return is similar to the horizontal return out behind the back (see exercise 3), but here the diagonal path of the free handle is much more difficult to control.
Return with wrist twist inward
Here we offer an exercise for practicing returning the weapon to different positions through wrist twist from the outside to the inside. The starting position for all exercises will be the “hard handle” position, with the weapon fully extended on the left side (41). Release the free handle and perform a horizontal outward swing with your right arm (42). Once the free handle is in contact with the imaginary target, begin twisting the wrist inward, counterclockwise (43, 44). Rice. 45, 46 show axillary return (AD - same for the other side).
Nunchaku movement diagram in exercise 12
Rice. 47 shows a return between the legs with a free handle behind the back. During this return, if you are in a forward stance, you are in danger of being struck by the flying free handle on your back leg. To avoid this unpleasant moment, take a position with your body weight transferred to your back leg. Rice. 48 shows the return of the free handle to the internal popliteal grip, and Fig. 49 - return to external opposite popliteal grip. Practice each exercise separately, returning the weapon to the starting position each time.
Vertical popliteal return from top to bottom
The starting position for this exercise is the cat position; the weapon is held in a shoulder grip using both hands (50). Release the free handle from your left palm and perform a vertical downward swing with your right hand (51). Raise your right knee and catch the free handle of the nunchaku in an internal hamstring grip position (52). Hold this position for a while while practicing holding the free handle and balance. Then move to a position supporting your front leg, and send the free end of the nunchaku to the starting position of the shoulder grip (53, 54).
Horizontal popliteal return to the outside
Take the starting position - external popliteal grip (55). Release the free handle of the nunchaku by placing your foot in the forward stance position. Use your lead hand to perform a horizontal inward swing motion, throwing the free handle behind your back to a dead center position at waist level (56). Return the weapon along the same path to the starting position, lifting your front leg up (57). Place the free handle in an outer popliteal grip (58).
Horizontal popliteal return inward
Stand in the right-hand forward position, holding the weapon in the same position as for the horizontal return to the outside on the same side in exercise 2 (59). Release the free handle from your left palm and make a horizontal inward swing with your right hand. Raise your left leg forward and catch the free handle of the nunchaku in the opposite external popliteal grip position (60). Stay in this position, practicing holding the free handle and balance. Then release the free handle, returning it to its original position by moving it horizontally outward on the same side (61). Place your left foot forward (62).
In most cases, interception can be called an ordinary return of the weapon after performing some kind of whip. On the other hand, interception can be an independent movement pursuing a variety of goals. This may be the choice of the optimal position of the nunchaku for defense or attack, it may be a psychological action that hides the direction of the main attack from the enemy or preempts his actions. There are quite a lot of weapon interceptions and it is difficult to reflect all their diversity in one book. Here I will show only those that seem to me the most effective from the point of view of practical use in battle. However, in addition to interceptions of a clear combat orientation, I will also show several more complex interceptions that serve the purpose of the general development of the student. I will also note that the topic of interceptions presented here complements the previous topic of returns, but does not duplicate it.
Grabbing the free handle in front of you
The starting position for interception is that the nunchaku is fully extended in front at chest level (1). Release the free handle from your left palm and swing your right hand horizontally in front of you (2). Having made a full turn of 360 degrees, the free handle returns back and is caught by the left palm (3). This exercise helps you master the free handle technique in front of you. At first glance, the movement seems simple, but in reality it will take a lot of time to perform this interception correctly. Using his example, the student trains to “extinguish” the energy of the free handle in a short movement. There is a possibility of injury (hitting your palms) during the reception, so be careful, do not rush, perform the exercise easily, at a minimum speed, sufficient only to maintain tension on the cord.
Grabbing the free handle from the side
Nunchaku in a shoulder grip position (4). Release the free handle and make a diagonal inward swing with your right hand (5). Catch the free handle with your left palm near your left hip (6). Move the weapon to its original position. This exercise develops the reflex of receiving and grabbing the free handle from the side.
Grabbing the free handle under the arm
Starting position - shoulder grip (7). With your right hand, perform a vertical swing from top to bottom (8), pointing the free handle under your armpit (9). When it touches the shoulder at the dead center position (10), it will immediately fall down. At this moment, grab it with your left hand in the palm (11) and move it to the left side in the shoulder grip position (12).
Various gripping of the free handle under the arm
Rice. 13-16 show an interception almost identical to that discussed in exercise 3. The difference is that the free handle is sent to the opposite armpit at the beginning of the movement.
Grabbing the free handle over the shoulder
This important interception, already familiar from the topic of returns, we repeat in this section. Rice. 17-19 show it for the left hand. The Nunchaku is intercepted from a right shoulder grip position to a left shoulder grip position through a vertical swing from bottom to top.
Different grip of the leading handle from the side
In this exercise, the starting position remains the shoulder grip (20). With your right hand, make a diagonal swing inward, directing the free handle from the right from top to left down (21). Unlike the free handle movement, this exercise uses the lead handle (22). Particular attention should be paid to the correct placement of the receiving hand and the change of palms. The receiving hand is turned out - fingers turned inward towards the body, palm facing down, thumb pointed far to the side. At the moment of interception, the receiving palm is placed on the fist of the leading hand. Some students grab the handle of the nunchaku over the holding palm, in which case the weapon is grabbed right at the cords. With such a grip on the lead handle, the whip technique loses its power and effectiveness. After interception, the nunchaku is moved from bottom to top into the position of the left shoulder grip (23, 24).
Hand grip of the same name under the armpit
Rice. 25-27 show an interception of the leading handle similar to that shown in Exercise 6, with the difference that here it is carried out from the same side. This type of interception is used less frequently, but for overall development the exercise should not be neglected. After intercepting the nunchaku, as in the previous exercise, with an upward movement it is transferred to the position of the left shoulder grip (28, 29).
Grabbing the driving handle behind your back
Rice. 30-35 show the interception of the leading handle behind the back during the execution of a vertical whip from top to bottom (before interception) and from bottom to top (after interception). Starting position - shoulder grip.
Grabbing the free handle behind your back
For the next exercise, take this starting position - the nunchaku is fully extended behind your back; the right hand holds the free handle above the right shoulder, the left hand holds the leading handle in the lower back area (36). Release the free handle and swing it from bottom to top and back behind your back (37). The hands change position - the left one rises to the shoulder, and the right one goes behind the back, where it receives a free handle in the lumbar region (38).
Intercepting the leading handle through the thumb
Starting position - shoulder grip on the right side (39). Unclench your left palm and release the free handle. Direct it with a diagonal swing from right to left downwards. The left hand in front of the chest waits for the lead handle to be passed by the right hand. The palm of the left hand is open, the thumb is moved to the side, the elbow is pressed to the thigh (40, A). The right hand goes under the left wrist, pressing against it, and transfers the leading handle of the weapon to the left hand (41), which takes it with a normal grip (42).
Intercepting the free handle with a reverse grip in front of you
For this exercise, get into a starting position with reverse grips of the “hard handles.” The left hand holds the leading handle in front of itself, pointing its lower end upward; the right hand holds the free handle under the left, covering the left forearm with it (43). Release your right hand and point the free end of the weapon upward using the wrist reverse of your left hand (44). Catch the free handle with an underhand grip over your left hand (45).
This daily training exercise develops manual dexterity in gripping the nunchaku handles, as well as stimulating the wrist areas through friction. During this exercise, keep your elbows pressed to your sides; monitoring this position helps to “remember” it for unarmed combat. It is useful to start every training with nunchaku with this exercise.
Grabbing the free handle with a reverse grip from the side above the arm
The starting position is the same as in exercise 11, but in the starting position the hands have changed places - the right hand holds the leading handle with a reverse grip in front of itself; The left hand also holds the free handle with a reverse grip under the right, covering the right forearm with it (46). Release the free handle and perform a horizontal outward swing with your right arm (47, 48). Place your left hand above your right forearm and, when the free handle of the nunchaku comes in for a second swing, meet and catch it in your palm above your right forearm (49).
Intercepting the free handle with a reverse grip from the side under your hand
This exercise starts the same way as the previous one. From the starting position (50), release the free handle from your left hand and swing it horizontally outward (51). After completing the wrist twist movement in a counterclockwise direction, direct the free handle of the nunchaku into the underarm grip (52), where it is caught in the left palm under the right forearm (53).
Disciplines
In the 80s of the last century in Holland, the art of using nunchaku acquired a sporting outline. The discipline began to be called nunchaku-do. It consists of four sections: kumite, kata, floor exercise and nunchaku-jutsu. Competitions are being held for the first three today.
Kumite is sparring with nunchaku. Before each strike, except for the thrusting one (“tsuki”), the sparrers must make at least two interceptions, which is done to increase the entertainment value of the competition. The battle is fought to 6 points. Complex and effective technical elements are awarded two points. In some ways this section is similar to fencing. Sports fights are conducted with soft nunchaku and protective helmets.
Kata is a demonstrative performance of certain elements with nunchaku, which are done in a predetermined order. This section of nunchaku-do is comparable to the kata of traditional martial arts.
Floor exercises, or freestyle, are not an applied form of nunchaku-do; its elements cannot always be used in a real fight, but it is the most spectacular. The originality of combinations, style of execution and technique are assessed.
Nunchaku-jutsu is a section of nuchaku-do that studies the use of nunchaku for self-defense. Within its framework, the use of nunchaku against various types of attack is studied. Both with and without weapons. This is the most combat section of nunchaku-do.
Currently, the development of nanchaku-do is supervised by three organizations: the World Nunchaku Association (WNA), the World Nunchaku Federation (WNF) and the World Kobudo Federation (WKF).