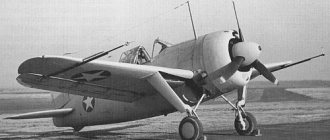
I bring to your attention a prefabricated wooden model of the Sturmovik IL 2 - a Soviet attack aircraft during the Great Patriotic War, created at OKB-240 under the leadership of Sergei Vladimirovich Ilyushin. The most massive combat aircraft in history, more than 36 thousand were produced. In the Red Army, the plane received the nickname “Humpbacked” (for the characteristic shape of the fuselage). The designers called the aircraft they developed a flying tank. Due to its survivability and lack of maneuverability, German pilots called it Betonflugzeug - “concrete plane”.
IL 2 aircraft model
In order to assemble such a model of the IL 2 attack aircraft with your own hands, you will need the following tools and accessories:
Preparation of the workplace
As usual, the first thing you need to do is equip your workplace where you will work. The rules are not complicated: there should be no unnecessary things on the table, all tools should be in their place and at hand. Not everyone has their own desktop, and you’ve probably already thought about creating one. Making a table is not difficult; choosing a place for it in the house is more difficult. A good option is an insulated balcony, where you can start working on your craft at any time. If you have a specially equipped room with a workbench, then you are lucky. You can read about preparing the table in a separate article where I tried to describe in as much detail as possible the entire process of creating it. After you have completed the process of creating a workplace, you can proceed directly to your future crafts.
Plywood selection
The drawing is based on A4 format; the parts can fit on three sheets of plywood. The thickness of the plywood should be from 2.5 to 3 mm. Before transferring the drawing to plywood, sand the workpiece with coarse-grain sandpaper and finish with fine-grain sandpaper. It is more convenient to sand with a wooden block wrapped in sandpaper. Sand the prepared plywood along the layers, not across. A well-polished surface should be flat, completely smooth, glossy-matte in the light and silky to the touch. Pay attention to grain placement, knots, dents and other imperfections. Quality and color.
Transferring the design to plywood
You need to translate the drawing accurately and carefully: secure the drawing using buttons or simply hold it with your left hand. Check if the drawing fits the dimensions. Arrange the individual parts so that you can use the plywood sheet as economically as possible. There is no need to rush, because your future craft depends on the drawing. To speed up the translation process, you can use the technique of quickly translating a drawing; for this, I suggest you read the article: Applying a drawing to plywood in 60 seconds. You can download a file with a drawing of a plywood car at the end of the article.
INSTEAD OF A FOREWORD
Making flying replica aircraft models is a good school for training future aircraft designers, pilots, and engineers. Championship class replica models are corded replicas of the F-4B category and radio-controlled replicas of the F-4C category.
In aircraft modeling, the F-4 class requires an in-depth study of the prototype aircraft and gives the modeler the opportunity to try himself as a designer, technologist, worker in various professions and, finally, a test pilot. It is necessary to solve complex design problems regarding the placement of mechanisms that ensure trouble-free retraction and release of the landing gear, extension and retraction of flaps, dropping bombs, and controlling the engine and brakes. Only mathematical calculations of the model’s dimensions, required engine power, weight and alignment will allow one to avoid design errors. Otherwise, to ensure alignment, it is necessary to load the nose or tail of the model with additional weight, which leads to an increase in weight and a deterioration in flight performance. When working on a model, you must be a highly qualified carpenter-model maker, a first-class mechanic and turner, and be able to combine the professions of an artist and an experienced painter.
Every year the requirements for copy models increase. Unconditional and accurate execution of dimensions must be combined with careful reproduction of the cabin, external small details, jointing of sheets and imitation of riveting. These requirements can only be met with detailed drawings on a scale of at least 1:72 (according to the rules of aircraft modeling competitions). A more convenient scale for taking dimensions from a drawing is 1:50 for general views and 1:25 for instrument panels and components.
When the model is ready, it is necessary to check the operation of all mechanisms on the ground, carry out leveling and checking the alignment, then refuel and test the engine in all modes. For radio-controlled replica models, especially replicas with a crutch wheel, it is necessary to perform several taxis to check stability during take-off.
Cord models should be checked for taxiing and approaching. Only after such preparation is the model released for its first flight, which is performed without retracting the landing gear and releasing the flaps. This is done to test its stability in free flight or on a line. The preservation of the model during testing depends on the experience of the modeller-pilot, the production of which, as a rule, takes 2-2.5 years. Tests are carried out until the reasons that distort normal flight (steep gliding, nose up, rolls) are eliminated.
In recent years, performing at all-Union and international competitions with copy models, our aircraft modelers have won a number of prizes, among them masters of sports of the USSR: V. Piltenko from Kiev (cord model copy of Pe-2), A. Pavlenko from Novosibirsk (cord model copy of the Yak-9B), A. Lysenkov from Gorky (cord model copy of the Il-14), E. Mosyakov from Moscow radio-controlled model copy of the UT-2), S. Potapov from the Air Force team ( radio-controlled model copy of Little-TOOT). Master of Sports of the USSR of international class Yu. Krylov from Yaroslavl (cord model copy of the Il-2) and Master of Sports of the USSR V. Borzov from Stavropol (cord model copy of the Il-10) repeatedly took first places in all-Union competitions.
In 1974, we witnessed the brilliant victory of Kyiv aircraft modelers B. Krasnorutsky and V. Kramarenko at the World Championship in the USA in corded replica models. The line model copy of the An-14M aircraft with original ten-cc engines designed by B. Krasnorutsky took first place and was awarded a special prize for the original design of the engines (the horizontal arrangement of the cylinders made it possible to install the engines without disturbing the contour of the engine nacelles). The model aroused great interest among athletes and spectators.
Currently, more and more modellers are interested in building replica models of aircraft from the Great Patriotic War. They successfully build models of aircraft made by Ilyushin, Yakovlev, Lavochkin, Petlyakov, Mikoyan and Gurevich, Polikarpov, Tupolev, Sukhoi, Arkhangelsky and other Soviet designers. But building a model is a huge job, the full satisfaction of which will only be achieved if the requirements for replica models are strictly met by the “Rules for holding competitions in aircraft modeling in the USSR”
Sawing out an airplane with a jigsaw
There are many rules for cutting, but you need to rely on the most common ones. First you should cut out the internal elements and then start cutting out the outline. There is no need to rush when cutting. The main thing is to always keep the jigsaw straight at a 90-degree angle when cutting. Saw out the parts along precisely marked lines. The movements of the jigsaw should always be smooth up and down. Also, do not forget to monitor your posture. Try to avoid bevels and unevenness. If you go off the line while cutting, don't worry. Such bevels and irregularities can later be removed using a flat file or “coarse-grained” sandpaper.
Rest
When sawing, we often get tired. Fingers and eyes, which are always tense, often get tired. When working, of course, everyone gets tired. In order to reduce the load, you need to do a couple of exercises. You can view the exercises here. Do the exercises several times during work.
Assembly diagram
Assembling the craft parts in this work is not very difficult. To do this, lay out the parts as shown in the Instructions (drawing in PDF format), find two parts with number 1, and connect them. Then connect the parts with the numbers 2,3, etc. in the same way. Please note that parts 1,2,3,4,5,6 are attached to one part marked 1-6. Even children can handle the assembly task; such activities develop fine motor skills, imagination, imagination, and also train patience. After the parts are assembled into one common craft without any problems, then start gluing them.
To make it more similar, you can add a few strokes in the form of lines using an electric burner. It can be very difficult to burn a pattern beautifully, but here there are not many lines and they are quite simple to make. First you need to draw lines with a pencil, then slowly go along these lines with an electric burner. You can read how to work with an electric burner and add patterns in a separate article.
Main types
Side view:
Back view:
Isometric:
How I built IL-2 or the thorny path of building the first semi-copy.
It all started after the new year, when I began to be interested in WWII aviation and discovered an injustice - more than 27 thousand ILs were produced, but there are not so many models of this legend in comparison with the mass of LA-7s and YAK-3s and so on.
Ordered the filling:
Motor, regulator, propeller: https://ru.aliexpress.com/item/A2212-1000KV-Brushless-Outrunner-Motor-30A-ESC-1045-Propeller-1-pair-Quad-Rotor-Set-for -RC/1934298152.html everything is a set, only the propellers are complete garbage, it’s better to buy these (the thrust will also increase): Propellers GWS EP (DD-1060 254×152mm) black (6 pieces) Product https://www.parkflyer .ru/product/984972/
Battery: https://ru.aliexpress.com/item/LION-POWER-3S-lipo-battery-11-1v-2200mAh-25C-MAX-AKKU-rc-helicopter-rc-car -boat/2007521611.html or any other 3S with 2200 mAh.
Aileron servos : 4 X TowerPro SG90 Mini Gear Micro Servo 9g Product https://www.parkflyer.ru/product/1566363/ Elevator servo: Micro servo Turnigy TG9e, 9g / 1.5kg / 0.10sec Product https://www. parkflyer.ru/product/9549/ Receiver/transmitter Hobby King 2.4Ghz 6Ch V2 (Mode 2 gas left) Product https://www.parkflyer.ru/product/9042/ Drawings were printed for a span of 1200 mm, nailed to the wall, well and they hung like that for more than two months... (somehow I didn’t feel like building them). And then the realization came that this year is the 70th anniversary of the victory in the Great Patriotic War, and it was decided to build with full dedication on the same day and in time for May 9).
The “technology” is simple - a 4mm plywood motor frame, and from it stringers from a ruler cut in half onto which sections from two layers of the ceiling were glued.
Then the center section spars were made from the rulers, which were attached to the stringers with 5x5 pine beads. All ribs are also made of two layers of ceiling.
Sew up the bottom of the center section:
Consoles:
Work continues:
Having completed the covering of the consoles and tail unit, I cut out the elevators and ailerons. It was decided not to make a rudder at this stage of construction because The “face” of the IL-2 is quite short, and one more servo and other additional parts will certainly not have a positive effect on the alignment.
The staple connects the 2 halves of the RV (made from a steel knitting needle).
Elevators, hinges:
The thrust from the servo is passed through a small bowden of ear sticks:
The fuselage skin begins:
After the fuselage was finished, I made the ailerons, passed the servo extensions, installed the servos, and only then closed the top of the center section (otherwise it would have been quite difficult).
A cut from the ceiling, or more precisely from a cut about 1-0.8 mm thick:
The joints are filled with ordinary acrylic wood putty, then sanded:
I made a simple balancer for appa from 6mm plywood and pieces of wire:
Unfortunately, at this stage of construction I somehow completely forgot about the photographs, and initially the article was not planned at all. So here are the following photos (edges, foam hood, canopy made of aluminum wire and packaging plastic):
The bottom of the air intake is made of whatman paper, and the grille is a wire frame in the shape of the air intake with a piece of mosquito net glued to it:
This photo (the one on top) was taken on the morning of May 7 (although already a week before that I understood that it would definitely not be possible to finish the model by the 9th), but after checking and setting up all the electronics, it was decided to fly on an unfinished plane, because the finished model would be destroyed much more annoying))) But it turned out that it was very disappointing to break an unfinished model (After all, a lot of work was put in... The weather was initially completely unflyable, but by the evening the wind had almost died down, gusts that were insignificant at first glance remained... I determined which side is more frequent " blows", gas to the floor, throw, iii...!!! And then everything was completely sad... The plane jerked almost vertically upward, a sharp lateral gust from the right heavily tilted the plane, which had not managed to gain speed, and Il, in turn, did not react at all to the aileron control ... The expenses on the aileron horns were set out of habit to the minimum (the very top hole), because on all my previous planes this was more than enough... Moreover, I did not take into account that the aileron area is not at all large... No one took a video, and why would ? The “flight” lasted no more than 10 seconds...
It would seem that’s it! We've arrived! And what is May 9th? But no!)) Almost all night and the next day I puffed as hard as I could over the IL and was able to almost completely restore the plane! The left console skin was completely replaced (the center section was not damaged), and the front panel skin was restored. The only thing I didn’t have time to make was the hood, but I finished it on May 9 after the victorious flyby!
Don’t blame me for the video, a friend filmed it on his phone and they called him several times, the recording was interrupted, besides, he was a volunteer for Victory Day and was late for the planning meeting. The landing was not filmed. (videos on a friend's channel)
Regarding the flight, the plane is not very stable, due to the rear alignment and the lack of downward slope (and the IL-2 prototype also suffered from poor alignment (the armor is not foam), but the downward alignment solved the problem). The efficiency of the ailerons, by the way, was increased: 1) I increased the cost per hole in the hog 2) I glued strips of cardboard onto the ailerons, which slightly increased their area. The weight of the model was 870 grams with a span of 1250mm... I had to fight any gust of wind. But everything went quite well, I flew at full throttle, the landing was successful, although not on the first approach.
I continued construction, slowed down the pace, there was nowhere to rush now:
The chassis is made from bicycle spokes and does not fold. Far from replicas, but still)
Penoplex exhaust pipes:
The plane was completely covered with receipt paper for offset printing (I bought a roll for 16 rubles at a convenience store). I used diluted PVA-M. This paper is much thinner than office paper, and it’s very convenient to work with narrow (7.5 cm) strips. The overlaps are ground down with sandpaper - the joints are almost invisible in the end.
I painted it with water-based emulsion with the addition of the necessary colors:
Several significant shortcomings were revealed: 1) Dull matte color; 2) Unlike the acrylic semi-gloss paints that I used before, you can’t wipe the water-based emulsion with a damp cloth. At first I thought about covering it with tape, but Il had already gained almost 350 grams after covering it with paper, painting, installing the chassis, and adding another 150 grams of all sorts of hardware to create a more forward alignment. I tried regular varnishes, but they inevitably corroded the ceiling. I found this at a hardware store:
In addition, only 280 rubles per liter bucket. The varnish has the color and consistency of PVA, but it smells like acrylic paint)) It is diluted with water. The result is obvious: So, May 29 has arrived, the plane is ready, (well, there were also ideas about modifying the canopy, putting the UBT in the turret, but that’s not about that now) I got up at 6 o’clock in the morning, they promised complete calm, set up the appa, and even increased the costs for ailerons for one hole, and off we go)) I didn’t take a video, no one wanted to go with me so early).
Take-off from the wheels, about 4 meters was enough for the take-off run, everything was fine: at first glance the plane behaved much more stable, the speed increased significantly, which also improved roll control, there were now almost no dips in height in turns, a mow was made, I only trimmed the ailerons a couple of clicks. The IL-2 looked gorgeous in the air, it was simply breathtaking. I circled for about five minutes, and then, a little bolder, I began to make sharper turns and turns... This is where trouble awaited me... After several figure eights, I noticed that the problem with the dip in altitude in a sharp turn did not go away, but only took on a slightly different character - the plane seemed to be trying to fall into a tailspin, something like a stall, which actually looked very realistic and replica (played in the IL-2 Sturmovik and War Thunder sim battles). But who would have thought that these blockages in turns, similar to the beginning of a corkscrew, could become a real corkscrew!!! I was flying at a low altitude and, approaching the outskirts of the edge of the forest where I always fly, I was afraid of the trees (you never know), even though the trees were still quite far away, I leaned, pulled the stick towards myself, and...... that's it! The end! Corkscrew!!!!! 3-4 turns and a dull blow to the ground... I even closed my eyes at that moment... stood there for 10 seconds and wandered there on wobbly legs... Of course it was a spectacle...
All this is sad and terrible, in a week I’m leaving for the village for the whole summer... But the conclusion is simple - I had to cut down on expenses for the aircraft and finally buy a flight stabilizer for which, unfortunately, there is no free money yet. I’ll end the article with the following words of Agnia Barto: “I still won’t leave him - because he’s good!”
The story of the plane does not end there - it will still see the sky!!! Thank you for your attention!