What types of berets are there?
Are common
- Light green - border troops. They were introduced as an element of everyday and dress uniforms in 1990. ...
- Blue - airborne troops. ...
- Orange - Ministry of Emergency Situations. ...
- The Vasilkovs are special forces of the Federal Security Service and the Federal Security Service. ...
- Grays are special forces of the Ministry of Internal Affairs.
- Raspberry. ...
- Speckled. ...
- Green.
8 Jan
2022 Interesting materials:
How to transfer iron-on adhesive to a T-shirt? How to transfer only? How to transfer all contacts to Viber? How to transfer all Google Chrome tabs? How to transfer division through equals? How to copy an image from a flash drive to a flash drive? How to reconnect Dualshock 4 to PS4? How to Relink your WoT Blitz account? How to transfer a crew from one tank to another? How to send photos to Viber?
What is needed for this?
Before we begin to describe beating methods, it is necessary to understand why this should be done. The beret is not only a civilian headdress, but also a uniform element in most armies of the world. However, over time, this military pride loses its shape and looks like a pancake - it’s ugly, and therefore it is beaten off.
You can do this yourself. To create a beret, light and pliable materials are used, and giving it a beautiful shape, as a rule, is not difficult. So, how to hit the beret correctly.
Final processing
After processing the product, it is necessary to properly remove the pellets and lint, otherwise the headdress will lose its appearance and will not look as intended. This is done when the beret is completely dry. To remove stray hairs, you need:
- Remove the suture beret from the head (other options are possible - drying on a ball, jar, mannequin).
- Carefully process the entire surface with a disposable razor, from the edges to the middle.
- Carefully blow off pellets, dust and debris.
- Treat the inside of the product with hairspray.
At the final stage, you should not skimp on the fixing agent. It's better to use the whole bottle. To remove the pellets, you can purchase a special machine. It will help solve the problem of protruding wool fibers that constantly come out during the beating process.
All military personnel are trained on how to properly attach a badge. The easiest way is to make perforations using any thin, sharp object, insert two parts of the clamp into the holes and bend them all the way in opposite directions. The flag is fixed in the same way, only on the side. The cockade is attached to the front, clearly in the center.
Before wearing a seamless or drop beret, the employee is advised to once again carefully read the provisions of the charter on wearing a headdress. Each type of military has its own nuances. The main thing is to know in which direction the cap should bend, then the work will be successful. Don't forget about your hair: it shouldn't stick out from under the beret.
Sign of the Elite
The armed forces, like any other complex hierarchical structure, have their own insignia. They are used to designate junior personnel - soldiers and sergeants, middle - officers from lieutenant to major, and senior - officers with a rank above lieutenant colonel.
In addition, insignia in the army serve to determine whether a serviceman belongs to a particular branch of the military. One of the most striking and indicative insignia is the beret. It speaks of its wearer’s belonging to the elite of the armed forces. To determine which elite branch of the military a fighter belongs to, a tradition arose of bending the beret to the right or left side.
Suture beret: nuances
It is not always possible to hit a seam beret beautifully, but nothing is impossible, everything comes with experience.
If the suture beret does not fit tightly on the head, it will have to be sutured. After which it is slightly moistened and folded in the desired direction. To beat off a seam beret, you will need water, a towel and an iron.
Step-by-step instruction:
- The headdress should be carefully ironed on the side that will wrinkle.
- Then a towel crumpled into a ball is inserted into the beret and the opposite side is smoothed out.
- As you move from the side with the seam pressed to the side with the seam pressed, the shape should be worked out with your fingers.
- Place a piece of plastic (can be from a plastic bottle) under the cockade on the inside, cutting it to the shape and size of the cockade.
Fixation means
As auxiliary means for fixing the headgear of the Airborne Forces and other troops, pliers (or pliers) are used to form a piping and clothespins. Various liquids and substances may also be needed. Each of them has its own advantages and disadvantages. The most popular method is using shaving foam.
Shaving foam
The product is applied at the final stage of work, rubbed evenly over the entire surface of the material. Leave for one and a half hours. After treatment using foam, pellets remain; they are removed with a clothes razor so that the beret can be worn without protruding lint. The method is effective, but time-consuming.
Sugar water
Apply at the beginning of work. While the beret is being beaten, the fingers are moistened with water in which sugar has been diluted to better fix the fabric. The duration of the process depends on the size of the headdress.
To prepare the solution, you need to dilute a teaspoon of sand in 0.5 cups of warm water. This type of fastening is not reliable. If an employee gets caught in the rain wearing a broken headdress, the product will immediately become deformed, as the water and sugar will dissolve. Dissolve sugar in warm water, Soak the beret, Squeeze well, Shape
Starch
The army headdress is soaked in starch before drying, and then put on the frame. No need to squeeze. Treatment duration is 20-30 minutes. To beautifully beat off the cap, you will need half a glass of starch, which is diluted in a liter of water until completely dissolved. The product holds its shape well, but during soaking you definitely need to cover the visor with something. Dissolve the starch in water. Soak the beret without squeezing, give it shape and leave to dry.
Layer of glue
Military personnel should definitely know how a beret works with a layer of glue. The product is applied at the final stage and fixed with a heated iron for 2-3 minutes. The interlayer is cut out of non-woven fabric, cardboard or plastic card and helps to give the product a strictly vertical orientation. You must first take measurements and make a pattern for the inserted part. The downside is that there is a high probability of making a mistake in size. The advantage is that this additional element is resistant to moisture.
Paraffin
Apply before drying and shaping the headdress. The product is left for 1-1.5 hours. Before processing, the product must be moistened, straightened and allowed to dry. The fabric is lubricated with melted paraffin from the inside out. The effect lasts for a long time, but the process itself is unsafe: it’s easy to get burned. This method can be used to beat off a droplet.
Rigid frame
The frame of a paratrooper's hat can be made of plastic. It is inserted at the end of processing and secured with double-sided adhesive tape. The beating procedure takes 2-3 minutes. Parts that require fastening are cut out in accordance with the size of the beret fragments. The downside is that a pattern is needed. The main advantage of the method is that the headdress does not need to be wet.
Laundry soap
This simple method will help you quickly remove berets at home. The pre-moistened hat is rubbed with soap to give it shape. The procedure can last 10-12 minutes, depending on the size of the headdress and the specifics of the material. To keep the edge sharp, you need to lightly press it with your hands. This method is only suitable for seamed caps. Its advantage is the availability of an auxiliary tool.
It should be remembered that laundry soap has an unpleasant odor that lasts for a long time, even if employees actively wear berets. To neutralize it, you can treat the material with any industrially produced flavoring agent. Another option is to ventilate the product in fresh air after it has completely dried for two to three hours.
We beat back step by step at home
The reverse side should be processed, not the front side.
Method 1
The most complex and expensive method. However, if performed correctly and strictly following all the instructions, the result will be a headdress that is ideal in shape and angle.
For the event you will need:
- hot water (some recommend sweet, but this is not necessary);
- cockade;
- colorless hairspray;
- shaving foam;
- scissors;
- dull razor;
- plastic card.
Algorithm of actions:
- tear off the lining of the beret (in some cases you can skip this step) and place the headdress in hot water for 2 minutes;
- take it out and drive off excess water with your hands (namely, drive it off, without twisting or squeezing);
- after the water stops dripping, insert the cockade (for correct placement, follow the liner inside the beret);
- put on the head, tie;
- smooth out the headdress, give it the correct shape;
- cover the beret with shaving foam without removing it from the head;
- wait a few minutes, wet your hands and start rubbing in the foam;
- give final shape;
- leave alone for 1.5 hours (no need to remove);
- after this time, remove the headdress, clean from pellets and residual traces of foam (small signs of wear - pellets - are removed using a razor, which is drawn along the pile);
- fill the inside with a large amount of varnish (you should not spare the product, as it will give the headdress the necessary hardness);
- cut a small rectangle out of the card, then make 2 holes in the piece for the “antennae” of the cockade, insert the cockade and tighten the “antennae” to your taste.
Important! The pellets can also be removed using a special machine. It works much more carefully, cleans better, causes less damage to fibers and costs mere pennies.
If you need recommendations for ironing the beret (5th step), then follow the following instructions:
- smooth the left side of the beret back (while bringing your hand straight to the back of your head);
- smooth the crown to the right;
- We create a half-disk near the right ear.
Method 2
The method is suitable for military and civilians who want to flatten one side of their headgear (bevel it to one side). To do this, you literally have to beat off the edge. You will need a hammer and a hard surface strong enough to withstand repeated direct hits from the tool (a barracks stool, for example).
Step-by-step instruction:
- using a spray bottle, spray water on the beret;
- iron it through 2 layers of gauze;
- place on a flat, durable surface;
- Use a hammer to beat off the desired edge.
The blows should be light, but accurate. If you don’t have the skills to handle the tool or are afraid of ruining the item, use a steel spoon. However, the process of involving her will take longer.
Important! Some servicemen, who do not have any tools at hand, generally make do with a barracks iron mug.
Method 3
A method that is relevant for the teardrop beret. Take a hat, wet it with water and quickly shake it off (no need to get too wet). Next, put the product on yourself and give it the shape prescribed in the charter. Do this until it is completely dry (do not forget to smooth and adjust the beret from time to time, otherwise it will not dry correctly).
When the beret becomes dry, press down the edge with pliers. If the tool is handled correctly, the part will become as sharp as required.
If the idea of wearing a wet headgear is not pleasant in itself or there are reasons to refrain from such a step, and you have a mannequin or at least a ball at hand, the circumference of which coincides with the circumference of your head, then put a beret on them. However, you need to be prepared for a not entirely correct fit - nevertheless, these objects do not correspond to the curves and structural features of your particular head.
Method 4
Soak the headdress in hot water, remove the bulk of the water with your hand, put the product on, and then give the edge a sharp shape using your fingers (punch the edge), paper clips or clothespins.
Method 5
Wash the product, sprinkle the seam with starch and beat off the edge. Brush off any remaining starch.
Method 6
Wash and iron through gauze (double). Before ironing, place a folded wet towel inside the headdress (helps create a shape). Then beat off the edges with a hammer.
Method 7
Soak for a couple of minutes in warm water. Take it out and stuff it tightly with newspapers. Ensure that the form adopted corresponds to that required by the charter. Smooth out the folds, and “bevel” the desired side and secure with clothespins. Leave until completely dry (the item should be kept away from operating heating devices and direct sunlight).
Final step: try on the dry beret and, if necessary, correct any imperfections with your fingers dipped in water.
Method 8
- Mix 180 g of water (cold) with 100 g of starch. Mix thoroughly. Add the resulting mixture to 900 g of heated water.
- Dip the beret and give it the desired look after pulling it out. Once you achieve your goal, put it on the ball or dummy. Let dry.
Important! The visor must not be wet.
Effective ways
How to beat off a beret so that it looks beautiful on your head?
3 simple options
Let's look at simple methods that will tell you how to shape a beret.
The easiest option is with a hammer. The headdress should be slightly wetted, ironed, and steamed. Then put it on a chair and beat it with a hammer along the edge. Then the edge will become sharp.
The second method is in the palm of your hand. Get it wet. You can use water with sugar, then the product will become hard. But with such a headdress you will have to avoid water and rain, otherwise it will lose its shape. Place it on your palm and beat it vigorously to give it the desired shape and straighten the edging.
The third one is right on the head. This method is suitable if you are tidying up a teardrop beret.
How to return the beret:
- insert the cockade;
- wet it and shake the water;
- pull it wet over your head;
- give the required shape;
- wait until it dries without removing it so that it retains its shape;
- Press down the edge with pliers to make it sharper.
To ensure the beret takes the correct shape, you can put it on your head while wet.
Complex method
You can beat off the beret using the simple methods described above. But they may not work. Then this method is also suitable. If you do everything correctly, it will fit on your head like a glove.
- Carefully, so as not to spoil anything, we rip the lining with scissors.
- Place it in water (the hotter the better) and wait a couple of minutes for it to soak. Then we squeeze it out.
- Replace the cockade and put it on.
- We smooth it out right on the head, giving it the desired shape. The crown should be pulled to the right so that a half-disc appears. Then - the arch for the cockade. To do this, hold it with your left hand and stroke the top of the head forward. Make sure there are no holes, press harder. Its fabric is strong, it will not tear.
- As soon as it has taken the desired shape, you need to apply shaving foam to it, lubricating it thoroughly. There is no need to remove your headdress. Then you need to wait a little and rub the foam into the product. Make sure there are no streaks or white spots left.
- Without taking off your hat, walk in it until it dries (from 1.5 hours). When it dries, you can remove it from your head and leave it until completely dry.
- Put it in order, remove the pellets of foam and water. To do this, you need to shave the beret with a razor. When the surface is smooth, spray hairspray inside the product. The more varnish, the better.
- We insert a plastic card under the cockade, cutting it to size.
Black, maroon, blue
In different countries, the same color of a disc-like headdress indicates belonging to different branches of the military. Below are the colors that are relevant for domestic military personnel.
- Black . The black color indicates that they belong to the Marine Corps. This is the most compact of the existing berets. You can easily hide it in your pocket or put it over headphones if necessary. The Marine Corps is the elite of the Russian army. And a black beret is evidence of belonging to this elite.
- Maroon. A military maroon beret is a kind of award for a serviceman, confirming his professionalism. You can get such a headdress only after successfully passing a series of tests. Moreover, first they conduct a training exam, and only after it the military man runs a cross-country race, demonstrates his mastery of acrobatic tricks and engages in hand-to-hand combat with an opponent.
- Blue. Blue berets can most often be seen on soldiers and officers of the Airborne Forces. Especially when this branch of the military celebrates a professional holiday. Until 1968, paratroopers wore crimson headdresses. But then they were replaced by blue “discs”, the wearing of which is still relevant today.
Berets are divided into seamed and seamless. The latter are popularly called “droplets”.
Steps
Wear your beret correctly
- Review your organization's dress code.
Although the following recommendations can be considered general rules for wearing berets as part of a uniform, it will not hurt you to familiarize yourself with the specific requirements that will apply to you.
Position the beret properly on your head.
This usually means that the bottom edge of the beret should run horizontally across the forehead. For example, according to Order of the Minister of Defense of the Russian Federation dated September 3, 2011 No. 1500 “On the Rules for Wearing Military Uniforms and Insignia of Military Personnel of the Armed Forces of the Russian Federation...”, berets should be worn with a slight tilt to the right and so that the bottom edge is located at 2 -4 cm above the eyebrows. If your organization wants to differ in some way from the military, it will probably require the beret to be tilted to the left.
Wear an appropriate hairstyle.
Hairstyles that can distort its shape, such as high buns or ponytails, are not suitable for a beret. Your bangs should also not extend beyond the bottom edge of the beret. Some organizations, such as the Royal Air Force of the United Kingdom, require girls with long hair to wear it in a net that matches their hair color as closely as possible.
Remove the lining.
Cut away the inner black lining of the beret, but be careful not to damage the outer part of the beret. By removing the lining, it will be easier for you to shape the beret into the desired shape. Please note that not all berets have a lining.
Remove any pellets from the beret.
Usually this procedure is performed after molding the beret. However, if there are already obvious areas of pilling on your beret, these will need to be shaved before you get it wet, in addition to shaving after drying. In the case of civilian berets, this step may be the only one necessary. You can remove pellets and fluff from a beret in various ways.
Shape your military beret
- Wet the beret.
Soak the beret in warm water. If there is a patch or emblem on the beret, try not to get it wet.
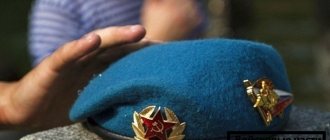
Part of the military uniform is the beret. It is practical, beautiful, does not take up much space, and therefore is the statutory headdress of many branches of the military. This is the pride of any soldier. But it comes out in the form of a disk, which does not sit so nicely on the head. In order for it to take the desired shape, you need to beat the beret. Every soldier can do this.
In order for a military beret to fit well, it must be beaten correctly
...and difficult for demobilization
It is not always possible to beat off a suture beret beautifully using the methods described above. It all depends on the quality of the fabric and the circumstances of use of the product. If plan “A” does not work, move on to plan “B” - more complex, but at the same time more effective methods.
Shaving foam
Peculiarity . To implement this method, you will need a small “arsenal” - a bottle of shaving foam, an iron or ceramic bowl with hot water, a razor, hairspray and tailor's scissors. Each stage of the algorithm described below must be implemented in practice strictly according to the instructions. If you manage to fulfill all the requirements exactly, then the beret will fit on your head like a glove - as if it was made especially for you. But mistakes can lead to damage to the headdress, so try to avoid them.
What we do
- Using small tailor's scissors, carefully rip off the lining.
- Dip the headdress into a vessel with hot water and leave it to soak for a few minutes.
- We squeeze the beret thoroughly, not twisting it, but pressing the product against the terry towel.
- We insert the cockade into the wet beret and put it on the head.
- We begin to smooth the product and give it the required shape.
- You need to hit the beret on the right side. To do this, the crown of the headdress must be directed to the right with your hands. As a result, the coveted half-disk will appear.
- At the next stage, we hold the arch on which the cockade “sits”, and with the other hand we smooth the top of the head forward. This action must be performed assertively and strongly. Otherwise, the beret will not give way, and its shape will remain the same. There is no need to be afraid of damaging the fabric. It is strong enough and it is unlikely that you will be able to tear it apart with your hands.
- After the beret has finally acquired the required shape, we take shaving foam and apply it to its surface. We do this without removing the headdress. We use a mirror for convenience.
- We wait a few minutes, and then we begin to rub the product directly into the fabric, doing it evenly - to avoid the appearance of white stains on woolen fabric.
- We wear the beret for about an hour and a half until it dries completely.
- Then we remove it and carefully go over its surface with a razor, thus eliminating the pellets formed from the foam.
- Apply hairspray over the entire inner surface. The more the better, ideally a whole bottle.
- From a piece of thin plastic we cut out a shape resembling a cockade and insert it under the metal element - into the space between the cockade and the lining.
Old newspapers
Peculiarity . If you don’t have the desire or ability to wear a wet beret on your head, resort to the method with an old newspaper. To do this, you need to crumple up the shapeless spherical elements and stuff them into the inside of the headdress. In addition to newspapers, you will also need plastic clothespins or women's hairpins that can secure the woolen fabric well.
What we do
- Using a spray bottle, we moisten the beret by spraying water over its surface.
- We stuff the old press inside the beret.
- We use clothespins and hairpins to give the headdress stuffed with newspapers the required shape.
- Leave the woolen “disc” with newspapers inside until completely dry.
- Then we try it on and, if necessary, adjust the resulting shape by re-wetting it.
A special case
During parades, military personnel of all branches of the military wear berets slanted to the left. Firstly, this is necessary for the unification and uniformity of the uniform of all military personnel. There is an opinion that this is done in order not to block the face. The fact is that a serviceman tilts his head to the right while walking in parade formation, so bending his beret in the same direction can cast a shadow on his face.
Others argue that the fold to the left is necessary so that the flag-shaped badge, which is attached to the right side of the beret during parades, is visible. After returning to places of permanent combat deployment, the paratroopers recapture their berets back to the right.
How to fix the form
It is important that the beret becomes hard. To do this, it is pre-treated with fixing substances. Thanks to this, the headdress will not lose its shape for the next few years.
Shaving foam
- We wet it. We put it on the head. We fix the shape we need.
- Apply foam without removing. It is important to cover the entire piece with foam, without missing a single area.
- We wait until the product is absorbed into the product.
- You need to wet your hands with cold water and rub the hat with foam. We put in a little effort. This will avoid divorces.
- Now we fix the final shape and wait for the beret to dry. It is advisable not to remove it from your head.
During the use of foam, pellets may form on the material. We get rid of them using a shaving machine.
Using sugar
- Dilute two tablespoons of sugar in 300 ml. water.
- Soak the beret in this solution. It is important that the mixture reaches all areas of the fabric.
- We beat off the bet using one of the methods listed above.
If you treat a headdress in this syrup, it will lose its shape instantly upon contact with the mixture. But be careful as the sweet tissue attracts insects.
Using hairspray
- Spray hairspray on the inside. We do this only after the product has dried.
- We wait until the fabric absorbs the product and dries.
- We repeat the manipulation.
- If we need to fix the beret well, making it almost motionless, we may need to repeat the action many times (we use the entire bottle).
Layer of glue
- We measure the size of the beret. We transfer them to paper. Draw a headdress template.
- Using a template, we cut out a part from adhesive fabric (non-woven fabric for bags is suitable).
- We fix the layer with a hot iron.
Advice! The adhesive layer is well resistant to moisture. This will allow you to maintain the required shape after several lines.
Using paraffin
- We fix the wet headdress. We are waiting for it to dry.
- Melt the paraffin. We process the areas that need to be fixed. We do this from the inside out.
- Correcting the form. We wait until the beret dries.
Rigid frame
- To install the beret with your own hands, you need to cut out the parts that require fixing from cardboard.
- We place this frame inside the product.
- We fix the backing using double-sided tape.
Using laundry soap
- We moisten the places that need to be fixed.
- Rub the fabric with soap.
- Wrinkle the edge with your hands. Let's make it spicy.
- We fix the product with clothespins.
- We are waiting for it to dry completely.
Soap may have a strong or specific smell. To treat your cap, it is better to choose soap without a fuse or with a pleasant aroma.
Berets can be worn by both military and civilians. It gives a touch of luxury. Even ordinary people often have to knock off their headdress. If you give it the right shape, you will look beautiful.
Tips for wearing an army cap
An army cap also tends to lose its “starched” appearance. Due to their intense contamination, such items have to be washed quite often. This means that every self-respecting soldier should have the skills to return to his former form. And even more so as an officer. There are two methods you can use.
- We dry it on the ball. Having removed the hat from the drum of the washing machine, it must first be dried properly. This can be done by wearing the product on your head. However, this is not always comfortable. Alternatively, you can place it on a ball, an upside-down 3-liter jar, or other suitable frame.
- We use starch. You won't be able to knock off an army cap, but you can easily starch it. To do this, mix 100 g of starch and 130 g of cold water in a spacious vessel. Add another 900 g of hot water to the mixture and mix thoroughly until the powder is completely dissolved. Then we dip the headdress in the starch solution, avoiding getting it on the visor. We thoroughly soak the cap and, without squeezing the product, put it on the frame until completely dry.
Be sure to pay attention to the material used to form the visor of the cap. Products with a plastic visor can be machine washed. But the cardboard base will not withstand even hand washing. Such a cap will have to be cleaned from dirt and dust using dry cleaning mode.
Returning to shaping the beret, do not despair if it does not suit you the first time. Remember a simple thing: manufacturers use a special pliable fabric, like plasticine, to create berets. If you can't get it into the desired shape, then most likely you are doing something wrong. Check that the algorithm is running correctly and try again.
By the way, there are several more folk ways of fixing the beret disk, which were not mentioned above. For example, the use of non-woven fabric - a semi-synthetic paper-like material that is glued under the lining on the inner surface of the beret so that it holds its shape better. For the same purpose, cardboard is used, and sometimes even paraffin or candle wax, poured inside for fixation.
Now you know how to hit the beret correctly and what methods should be used for this purpose. By the way, owners of ordinary (non-military) disc-shaped headdresses can from time to time shape them in a new way - in order to slightly change the image or dilute a boring image. Molding makes it possible to obtain fundamentally new variants from the same product.
Pound test
It is worth noting that taking a beret in the airborne troops is no less a serious test than a forced march or parachute jump. The ability to correctly beat off his headdress has always served as a sign of the experience of a paratrooper, his real belonging to the elite army caste. A real paratrooper always knows how to properly return a beret.
Not everyone succeeds the first time. There are different “recipes” for how to break a beret. Experienced paratroopers advise using a sugar solution rather than water to moisten headgear. Others are experimenting with wax. After moistening the beret, it is given the desired shape.
You will need
- Takes a drop (choose your size, take a closer look at 54-55),
- water (preferably hot),
- shaving foam or gel,
- hairspray (colorless),
- disposable razor,
- scissors,
- any plastic card,
- cockade.
Instructions
To begin with, we cut out the lining with scissors, but do not cut off the insert for the cockade. Next, immerse the beret in hot water and wait 2 minutes for it to completely soak. We take it out, squeeze it slightly, insert the cockade exactly in the center (we are guided by the insert inside the beret), put it on the head and tighten the ropes at the back of the head, tie it.
Without removing the beret, we begin to smooth it with our hands in the right directions. We smooth the left side back, bringing the hand to the back of the head. We stroke the top of the head to the right side, creating a half-disk near the right ear. We make the arch for the cockade as follows: hold the cockade, and with the right hand we smooth it forward from the top, creating an edging. Then everything is much simpler, you just need to straighten these sides and remove stains and holes. Don’t be afraid to smooth it harder, the beret won’t tear. Pay special attention to the arch and half-disk at the ear, make them more prominent and even (after its formation, it is advisable to iron the half-disk a little back to the back of the head, press it well to the ear and crush the ends). Your choice of how you want the half disk to look: cover the half disk, lightly touch it, or just hang in the air above it.
After we have made the form, we continue to improve it. We take shaving foam and apply it on the beret in large quantities. We coat everything thoroughly, every area (don’t remove the beret!!!). Then wait a few minutes, you can also iron the sides a little, but not too much. Next, we wet our hands with water and begin to rub in the foam (which is on the beret) with movements from side to side, with medium pressure. Having removed all the stains and white spots, we iron the shape a little more, smooth out the imperfections and leave our creation alone. Under no circumstances do we take off our beret; we walk around in it for about 1.5 hours, or even more. It is advisable to be in a warm place so that it dries on you.
When it's dry on your head, you can put it on a table or on a radiator to dry completely, but so that the half-disc hangs over the edge. Then the beret is completely dry, we must get rid of the pellets that formed from our foam and water. We take a razor and shave in the same directions where we smoothed the creation. We shave so that the surface is smooth and without defects, everything is neat and without rushing. After this, we take hairspray and spray it on the inside of the beret, that is, where we cut out the lining. Use all the polish, don't waste it, the more the better. All this is done to make the beret harder. You will feel the results after such an operation.
Regulatory documents prescribe exactly how to wear a beret. From there you will find out at what distance from the eyes the headdress should “sit” (usually they require 2 cm), and you will also understand which side the bend should be made on. If you don’t want to make a mistake and appear inappropriately on a holiday, first re-read the charter, and only then start “fighting off”.
Often, berets are literally “beaten”, that is, to give the correct shape you will need a hammer. In the case of products made from thin fabrics, and not from thick wool, you can get by with less drastic measures. For example, you can turn to heated water (sweet or starchy), paraffin, or hairspray.
Since most methods require washing, you will have to find the right place to dry before starting manipulations. In this context, a window sill is definitely not suitable, as well as rooms with drafts and rooms with high humidity. You should not place woolen or wool-blend items near heating appliances.
. This is fraught with deformation and change in size.
Right and left
Army berets appeared in the armed forces of our country only in the 1960s. Originally they were crimson in color. The familiar blue beret of paratroopers was introduced into everyday use only in 1969. Until this moment, to indicate belonging to one or another branch of the military, the practice of twisting the beret to the left or right side appeared.
Special forces and internal troops began to bend their berets to the left. They now wear maroon and olive (green) headdresses respectively. In turn, the marines (black berets) and paratroopers (blue) began to push the berets to the right side.
Tips for beginners
The following nuances of caring for a beret can be advised to novice military personnel:
- For any beating, it is better to use a sugar solution rather than pure water.
- Soft berets fit better on the head and are easier to shape.
- A disposable razor can be useful not only for removing pellets from a beret, but also for eliminating “fluffiness”. During beating, the material begins to “wool” and the product looks unaesthetic.
- You can dry it not only on your head, but also on a ball or globe that fits in size, as well as on a three-liter glass jar turned upside down.
- To prepare a starch solution for beating berets, you need to dilute 100 g of starch in 130 g of cold water, and when all the lumps are mashed and dissolved, you can add 900 g of hot water. The solution must be stirred very well so that the starch is completely dissolved.
- If none of the above methods are suitable for beating your beret, do not despair: there are many more different methods, for example, gluing non-woven fabric, using paraffin, laundry soap, candle wax, cardboard, adhesive base and much more.
- No need to worry if you didn’t get the desired shape the first time, you can try again. Manufacturers use dense but pliable fabric for production; you should not be afraid of damaging it with frequent attempts to shape it.
- If you still encounter difficulties while beret-taking, you should ask for help in this matter - your colleagues will not refuse.
Drying a beret in a three-liter jar
Now you know how to beat a beret at home, and you will not be confused when receiving a shapeless “pancake” from the warehouse. You can tidy it up so that it becomes a symbol of pride and courage.
This article discussed simple and not so simple methods, and everyone can choose the one that suits them, based on the material of the beret, technical capabilities and weather conditions.
Next Conscription into the armyIs it possible to come to the military registration and enlistment office before the summons