In ancient times there were many types of weapons, but the bow differed from them in its range. Modern models of guns have improved; they are equipped with a durable bowstring, a sight, rollers and several arms - this increases the power of the shot. Such weapons are used for entertainment, hunting and sporting competitions. At home you can make a bow and arrows no worse than factory ones, but you will have to put in a lot of effort and time.
What is an onion?
A bow is a throwing weapon designed to fire special arrows. The shooting process is extremely simple and requires the shooter to nock the arrow, shoot and release the string. Thus, the energy stored in the recurve bow of the weapon is transferred to the arrow, which hits the target.
Despite the simplicity of the bow design, shooting from such a weapon requires a number of specific skills:
- First of all, the shooter must have enough strength to pull the bowstring.
- There is no place in classic and traditional models. In addition, the aiming process is somewhat complicated by the need to keep the bowstring taut.
- Archery requires a number of steps, from correctly positioning the arrow on the bow to lowering the string. Without perfection of actions in this case, there can be no talk of any goal.
The next stage in the development of this weapon was the crossbow, built around the 4th century BC. The shooter does not require physical strength or special skills. However, the bow has a simpler design and a high rate of fire, so it was not forgotten even with the advent of firearms.
How to make arrows
Young animals are usually taken to make arrows. To make the reed even, you need to hang it on a heavy weight and let it dry in the sun. If the summer is very hot, a week will be enough for complete drying.
You can also take a dry oak log and cut a lot of arrows on it to make arrows. But this method takes a lot of time, since it will take a lot of time to process the arrows.
What to make the tip from
The arrowheads must be made of heavy material; in this case, after releasing the bowstring, the arrow will acquire great acceleration.
Tips can be nail clippings, steel wire or glass pieces.
Using a knife, a recess is made in the wooden base of the arrow and the tip is securely fixed. Typically, homemade arrowheads are tied with thread and then soaked in superglue.
If you want to make very strong tips that will fly big, coat them with epoxy resin.
How to make an arrow stabilizer
Thin plastic sheets or large bird feathers can be used as stabilizers. There are 2 ways to attach: cut the arrow and attach the stabilizer from the inside or wrap it on top.
If you are using large bird feathers, the second method is best. Because splitting an arrow can negatively affect its flight characteristics.
Homemade bow from a car spring
If a car spring is suitable for creating a crossbow, then why not try using it as a material for a homemade bow? Anything can be at hand, and you shouldn’t neglect it.
To work, you will need a car spring, for example, from an old Lada or Muscovite, and a sharpening machine.
- The spring needs to be ground off. The narrower it is, the more pliable the bow will be. At the same time, it is necessary to ensure that the arms of the bow are the same.
- The handle can be made of paralon. To do this, you need to cut a piece of foam and tape it to the spring using electrical tape.
- Toward the ends, the arms of the future bow need to be narrowed even more using a sharpening machine, and shallow notches for the bowstring must be made.
Now let's move on to making arrows. This requires thin reinforcement. It must be ground down, but in such a way that it does not lose its elasticity and does not bend. On one side the arrow is sharpened a little sharper, and on the other side a plastic feather is attached. A linen cord is suitable for the bowstring.
A bow made from a car spring is very tight and may not be suitable for everyone. But it will be an excellent tool for developing arm strength.
When using this version of a homemade bow, do not forget to wear thick gloves so as not to injure your hands.
What do you need to know before you start?
Even if you're making a bow and arrow for fun or as a gift for a child, there are a few things to consider:
| Swing by hand | Arm length | Arc length |
| 137-142 | 55-58 | 137 |
| 145–150 | 57-60 | 145 |
| 152-157 | 60–64 | 152 |
| 160–165 | 64-66 | 160 |
| 167–172 | 66-68 | 167 |
| 175–180 | 70 | 178 |
The classic version of the arch consists of:
- Shoulders
- Bow string
- The main part, namely the handle
After making the bow, it is necessary to ensure proper care. Don’t be alarmed, leaving is easy and won’t take much time:
- The bowstring is only put on when shooting, so it is immediately removed. Before shooting, you need to “click” the bow and pull the string.
- Store only in a dry place, preferably in a case.
- Onions should be stored in an upright position.
- You can't pull the bow.
List of required tools
Knowing how to make a bow and arrow at home, you need to acquire the following tools:
- large file;
- chisel;
- vice;
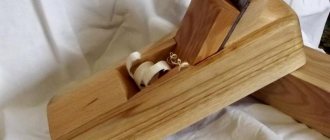
- plane;
- with a very sharp knife.
Here is the recommended set of tools needed for the process. You also need to select other tools that will correspond to the design chosen by you personally and will help to carry out high-quality processing of the base. This will make the manufacturing process much easier.
Shoulder gluing
A wedge-shaped notch is drawn on one of the shoulders (exactly on his back). The diagram can be found on the Internet. The cut should be 10-15 cm long. The marked fragment is cut out.
If something went wrong, it needs to be fixed. The second lever is sharpened for a cut wedge. First with an ax or saw, then with a wooden file. It is important to adjust both shoulders so that (when viewed from behind) they form a straight line.
You can help yourself by drawing an axis of symmetry on them. Then three nails are driven superficially along these axes: one near the future connection and two on the griffins.
If all three “coincide” with each other, the arc is straight. Epoxy resins are best suited for gluing. After joining, everything is twisted using carpenter's clamps or rope or twine.
Arc formation
To form it, you will need a beam measuring approximately 10x10x100 cm. An improvised crossbow is made from this beam and the future bow. To do this, “thresholds” are made on a block, cutting them every 5 cm along the entire length. They must be deep enough to hold the bowstring.
Instead of thresholds, you can nail short nails that will perform the same function. The end on which the bow handle rests is inserted into the saddle so that the bow is securely fastened to it. For a set, the string is made approximately 10 cm longer than the bow.
The “crossbow” is mounted by placing the bowstring on the griffin, and the bow handle rests on the saddle of the bar. Gradually draws on the next “thresholds”, watching the shoulders of the bow. If one bends more, it means it is weaker. Then the following ones are filed with a file.
The shoulders should bend evenly along the entire length, except for the handle. If this does not happen, the tougher parts of the shoulder are sawed. Throughout the process, it is necessary to maintain the bow and not stretch it to its maximum length before it is formed. Of course, only the convexity, that is, the inner part of the shoulder, is processed.
More often than not, it turns out that the formed bow is too complex for the archer's abilities. To reduce the tension force, it is necessary to evenly saw both arms equally from the center and re-shape the bow. Then measure the tension again. And so on until the end.
At the end of the work, the file is replaced with sandpaper with increasingly finer grains. The operating time will, however, increase, but the effect will exceed expectations.
This stage is perhaps the most tedious of all, and at the same time the most difficult, because without “getting used to” the bend of the bow, it can be broken.
Proper drying of wood for making bows
Drying is the longest phase. It is imperative that all conditions are met, since flexibility depends on proper drying. This product is not prone to breakage and has a longer service life.
Natural drying
The optimal drying time is from 2 to 5 months. At the same time, humidity is reduced by 50-10%. This indicator is determined using a needle or non-contact moisture meter.
In the absence of such devices, weighing equipment is used. To do this, study the initial moisture level of the tree in the corresponding climatic region.
Natural drying.
The best place for drying is a ventilated room with a humidity level of 40-65%. Dry air should be avoided to prevent the wood from drying out and losing its elasticity. Otherwise, a rupture will occur.
Methodology:
- The workpiece is placed vertically in a place inaccessible to direct sunlight. Avoid excessive moisture to avoid damaging the texture.
- After 2 months, the humidity level is measured.
- If the proportion is above 10%, they are additionally dried.
Accelerated drying
Modern technologies make it possible to speed up natural drying. This will allow you to create an arch faster. Accelerated drying is performed using several methods. Each method has its own characteristics.
Boiling, soaking
This method is effective and fast. However, this takes time. Algorithm:
- The product is pre-dried naturally at a density of 18-20%. Wood in bark Digestion of wood.
- Soaking, boiling in water (this method was widespread in the Middle Ages). This helps prevent cracking and rotting.
- The workpiece is pulled onto the tree using clamps.
- The drying process is much faster than natural. Usually within a few weeks.
Infrared drying
This option is the fastest. Infrared drying is carried out using a thermomat or thermal cassette with an infrared heater. This heater is used as a home heater in a house or apartment.
Algorithm:
- The product is placed on a thermomat.
- Let dry. The speed depends on the type of wood. It will take 4 to 7 days. The effect will be similar to natural drying.
- The material will have the required level of moisture while maintaining elasticity.
Bow assembly technology
A wooden bow is easy to make at home. The structure consists of:
- handle - the central wide part;
- arches or shoulders - the upper and lower elastic parts of the product. They are located at the top or bottom in relation to the handle;
- bowstring - the thread that launches arrows.
Wood ready for onion harvesting.
The wood for the handle and shoulders is chosen to be dry and smooth. A rod is 1.3 m long and has a diameter of 2 – 3 cm. The best solution would be to use:
- hazel;
- yew;
- juniper;
- and you.
The handle and shoulders will be one piece. This is an acceptable option for hiking conditions.
The basic model involves attaching arcs to the handle. A block of birch or beech (6*4*40 cm) is suitable. The arches are made from two dried rods, 1 m long and 2-3 cm thick. You can use:
- rowan;
- ash;
- oak;
- lamella;
- plywood
The string can be from:
- nylon, nylon or Kevlar thread; Traditional bow string.
- fishing cord or fishing line;
- grapevine fibers;
- horse hair.
Several centuries ago, ox veins or dried animal entrails were used. The string is shorter than the bow by an average of 4–6 cm.
Assembly method in field conditions:
- On both sides on the outer side of the rods, make 2 deep notches with a knife. 1.5 cm away from the ends.
- At the end of the bowstring, strong loops are made and tied into knots.
- The first loop is placed on the lower end of the bow, the second on the upper end.
- The string is straightened carefully until the loops are tightly immersed in the notches.
- For the most accurate shooting, a guide groove is scraped out in the middle of the rod.
- Arrows can be replaced with ordinary, but sharpened, sharp sticks.
This option is acceptable in forests and taiga.
Bow design diagram.
To make a more beautiful and durable model you will need:
- drill;
- plane;
- bolts.
Instructions:
- After cutting out a straight or shaped handle, make 2 holes using a drill. The holes are needed for the bolts that secure the arms. Varnish is applied to the handle, and a leather gasket is placed under the bolts.
- The length of the shoulders is about 70 cm, the width near the handle is 30 cm, at the place where the bowstring is attached - 20 cm. Thickness - 1.2 cm. To beautifully bend the shoulders for 24 hours, they are tightened with clamps.
- The arcs are attached to the handle using bolts. Shelves made of small wooden blocks are attached to the ends of the arcs. The bars can be of any shape.
- Cuts are made in the bars, the depth of which is 0.8 mm. This indicator corresponds to the diameter of the bowstring.
- The string is attached using the standard method with loops.
How to make a bow with your own hands - designs, sizes and detailed description of how to make a weapon
Surely many would like to have a bow and arrows made with their own hands. In this article we will tell you how to make this dream come true.
Preparation of material
The arch will be made with your own hands from acacia (can also be ash or elm) with a trunk diameter of about 15 cm and a length of at least 1 meter.
It would be nice if the barrel was a little thicker. This will make it easier to “find” the shoulders of the arch in the body. The trunk should be fairly straight, not twisted, without knots or branches.
This "trunk" can also be a large branch. If someone has access to a two-meter log that meets the above conditions, they might be tempted by a bow made from a single piece of wood. Then he will skip the gluing step.
What other wood is used
For production you can take ash, rowan, willow, juniper, oak, birch. It is recommended to cut the branch in winter after frost. Before making a bow and arrow, it is necessary to determine the opening of the future shooter's hand.
Cutting a branch takes longer than cooking the onion: the broth can be up to 30 cm. A branch 3-4 cm thick should be flat, without knots. Wood plays an important role in how to make a bow and arrow with your own hands.
Barrel processing
So where to start making onions with your own hands? With barrel processing. Below are instructions.
The trunk should be cut with an ax so that it has straight cut ends, which should be painted with rubber paint. This will allow you to monitor the wood as it dries and possibly prevent cracks from occurring.
The trunk is then cut in half. If there is a knot, the cutting line should intersect it. This requires 2 wedges and a hammer. The ax can be used as a wedge, but understand that the ax can be broken. A wedge is inserted into the thicker end of the barrel.
When the wood breaks, a second wedge is inserted into the crack to free the first. These steps are repeated until two strips of wood are obtained.
Note. If the trunk breaks asymmetrically, it should never be “straightened.” It is possible that one of the parts will no longer be useful for anything and will have to get rid of it.
The bark is removed with a sharp ax (or other tool, such as a plane). After this, the tree is placed in a dry and cool place.
The main idea behind these steps is to dry the wood slowly and evenly. In the notes of the old masters it was written that the target humidity should be 10%. If you have nothing to measure, you will have to trust your instincts.
The above mentioned events can also be separated from each other by a break of several days. There's no rush here. Drying should last at least 2 months.
After about 5 weeks, you can gradually move on to the next stage. The wood is still too wet, but removing any unnecessary excess will speed up the drying process a little.
If during this time the pieces of wood begin to become covered with white mold, they should be placed higher in a drier place so that they do not collect moisture from the soil. If cracks appear during drying, the wood should be moved to a cooler place. The reason for these shortcomings is the lack of bark on the trunk.
Next, the most beautiful piece of wood is selected. Now you can get started; When making a compound bow with your own hands, the steps may vary.
"Finding" the arc
The base surface is the part of the tree without bark. This surface is processed to a minimum.
Another thing to pay attention to is the rotation of the barrel. A twisted barrel is not suitable for bows. You can try to make corrections, but the chances of success are low.
After determining the position of the bow arms, a dividing line is drawn between them. The shoulders need to be separated so that they can be connected again, but in a slightly different way. The trunk is cut with a saw.
An ax or plane removes fragments that are definitely not useful. Leave to dry further. You can’t be too zealous here, as a very thin block will warp when drying.
You need to leave a little more material at the ends, which will serve as a connecting piece. If you plan to make carved griffins, this must also be taken into account when planing, leaving an appropriate allowance.
It should be understood that this piece of wood once lived its own life. And now it needs to be revived, but in the form of an arch. All steps need to be done slowly and carefully to make a bow with your own hands.
Shoulder gluing
A wedge-shaped notch is drawn on one of the shoulders (exactly on his back). The diagram can be found on the Internet. The cut should be 10-15 cm long. The marked fragment is cut out.
If something went wrong, it needs to be fixed. The second lever is sharpened for a cut wedge. First with an ax or saw, then with a wooden file. It is important to adjust both shoulders so that (when viewed from behind) they form a straight line.
You can help yourself by drawing an axis of symmetry on them. Then three nails are driven superficially along these axes: one near the future connection and two on the griffins.
If all three “coincide” with each other, the arc is straight. Epoxy resins are best suited for gluing. After joining, everything is twisted using carpenter's clamps or rope or twine.
The seam reaches maximum strength in a week, but the arch can be worked on in two days. After gluing, it is recommended to check whether the arms are offset relative to the axis. The previous model is used for correction.
Excess wood outside the lines drawn on the template is removed. A second model is drawn showing the thickness of the shoulders. If your shoulders are bent, this line is best drawn with a ruler. After submitting the application, the premium is removed. Traditionally, you can use a plane, saw or axe.
In this form, the arch should resemble a rectangular strip. The surface of the convex was rounded with a file so that the cross section was shaped like the letter “D”.
Slowly but surely the process of creating a combat bow with your own hands is progressing.
Arc formation
To form it, you will need a beam of approximately 10x10x100 cm; a homemade crossbow and a future arch are made from this beam. To do this, “thresholds” are made on the bar, cutting them every 5 cm along the entire length. They must be deep enough to hold the rope.
Instead of thresholds, you can nail short nails that will perform the same function. The end on which the bow hilt rests is inserted into the saddle so that the bow is firmly attached to it. In one set, the string is made approximately 10 cm longer than the bow.
The “crossbow” is attached by pulling the bowstring onto the griffin, and the bow handle rests on the crossbar saddle. Gradually he moves on to the next “thresholds”, looking around the back of the arch. If you bend more, it means it is weaker. Then the next file is archived.
The shoulders should bend evenly along the entire length, except for the handle. Otherwise, the hardest parts of the shoulder are sawed off. Throughout the process, it is necessary to maintain the arch and not stretch it to its maximum length before it is formed. Of course, only the convexity, that is, the inner part of the shoulder, is processed.
Very often it turns out that the formed arc is too difficult for the archer's skills. To reduce the pulling force, it is necessary to trim both arms evenly from the middle side and reshape the bow. Then measure the voltage again. And so on until the end.
At the end of the work, the file is replaced with increasingly fine-grained sandpaper. The operating time will, however, increase, but the effect will exceed expectations.
This phase is perhaps the most tiring of all, and at the same time the most difficult, because without “getting used to” bending the bow, it can break.
Bowstring
An ideal bowstring should be thin, strong and not stretchable. The thinner the string, the better the bow's performance. However, it must withstand arc voltage of more than 7 times. The best material in terms of availability, price and parameters is the so-called dratva linen.
Practice shows that a drape folded 8 times can withstand a load of up to 25 kg. You can reduce the number of fibers to obtain better parameters, but this increases the risk of string breakage and, as a result, bow breakage.
You should remember about strengthening fragments that work with an arrow (sleeve) and griffins (rings). In these places the bowstring most often breaks. The bowstring has one or two rings.
In the case of two rings, it must correspond to a certain arc length. Once he has it, the archer ties the free end to the crossbar, drawing the bow. Thus, he has the ability to adjust the degree of deflection of the bow.
Here the terminology is noteworthy: the archer draws the bow, threading the string, and draws it back, preparing to fire.
There are many ways to weave fibers. Examples can be found on the Internet.
Service
Do-it-yourself wooden arches are very sensitive to moisture and must be protected from moisture. Otherwise, it may become permanently deformed. In turn, it should not be overdried (for example, over a chimney), otherwise it will dry out and may crack.
Modern wood paints effectively prevent the exchange of moisture with the environment and are recommended for people who have limited choice of storage space. However, experienced experts say that the onion must “breathe”.
To make this possible and at the same time protect it, the raw wood is regularly rubbed with warm linseed oil. However, this is a dirty job that needs to be repeated periodically.
What other options
An intermediate solution when caring for onions at home can be painting the onions with linseed oil. The aroma is not very pleasant, but it is excellent as an impregnation. However, after 24 hours the smell disappears.
Regardless of the chosen method, archery accessories must be protected from dust and moisture; Wipe them with a dry cloth from time to time.
Decoration
A bow must first shoot well and only then look good. Therefore, you should wait a little with decoration. It's better to shoot and test the bow first.
It is possible that after a while you will have to make small changes. Its handle and griffins can be shaped using a sharp knife and small files.
Alternatively, leather tape or linen cord can be wrapped around the handle to disguise the gluing area. One of the decoration ideas is to make an original inscription on the shoulders.
Good. The wooden arch with your own hands is ready!
↑ How to make a blank for an arrow at home
The existing examples of creativity from military history clubs are made on an intuitive level and do not meet the requirements for historical bows and equipment (arrows, tips, etc.), both in terms of the materials used and in terms of the results of shooting from them .
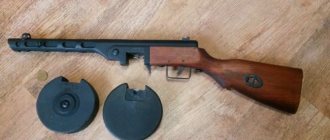
This state of affairs seems unacceptable to us. With all our respect for iron and the people who seriously deal with it, we cannot understand such a disdainful attitude towards historically accurate equipment suitable for practical shooting. The lack of information on historical small arms (throwing) weapons leads to the fact that archery competitions at various tournaments turn into a comedy worthy of prime time on leading TV channels. Armed with hybrids of slingshots and fishing rods or products made from car springs that fit the same cars and pull, masters of accurate shooting try to hit a half-meter target from a mind-boggling distance of 20-25 steps (15-18 meters). As a rule, they fail to do this. At least from the first shot.
The assumption that with such weapons English archers could send thousands of Frenchmen to the next world in the battles of Crecy, Poitiers and Agincourt causes mocking giggles even from an inexperienced person. Of course, practice is necessary to achieve acceptable shooting. However, practice alone is not enough. We need reliable information about the methods of correct and accurate shooting from a historical bow, as well as the technologies for making bows and equipment.
Therefore, we are preparing a series of materials devoted to the manufacture of historical throwing weapons, arrows and other equipment in the hope that this will partly alleviate the lack of information on this topic and inspire our colleagues, as well as simply interested readers, to make their own bows, arrows, etc. as well as searches, research and exchange of information on this topic. The first of the articles brought to your attention is devoted to the manufacture of arrows.
The majority of people perceive arrows as a stick with feathers and a tip. This is not entirely true. The “stick” has a very definite length and shape, the appearance and size of the plumage can be very diverse, and arrowheads have so many varieties that it is difficult to list. In this article we will try to tell you in a popular form how to first make at home, without going into tricky technical details, that very “stick” that will not only fly competently, but also hit the target, obeying your skill.
So, let's proceed to the first stage of making our arrow: searching for material for the shaft (from now on this will be called a “stick”). To begin with, forget from your mind that you can go into the forest and cut young shoots of hazel or other shrubs. Everything is much more complicated. The minimum we can offer you is to take a walk through the building materials stores and find a product called glazing bead (wooden slats of rectangular cross-section), but at most, get ready for a little warm-up in the form of purchasing and further processing the board.
Now about the secret, about the type of wood that we will use.
There is a very wide choice in types of wood for making arrows. Each variety has its own pros and cons when choosing. The main varieties that are used for arrows: oak, ash, beech, elm, birch, pine and the list goes on. Some varieties have good strength, but are rigid and heavy, others are brittle, light and ductile.
Well, perhaps one of the most important factors on this list is the availability and price of these types of wood. In our case, we will take pine, as it is the most common in our area (Moscow), as well as the cheapest. This type of tree satisfies our needs. Pine is a fairly light and durable tree. Its abundance on sale and in a “free” state (at construction sites, dachas and in forests) allows for a fairly picky choice. The criteria for choosing a board or bead for our workpiece are as follows:
It must be sustained. Not dry, like poorly dried fish, but seasoned. If the tree has simply been dried, it is more sensitive to moisture (with further use, it may “lead”).
Thickness (should be at least 2 cm for the board and 1.5 cm for the glazing bead; by the way, it doesn’t make sense to take it thicker, since in this case “the reserve will pull in the pocket” in terms of processing).
Texture (the material for the workpiece should not have knots, the fibers should run parallel along the length of the workpiece).
So let's assume that you find such material. Amazing. Then we move on to the next stage of our process - selecting tools. In our work we will need four items: a saw, a plane, a rasp or hog file, a file and sandpaper with a grit of 60-80 (Euro marking).
If you have a glazing bead as your starting material, then you won’t need a plane; if you have a board, then get ready for a little warm-up. It will have to be hidden. We'll explain how and where to use these tools later in the process. Let's start with a lyrical digression. No two people are the same. Therefore, our blanks in the future will have a strictly individual length. Let's explain. This is due to different arm lengths. How to determine your arrow stock length. Elementary. For this you will need a meter ruler.
The method is simple. Stand up straight and hold the ruler at zero with your right hand. Next, hold the ruler between the index finger and thumb of your right hand at the 1 cm mark. Why this will be said below. Next, move your left arm to the side at a 90-degree angle to your body and clench your hand into a fist. Turn your head towards your left hand and at the same time place the ruler on the fist of your left hand. Now, if you know or have seen how a bow string is pulled, pull your hand with a ruler to your chin. Lock this position.
Next, look under the index finger of your left hand and you will be able to see your desired length of the future workpiece. Add another 2 cm to the result (we need our 1 cm to make a cut for the bowstring in the future). The author of this article has a tension length of 76 cm, taking into account our 3 cm. For example, we will assume that yours is the same length as mine. Now we can proceed directly to making a wooden base for our future arrow.
Step 1.
Take a board or glazing bead and measure our 76 cm. Saw it off.
If you have a board, then use a plane to sharpen it to a thickness of 1-1.5 cm. Next, mark the board widthwise into parts according to the dimensions obtained as a result of turning so that you get square sections (the same glazing bead). Saw it. If everything is done correctly, then you should get a smooth source material as if you bought it in a store. By the way, there is nothing terrible, if it turns out a little crooked, it can be fixed. Step 2.
Take what you got and use a rasp or hog file to give the workpiece a hexagonal shape. The main thing is to do everything carefully.
Step 3.
Repeat everything as in step 2 with the only difference that you need to make an octagon from a hexagon, applying maximum attention and accuracy.
Next, take a small piece of sandpaper and wrap it around what can now be called an arrow blank and holding it in your hand, using reciprocating movements, give it a round cross-section. Once you have an arrow shaft that is round and smooth to the touch, you can consider the work finished. There is one thing left, and perhaps the most important thing to consider your work ready for further production of the arrow, this is measuring the thickness. The thickness should be 8-9 mm along the entire length. In general, it depends on a lot of factors and is one of the most important parameters of the arrow. In the future, we will talk about how to choose the right arrows depending on the bow you are using. In the following articles we will tell you how to select and install the fletching on an arrow, how to make a tip and how to select it for an arrow, as well as how to make a simple machine for quickly making arrow blanks.
Tools and materials
To make such a bow you will need a minimum set of tools:
- airplane;
- knife.
- hacksaw;
In order for the bow to acquire the desired bend, it is best to use a special slipway.
You can also make it yourself from a board and several bars. To make a simple non-removable arch with your own hands, you will need:
- strong rope, leather tape, metal wire, thick thread for making a bowstring;
- thick rope or other suitable material for gripping.
- wooden or PVC pipe for making an arch;
When shooting from a bow, his shoulders should bend, while the bowstring practically does not stretch. The arrow hits the target precisely with the force of the weapon's bow, which straightens at the moment of the shot.
Design features and types of bows
Before you make a bow with your own hands, you need to familiarize yourself with the features of its structure. A modern arch consists of three main elements:
- The shoulders, thanks to which energy is accumulated, are transferred to the shooter during the shot.
- Process. When shooting, you need to hold the weapon comfortably.
- Bowstring. One of the main structural elements, as a result of which tension and energy are transferred to the shoulders and arm.
These are the basic elements present in all modern arch designs. In addition to them, the weapon can be equipped with a shelf that serves to support the shooter, various types of sights, and a system of blocks that increase the effectiveness of such weapons.
At the moment there are many varieties of bows. Let's consider the main ones:
- In appearance, such weapons can be simple or complex. In the first case, the bow body is a flexible stick that bends in an arc. Composite structures require a base to which the arms are attached. Usually they are reinforced with horn plates, which are connected to each other using special glue.
- The shape is possible in straight and curved models. Recursive models whose shoulders have reverse curvature are very popular. Thanks to the effective distribution of bowstring tension energy, the arrow speed of such models increases significantly.
- As for the material of manufacture, there are models made of wood, metal, fiberglass and combined ones. Metal structures are usually welded from lightweight hollow pipes.
- In search of an arrow. The most popular are central arches, where the arrow is located in the middle, that is, on the longitudinal axis of the arch. Peripheral models assume that the hand is to the left of the shoulder.
- As for the design, there are solid and folding arches. The latter features removable shoulders so that the shooter can change the characteristics of his weapon as needed. The most modern is the compound bow. There are many parts in its design, and blocks are involved in the process of tensioning the lever.
- Depending on the method of application, there are hunting, sports, combat models, and so on.
Selecting the length of the bow and string
The first thing you need to do when deciding to make a bow is to choose the right length of the string and the bow itself. Please note that depending on the length of the arms, the dimensions of the product will change. For example:
- arm span 155-165cm, bow 153-160cm and arrows 66cm;
- sleeve width is from 167 cm and above, so choose a length of 160 cm, arrows from 60 cm.
- the opening of a person’s arms is from 136 to 150 cm, the length of the bow should be 137-151 cm, arrows should not be longer than 60 cm;
DIY bow made from PVC pipe
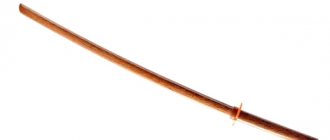
A post-modern style option for agile and agile archers. To make such an arch with your own hands, no drawings, videos, or dimensions are required. You will need a PVC pipe up to 80cm long, plastic up to 1cm thick, you will get a kind of children's bow with your own hands. Pull the loose rope and you can follow the trail of wild cans and bottles (Figure 7).
Figure 7. PVC pipe: a universal material for making arches
But it will be difficult to make a hunting bow from such material with your own hands. The reason is simple: plastic does not have exceptional rigidity parameters. However, you can try. The do-it-yourself arch diagram will be as follows. The tube will need 160-180 cm, 1 cm thick. Make holes for the twine at each end. Slightly bending the tube, stretch the cable. If it vibrates like a guitar string, you will get the correct result. No additional action is required.
DIY composite bow
Many people today are interested in how to make a folding arch, known to many as a composite arch. Let's just say, even more, the majority, especially hunters, are interested in how to make a powerful bow from such a small compound folding arm with their own hands.
Let's figure out what a compound bow is and whether it is possible to make such a small weapon yourself. So, making a compound bow with your own hands is quite possible. For these purposes, different materials can be used, but suitable designs should be selected. The materials are closely related to each other, which will make the weapon more powerful and stronger.
It is worth saying that in ancient times the folding arch was made of wood, its components were horn inserts and grain, due to which such an arch was considered more powerful, in contrast to a simple wooden arch of the same length. The glued bow consisted of several layers, it was a very powerful hand. Arrows from a homemade composite bow fly much faster.
The advantages of a DIY folding recurve bow compared to the classic solid wood version are obvious. Despite its compact size, such a bow is much more powerful, more convenient and easier to shoot. It must be said that almost all sports bows used at the Olympic Games are made as compound bows.
How to strengthen a compound bow with your own hands and make it more powerful
If you are interested in how to make a compound bow with your own hands, we invite you to watch a video review on our portal. You will then see the fine details of the manufacturing process of this type of arch, which play an important role in its functionality.
Bow hunting
Due to its quality and properties, the bow is suitable for hunting birds and animals. But the following fact is of critical importance: the use of a bow (not just a compound bow, but such weapons in general) as a hunting tool is prohibited at the legislative level. It is not included in the lists of hunting weapons.
The use of a bow is allowed only for entertainment and sports purposes, subject to safety precautions.
- However, in fenced areas, training use for hunting purposes is allowed - with strict control of the actions by an experienced shooter and without the presence of unauthorized persons. The danger of a bow lies precisely in the fact that a mushroom picker or simply a lover of forest species is under the threat of a silent shot and the arrow itself.
- The bow is selected or made exclusively for yourself, otherwise posture and muscle function will be negatively affected.
- It is important to move slowly with a bow.
- If the arrow is inserted and the bowstring is pulled, it is never allowed to point the bow at a person.
- The shot (like releasing a bowstring) is done softly. To protect the hand and fingers, special gaiters are common - archer's gloves.
Hunting with a compound bow.
Onion making technology
To create a bow you can use the following materials:
- Wood. This is the most common option, allowing you to create your own bow model with excellent shooting characteristics.
- The cardboard is thick. It allows you not only to make a model of the arch, but also to make a compact working model. Of course, such an object will not be a weapon, but with its help you can understand the basics of how such a weapon works.
- PVC pipes. Some PVC pipes are thick enough to make a bow for target shooting.
- Skis. The top of the skis can be used as shoulders.
- Plywood. Having sufficient density, it can also be used to make shoulders.
Wood harvesting and processing
Since the classic bow model is made of wood, the features of making weapons from this material will be discussed below. In order for the final product to have truly high performance, several important conditions must be met:
- Wood harvesting is carried out on a cold frosty day. You should cut a large strong branch, the length of which reaches 180 cm. The diameter of the branch should be 10-12 cm. It is advisable to pay attention to growths and nodes - their number should be minimal.
- Do not remove the bark. The ends of the branches are coated with a special impregnation with oil or wood varnish.
- Place the piece vertically. In this state, it should dry for 2-3 months at a temperature of 20 to 28 degrees.
- Using a well-sharpened knife and a sharp ax, it is necessary to give the part a rectangular shape.
- Next, you should thoroughly steam the blades of the future onion, holding the workpiece over boiling water for 10-15 minutes. It is recommended to steam both shoulders at the same time.
- The steamed piece is placed in a slipway for two weeks. During this time, the bark should peel off on its own. If this does not happen, you need to carefully scrape it off with a sharp knife.
- The wood is treated with wax. After complete drying, it is necessary to make notches designed to fix the bowstring.
Now let's talk about each stage separately.
About wood structure
It is best to choose a rough piece of wood for birch, ash, hazel or oak bow
Before you make a hunting bow with your own hands, you need to understand the structure of the wood. If you do not take into account the characteristics of the material, it will not be possible to make a balanced weapon with sufficient power and reliability.
Taking a closer look at the workpiece, two types of wooden structures can be distinguished:
- Dark inner rings. This part of the plant is already dried. These areas are the hardest.
- The lighter layers are called sapwood. They are less dense and more elastic.
The surface of the bow that the archer is looking at is called the belly. It is this that compresses when the bowstring is pulled. The reverse is the back part of the bow that expands when fired.
For long-term use of the tool, it is necessary to create the perfect balance between old wood fibers and sapwood. Therefore, the arch must have a light “back” and an elastic “belly”, which will provide the necessary rigidity.
First stage
After the material has dried, you should begin work. First of all, you should carefully inspect the product. The part with the thinnest annual rings is selected for work. Very often we are talking about the north side. In this place the wood has a denser structure and therefore the arch will be sharper.
The piece is sawn or split in half. If the log is clumsy, it is best to saw it, as splitting can damage the piece.
After the longitudinal tearing of the workpiece, it should be kept suspended for some time. In this case, many craftsmen suspend the weight from the bottom edge of the product.
Forming a bow
When creating an arch, you must perform the following steps:
- First of all, mark the center of the part. The arrow will be placed here.
- We determine the dimensions of the handle by making the final markings.
- Now you can start preparing the onion base. To do this, remove excess layers of wood from the back of the weapon with a plane or knife. Gradually moving away from the handle to the sides, you should form the shoulders of the required thickness.
It is very important to ensure uniform shoulder flexion. To do this, remove the same amount of excess wood from them.
How to determine the optimal shoulder thickness?
The shoulders of the arch are the main element of the arch. Therefore, they should be handled as carefully as possible. For this, a special bowstring with many loops is used. They are located at a distance of 2-3 cm from each other.
At first it will be difficult to bend your shoulders. They should be checked against the outer loops of the bowstring. Gradually cutting off excess layers of wood, you should move on to the next rings, achieving a gradual increase in tension. This is done until your bow has the desired shape.
It is also very important to make sure that the back of the bow is curved evenly. It should be understood that even if you have achieved visual identity of the shoulders, they may still bend unevenly due to the different structure of the wood. Therefore, fine tuning is required. To do this, it is better to use a file, gradually grinding those areas of the structure where there is an uneven bend.
Sawing of knots must be done after the product has completely dried and finished. Otherwise, the structure may break, rendering it unsuitable for further use.
Even at the last stages of onion processing, tying must be done very carefully. To do this, it is recommended to use a well-sharpened knife. It is better to leave small protrusions, which are subsequently sealed with sandpaper. This way you can make a good homemade bow for hunting.
Making the handle
The finished handle can be coated with marine paint or stain
After approximately marking the handle, it is necessary to carefully study it. To do this, grab it with your hand and draw its borders. Next, you should cut out some kind of transition from the handle to the shoulders. It is best to cover the handle itself with soft cloth or leather, which will ensure ease of use.
What to make a bowstring from?
The following materials are suitable for making bowstrings:
- polypropylene rope;
- lavsan thread;
- fishing line;
- split leg;
- nylon or lace thread;
- nylon.
- a Kevlar climbing lanyard, which can be purchased at sporting goods stores;
Advice! For stronger ropes, it is best to use synthetic threads.
↑ Wood and its preparation
For a simple onion, almost any tree growing in central Russia is suitable.
Recommended:
- Juniper
- Hazel
- Birch
- Ash
- Oak
- Elm
Workpiece:
cut down the intended workpiece in winter, in frost (approx. 10-15 degrees).
The workpiece should not have large knots (growths, mechanical and thermal damage.
Length of the workpiece = onion length + 30 cm (15 cm on each side for cracks during drying, the occurrence of which is not excluded).
DO NOT REMOVE the bark from the resulting “log”!
Cover the ends of the workpiece with oil paint. The wood should dry evenly to avoid the appearance of internal defects in the material. If this is not done, the bow will not last long.
Dry the processed workpiece in a vertical position at room temperature. The air should not be too dry, otherwise the tree will dry out and the work will be in vain. Drying time 2-5 months, depending on conditions.
Advice: look for something to prepare before winter if you don’t want to climb through snowdrifts for several hours.
Primary processing
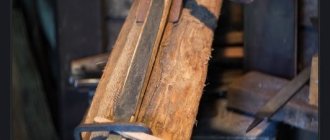
The resulting workpiece is a log (Fig. 1).
Fig.1
Our task is to get a board from this log (Fig. 2).
How to achieve this? There are several options, each of which is quite historical.
- Processing with an ax
- Using a saw
- By splitting using wedges (from harder wood).
Fig.2
The thickness of the board is equal to the width of the bow being made in the handle (for a Slavic bow about 3 cm).
After receiving the board we need, we need to mark it.
Visually check it for cross-layers and other defects. Based on the inspection results, make adjustments to the thickness of the bow at the location of the material defect (increase it).
Figure 3 shows the marking diagram.
Please note that we did not remove the bark from the workpiece. Don't damage the outside of your future bow!
Fig.3
The excess part is separated from the bow using an ax (rough work), and then a knife and plane (finish work). With this treatment you get the side profile of the bow.
After separating the onion, begin forming its frontal profile (Fig. 4).
Fig.4
The ratio of the width of the handle to the width of the end of the shoulder is approximately 3/2. Be extremely careful during these stages of work. It depends on the precision and accuracy of your work whether the arms of the bow will work equally evenly or one will be more elastic than the other. At these stages, the bow cannot be bent - this can lead to splitting of the workpiece and its damage.
The cross section of your bow will depend on the thickness of the log you have prepared. It can vary from lentil-shaped to almost rectangular.
Fig. 5 (sections of bows)
Steaming onions (final stage)
At this stage, the bend of the bow is formed. Some manufacturers resort to soaking the workpiece in various infusions and solutions. Wood treated with water vapor has all the properties we need.
Why, exactly, steam onions?
Here are a few reasons to be aware of the production process:
If the wood dries out during the drying process (therefore, it is not recommended to bend the onion before steaming).
In the case when your initial blank was not straight (which is not uncommon, and which is not something to be afraid of. The front profile of your weapon does not have to be straight at all. This will not affect the shooting efficiency in any way, except that it will be inconvenient for another person to use your weapon. The main thing is - convenient for you!)
If you are making a relatively short weapon (Slavic version 1 - 1.3 m).
If you intend to make a bow with a reverse arch.
In the case when you are making a “light” (for example, a gaming) bow.
In order to give an aesthetic appearance.
At the beginning of the stage, your workpiece represents the following
Fig.6
For example, you need to get a bend like this:
Fig.7
To do this, you need to steam the onion limbs (the steamed element becomes plastic and easily accepts the bend that you set. Steam the onion limb until you can easily bend it for captivity).
The following parts are steamed (shown in white).
Fig.8
It is best to steam at the same time, so that the onion shoulders dry simultaneously and evenly.
After steaming the shoulders, the bow is forced into a special slipway prepared in advance just for this bow.
Fig.9
Shown in black are the wooden blocks between which the “hot” bow is trapped. The number, shape and location of the clamping bars depends on the bow shape you want.
In such a slipway, the onions dry for up to 1 week. After this, it is removed from the stock, the ends of the bow are shaped for subsequent putting on of the bowstring (a place is prepared for the horn/bone tips or a “step” is simply cut out for the loop of the bowstring).
Please note that we did not remove the bark from the “back” of the onion! When steaming and capping in a slipway, part of the bark will peel off from the back of the onion. Separate it with your fingernail or a wooden knife. ATTENTION!
Do not damage the fibers on the back of the bow! If part of the bark remains, do not be upset, carefully sand it with sandpaper until smooth and your bow will acquire a decent appearance.
The onion is almost ready. For the longevity of the onion, it must be protected from drying out or moisture. If you adhere to the historical-reconstructive direction in your work, then I recommend soaking the onion with hot wax or melted fat (do not overdo it! Impregnation should be no more than 3 mm deep, otherwise the onion will lose its elasticity), otherwise you can use varnish or modern paints or mastics.
Decoration
A bow must first shoot well and only then look good. Therefore, you should wait a little with decoration. It's better to shoot and test the bow first.
It is possible that after a while you will have to make small changes. Its handle and griffins can be shaped using a sharp knife and small files.
Alternatively, leather tape or linen cord can be wrapped around the handle to disguise the gluing area. One of the decoration ideas is to make an original inscription on the shoulders.
Good. The wooden arch with your own hands is ready!
Barrel processing
So, where do you start making your own bow? From barrel processing. Below are the instructions.
The cut of the trunk should be cut with an ax so that it has straight cut ends, which should be painted with rubber paint. This will allow you to monitor the wood as it dries and possibly prevent cracking.
The trunk is then sawn in half. If there is any knot, the cut line should go through it. For this operation you will need 2 wedges and a hammer. You can use an ax as a wedge, but you should understand that the ax can be broken. One wedge is driven into the thicker end of the barrel.
When wood cracks, a second wedge is driven into the crack to free the first. These steps are repeated until two pieces of wood are obtained.
Note. If the barrel breaks asymmetrically, it should not be “straightened” under any circumstances. It is possible that one of the parts will no longer be good for anything and will have to be disposed of.
The bark is removed using a sharp ax (or another tool, such as a plane). Afterwards the tree is placed in a dry and cool place.
The main idea of these actions is to dry the wood slowly and evenly. In the notes of ancient masters it was written that the target humidity should be 10%. If there is nothing to measure this, then you just have to trust your instincts.
The above actions can be separated from each other even by a break of several days. There's no rush here. Drying should last at least 2 months.
After about 5 weeks, you can gradually move on to the next stage. The wood is still too wet, but removing any unnecessary excess will speed up the drying process a little.
If during this time the pieces of wood begin to become covered with white mold, you need to place them higher in a drier place so that they do not collect moisture from the ground. If cracks appear during drying, the wood should be moved to a cooler place. The reason for these unfavorable problems is the lack of bark on the trunk.
Note!
- Do-it-yourself compressor: selection of materials and tools for assembly at home + step-by-step instructions for making and assembling yourself
- Homemade products for the garage with your own hands: options for products for arranging a garage, detailed diagrams and drawings for creating with your own hands
- Do-it-yourself press - design features, choice of manufacturing materials. Step-by-step instructions for making it yourself + simple diagrams and drawings
Then the most beautiful piece of wood is selected. Now you can get to work. When creating a compound bow with your own hands, the steps may vary.
Bow Handle Design
The folding bow includes two brackets, which are secured with nuts on both sides. The handle should have two flat surfaces to support the shoulders, a place for the handle, and a shelf cut to allow the arrow to pass through. The handle should not bend (under any circumstances!) when using the bow! As long as the bow meets these three conditions, it doesn't matter what it looks like. Now is a good opportunity to show your creativity.
Start your arch design with a couple of sketches on a piece of paper. I made some sketches to scale to give you some ideas before drawing the handle at full size. The two poles I made were approximately 51cm and 46cm long. The putter shown on the left was constructed using one bolt securing the bow limb, while the one on the right was constructed using two bolts on each limb. Don't pay too much attention to this. Even after the bow is fully assembled, there are ways to change the angle, which increases the pulling force of the string. We'll come back to this later.
Then I made a handle from 5cm thick polystyrene foam. This is an optional step, but it may come in handy when carving the handle into wood later. Make a copy of your design so you have an original design to transfer onto the wood. Cut and glue the design onto the foam and cut it out with a knife or rasp. On a foam handle, you can choose a comfortable shape for the part that your hand will hold, adjust the curves before making a wooden handle. The foam model helped me a lot. I'm not very good at transferring a 3D image from my imagination to an airplane. Having a 3D model allowed me to adjust the design before making the wooden handle.
Making a bow handle
Depending on your desire and available materials, this stage can be short or long. I didn't have a piece of wood large enough to make the handle, so I glued it together from several pieces. This method will also allow you to color the pen. If you decide to use a block, give it the largest possible square section using a table saw, router, planer, and move on to the "Rough Cut Handle" step. If you want to make a glued grip out of several sticks, read on.
You will need several pieces of walnut, oak, or pecan wood. Take the time to “play” with them to create an interesting color combination of different types of wood. Using a table saw, cut selected pieces of wood the same width (along the grain). The width of the skis should be approximately 5mm wider than the widest part of the ski. In my case it was about 5 cm for both pairs of skis. The 5mm margin will be removed later with sandpaper. Now cut the boards to the desired length (across the grain).
For this I used a hand-held circular saw. Be careful, the boards were a little uneven. For good adhesion, it is important that the boards fit together as tightly as possible. If you have a plane or feeler, straighten the boards or sand them down onto a rectangular piece of wood.
Sources
- https://svoimirykami.guru/kak-sdelat-luk-svoimi-rukami/
- https://nowifi.ru/oruzhie/holodnoe/116-kak-sdelat-luk-svoimi-rukami.html
- https://clubsamodelok.ru/kak-sdelat-luk/
- https://www.nuemoe.ru/kak-sdelat-lyk-i-strely-v-domashnih-ysloviyah-145
- https://VashNozh.ru/luki/derevo-dlya-luka
- https://lukpro.com/masterskaya/kak_sdelat_moshnyj_luk_kak_sdelat_moshnyj_luk_svoimi_rukami/
- https://voin.guru/oruzhie/arbalety-i-luki/kak-sdelat-luk-svoimi-rukami/
- https://pohod-lifehack.ru/material-dlya-luka-luk-svoimi-rukami-10-chertezhej-razmery-i-shemy/
- https://ohota360.ru/samodelnyy-luk-dlya-okhoty.html
- https://www.freeseller.ru/4217-samodelnyy-razbornyy-luk-iz-lyzh.html
- https://kaksdelat.guru/kak-sdelat-luk/
- [https://megamaster.info/luk-svoimi-rukami/]
[collapse]
↑ Making fletching for an arrow
We think that everyone more or less understands what feathers on an arrow are needed for - to stabilize the flight, i.e.
so that during the flight the arrow flies exactly at the target, and not to the side, while also tumbling. Here we will talk in detail about how fletching is made and installed on an arrow... Feathers from a wide variety of birds can be used to fletch an arrow. Goose, turkey, turkey feathers, grouse, capercaillie, etc. It is important that the feather is strong enough, long (approx. 10 cm) and has a width of at least 3 cm. In European bows, the flight feathers of the left and right wings were used for arrows (in the East, tail feathers were also used).
There is no fundamental difference between the feathers of the right and left wings. However, it is important that one arrow has feathers from one wing (i.e. only from the right or only from the left wing). Goose feathers satisfy all our requirements (long, stiff and wide enough). In general, the choice of feathers for an arrow largely depends on what is easier to get in a particular region.
Based on our experience, we can say that we would not recommend using crow feathers, since they are very fragile (after several shots they will become frayed and the pile will break off, as a result of which the flight of the arrow will become difficult to predict), although it is worth noting that there are a lot of these feathers and they can be used for game arrows, since the lifespan of “toys” is short. So, let's assume that you have goose or any other suitable feathers, then we proceed directly to the process of making plumage.
You will need: a sharp knife, glue (Super Moment, PVA, etc.), thread and a needle.
In our case, the plumage will consist of three feathers, standing at an angle of 120 degrees to each other. The lead feather (one of three) should be parallel to the layers of wood on the shaft, so that the cut under the bowstring (perpendicular to the leading feather) is subsequently positioned perpendicular to the layers (this is done so that the loads arising during the shot are distributed throughout the shaft, and did not fall on a separate layer of wood).
There are other plumage options (one-, two-, four-feather).
Look at the feather. He has a core. On one side of the feather there is a pronounced groove in the center of the shaft. Place the pen in front of you with the groove facing up. Next, using a knife, carefully cut the feather along this groove.
You should have two parts. We will use a wider one. For the arrow we need three feathers.. If you are done, then continue further. With all three parts of the plumage, we do the following: we cut the feather shaft so that about 1 cm remains before the beginning of the pile (generally it is called differently). Next, we move to the end of the feather and find the place where the thickness of the shaft becomes less than 0.5-1 mm, and We also trim it there (we make sure that all our feathers are the same length). Then use scissors to cut approximately 0.5 cm from the end of the feather. pile (leaving the rod intact) - then there will be a rewind of the feathers. Done. Now we move on to installing the feathers on the shaft of our arrow. Take the feathers, place them on the shaft so that the thin ends of the feathers do not reach the end of the shaft by about 1 cm. We install the feathers so that we get 120 degree angles between the feathers. The next step is winding. To do this, holding the feathers with one hand, take the thread with the other hand and pass it under one of the feathers so that after you do this, the length of the missing end is approximately 10 cm.
Now, without cutting the thread, wind the feather shafts, turn to turn (the missing end of the thread will be useful for you to tie a knot later, so winding is done over this “tail”). It’s not scary if the angles between the feathers (120 degrees) get lost during winding; they can be easily corrected, say, in the middle of the rewinding process. After rewinding, we move on to the process of “sewing” the plumage to the shaft. To do this, take a thread about 40 cm long and not very thick.
We insert the thread into the needle, but do not tie a knot, but sew “in one thread.” Next, we tie one end of the thread to any feather at the base, where the rewind ends. We begin to sew the feathers along the entire length in increments of about 1 cm, but so as not to disturb the texture of the feather if possible (do not break the fibers). Keep in mind that the term "feather sewing" refers to the process of attaching the feathers by passing a needle and thread through the feather's nap at the shaft.
When the process is completed, we use the remaining thread to secure the feathers at the far (thin) end of the feather in a “pile” (i.e., without trying to put the turn to the turn). Using the type of our first rewind, we secure the feather at the back (when the feathers are sewn on, you can straighten them, because during the sewing process they will bend into a spiral, but do not try to give the feathers a perfectly straight shape, this is useless and unnecessary).
Now everything that happened (feathers, windings) needs to be lightly glued with glue to the shaft (try not to get glue on the pile itself, otherwise it will simply break when shooting in these places). Done. Then the last phase is shaping the plumage.
Keep in mind that large dimensions of the tail (length, width) allow the arrow to be better stabilized in flight, but they dampen its flight speed more, correspondingly reducing the firing range. A feather that is too wide will fray more on the bow and can injure the shooter's hand.
Due to its structure, the pile of the flight feather bends along the edge. So, find the place where this bend begins - this will be the maximum height of your feather. Based on this, shape your plumage. There are many varieties of plumage forms, but within the scope of this article
there is no opportunity to consider them in detail. We recommend starting with a simple conical shape of the feather, expanding in the direction from the tip to the heel of the arrow, like rocket stabilizers. You did everything right and you like it. This is great, but if not, don’t be discouraged, everything will come with experience.
Now make a cut in the “heel” of the arrow (this is the name of the place where the arrow is inserted into the bowstring), first lightly with a metal file, and then with a rectangular file. The cut should go perpendicular to the leading feather (see above). The depth of the cut should be within 8-10mm. and width 2.5-3 mm. We recommend rounding the bottom of the cut (grinding off corners and burrs) in order to reduce the risk of the arrow splitting.