How to disassemble a Makarov air pistol: device, steps, diagram
And one more article about the pneumatic Makarov. Every self-respecting company is engaged in the production of this legend of the domestic arms industry in pneumatic design. The main representatives on the market are Umarex, KWC (and other Taiwan) and our domestic one from IzhMech. Today we will look at how to properly “dismember” the MP-654k, i.e. how to disassemble a Makarov air pistol.
Device
The pneumatic replica is produced on the basis of the original combat pistol, with many parts and mechanisms remaining unchanged. Therefore, the design of the Makarov air pistol largely coincides with the original. Before you climb inside, I suggest you look at the interactive diagram of how the combat PM works:
PM operation scheme. Click "DEVICE" to get started
PM Information Poster (click to enlarge)
Now let’s apply diagrams of the pneumatic Makarov. A little different, but overall still the same.
Diagram of the Makarov MP-654k air pistol (general structure and magazine)
Key points about the design of this Makarov:
- The general diagram of all mechanisms of the pneumatic Makarov is shown in the figure above.
- The bullet is ejected from the barrel due to the energy of the compressed gas of the cartridge located in the magazine. The gas portion per shot is cut off due to the operation of the firing mechanism.
- The bullets are fed to the barrel line by a spring in the magazine.
- The USM allows firing by self-cocking or pre-cocking.
- The safety is located on the left side of the bolt. When switched to the safety mode, the trigger is released safely without firing a shot, ensuring that the trigger does not hit the firing pin.
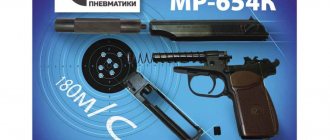
- The gun can use two types of cans - 7 g. (when using the supplied adapter) and 12 g.
Preparing the gun for use
Initially, you need to load the magazine with balls and screw a CO2 cylinder into it (see the section “device and design diagram of the pistol”). The loaded magazine is inserted into the handle until it stops, and the safety is moved parallel to the barrel of the pistol.
To minimize walking around with a loaded weapon, the target must be prepared in advance. Shots should be fired only towards the target, making sure that there are no people in the direction of shooting
Before transportation, the pistol must be unloaded - to do this, you need to finish shooting the remaining balls in the magazine and carefully unscrew the cylinder with the remaining gas
Incomplete disassembly
A pistol, like a combat pistol, allows for partial and complete disassembly. Incomplete disassembly on this version is used mainly for “training” in handling the combat model. Due to the “pneumatic” nature of the pistol in the field, incomplete disassembly can be reduced due to the absence of the need to check the chambered cartridge. Basic moments:
- Pull out the magazine
- Pull the trigger guard down
- Separate the shutter
- Remove the return spring
Complete disassembly
In case of serious contamination, “bathing”, tuning or breakdown (for example, the mainspring flying out), the Makarov air pistol is completely disassembled. Disassembly is usually carried out before a breakdown is identified, so many steps can be skipped. For a complete understanding of the process, the following video is offered:
Below we present only the basic procedure for disassembling a pistol. To study it, it’s better to watch the video above, here is just an eerie semblance of a reminder. So, what and why to shoot.
Incomplete disassembly
- Shop
- Gate
- Return spring
Gate
- Fuse
- Drummer
Frame (numbering according to the device diagram)
- Handle screw (11)
- Lever
- Gate valve (12)
- Mainspring (10)
- Sear (7)
- Shutter lag
- Trigger (9)
- Traction (5)
- Trigger (14)
- Trigger guard
- Barrel (3)
- Barrel nut
Shop
- Clamp screw
- Store head
- Spring
- Valve
Assembly of the Makarov air pistol is carried out in the reverse order. In terms of disassembly, the MP-654k is not a complex pneumatic product, so you can simply make do with common sense and available tools. We study, use and enjoy. And may your weapon last as long as possible.
Service addresses
The first service center is located near the Tekstilshchiki metro station (South-Eastern Administrative District):
The workshop is located in Moscow, within walking distance from the Tekstilshchiki metro station (about 2-3 minutes on foot). Also, the nearest stations to us are Volzhskaya, Kuzminki, Tekstilshchiki and Pechatniki. There is free parking on site at the store.
Exact address: st. Lyublinskaya, building 9, building 3. Before arriving, be sure to coordinate the time of your visit by calling 8 . If you arrive without calling, there is a chance that you will not get into the workshop, and the likelihood of urgent repairs also decreases.
Driving directions to the workshop:
A stone's throw:
- from Tekstilshchiki metro station - 350 meters;
- TsMD Tekstilshchiki station - 520 meters.
You can also get to the workshop by bus:
- From Tekstilshchiki TsMD station: bus 234 - 1 stop;
- From Ugreshskaya metro station: buses M89, T38 - 3 stops;
- From Kuzminki metro station: bus 99 - 4 stops, bus 159 - 6 stops;
- From Volgogradsky Prospekt metro station: bus 99, trolleybus 27 - 4 stops;
- From Pechatniki metro station: buses 161, 193 - 4 stops.
The second service center for repairing pneumatics is located near the Molodezhnaya metro station (JSC):
Telephone:
Working hours : Mon-Sun, from 10:00 to 20:00
Workshop address: Moscow, Yartsevskaya st., 4 (Molodezhnaya metro station)
Before arriving, be sure to agree on a time for your visit by phone. If you arrive without calling, there is a chance that you will not get into the workshop, and the likelihood of urgent repairs also decreases.
Driving directions to the workshop:
How to get to the workshop (5-10 minutes by public transport):
- From Molodezhnaya metro station: bus 794, minibus Auchan-7 - 1 stop, buses 73, 127, 464, 825, minibus 597 - 2 stops, bus 127B - 3 stops
- From the railway station Rabochy Poselok: bus 127B - 2 stops, bus 73 - 3 stops
- From the railway station Setun: buses 794, 794K - 3 stops
- From Kuntsevskaya metro station: bus 58 - 8 stops
Air guns - practical tips for repairs
No matter what margin of safety the designers put into the mechanism they created, breakdowns of individual samples are inevitable. This largely applies to air guns. Rifle pneumatics are much less reliable than combat-style mechanics - the circuit, saturated with valves and o-rings, is susceptible to various types of failures.
Let's consider ways to independently troubleshoot problems in popular weight and size pneumatic copies of Makarov and Tokarev pistols (PM and TT)
Defects of a gas cylinder gun (CO2)
The structure for diagnosing a non-working sample is standard - first you need to determine the problem, and only after that begin to eliminate it. The method of “disassembling the gun completely, and then you’ll see” is not suitable. The fault detection steps for various causes are as follows:
- poisons gas from the cylinder - check the place where the gas is released from the magazine by immersing it in a container of water (preferably with alcohol, so that it evaporates faster). After this, the leak will be easily visible visually. The repair will consist of replacing the rubber seals at the sealing point of the cylinder and the pneumatic chamber;
- low bullet speed - look to see if the barrel gasket is damaged. The problem is often solved by replacing it;
- balls sticking into each other when shooting or they fly out of the barrel in pairs - the problem may lie in a deformed barrel gasket or a magazine spring that is too powerful;
- The trigger mechanism does not work - shake the gun in a quiet room. If an extraneous sound is heard from inside, similar to the knocking of metal fragments, it means that the parts are broken and need to be replaced (including the spring);
- the cylinder is enough for a small number of shots - listen to see if the cylinder hisses (whether the gas is released). Place a drop of alcohol on the rubber seals in the gun - if gas escapes, the gaskets must be replaced;
- visual damage - finding chips, cracks and shifts of sighting devices.
Price list with prices for Borner repairs:
- Diagnostics of technical condition from 150 rub.
- Installation of a swivel from 300 rub.
- Replacing the front sight on rifles from 300 rubles.
- Cleaning and lubrication of the gun from 200 rubles.
- Cleaning and lubricating the rifle from 400 rubles.
- Minor repairs of pistols from 200 rubles.
- Stock replacement from 400 rub.
- Sighting from 250 rub.
- Minor rifle repairs from 500 rubles.
- Replacement of a screw, gas spring from 1000 rubles.
- Power boost from 500 rub.
- Replacement of piston cuff from 800 rub.
- Replacement of a set of gaskets from 400 rubles.
- Replacement of gearbox, valve needle for PCP from 1200 rub.
- Repair, assembly of USM from 500 rub.
- Re-preservation of pneumatics from 800 rub.
- Installation of optical and collimator sights from 400 rubles.
- Replacement of gaskets in CO2 guns from 450 rubles.
- Adjustment and repair of the store from 1200 rubles.
- Repair of USM pneumatics and all types of pistols from RUB 1,500.
- Elimination of undershooting and sticking (pistol) from 1500 rub.
- Optical sight zeroing (according to LHP) 10m from 800 rub.
- Gun cleaning from RUB 1,150.
- Removing stuck bullets from RUB 900.
- Measurement of bullet departure speed from 150 rubles.
- Enlargement of the passage pupil RUB 1,600.
The site lists only a small part of the work that we perform daily. The exact cost depends on many factors: how complex the breakdown is, whether this part is in stock or needs to be ordered, on the complexity of the design and condition of the weapon, etc.
Cleaning and lubrication - general recommendations
Umarex Airgun Cleaning Kit
When disassembling the pistol, you must follow the manufacturer's instructions specified in the weapon's passport. Cleaning and lubrication is carried out in several stages:
- wiping the barrel with a piece of oily rag on a cleaning rod until foreign deposits are completely removed (especially lead when using lead shot - 4.5 mm or “00”). Finally, the remaining lubricant is wiped dry with a cloth;
- lubrication of the trigger mechanism (trigger mechanism) . In practice, this is conveniently done by adding a drop of oil on top of the moving parts, after which it is advisable to fire several blank shots. The trigger should not be completely disassembled unless necessary;
- removing excess traces of oil from the surface of the gun without wiping it dry. This will allow the oil to form a thin film that protects the metal surface from corrosion.
Now let's look at specific tips for correcting breakdowns and defects of popular air pistols - heavy-duty clones of well-known firearms.
Targets for shooting and training with air guns in A4 format can be viewed here. Choose between concentric circles and silhouettes.
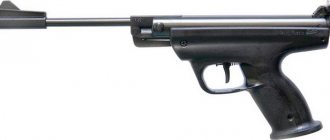
Technical characteristics of PM49
| Characteristic | Parameter |
| Caliber | 4.5 mm |
| Shot source | CO2 gas cartridge |
| Ammunition | Copper-plated balls |
| Trunk | Metal, no rifling |
| Bullet speed | 125 m/s |
| Shots per cylinder | 60 |
| Number of cartridges in the magazine | 17 pieces |
| Shot strength | No more than 3 Joules |
| Material of manufacture | Aluminium alloy |
| Blowback system | absent |
| Weight | 0.65 kg |
| total length | 16.5 cm |
This is a classic design of a short-barreled pistol, where a CO2 gas cylinder is used as the source of the shot. Shoots copper-plated steel balls with a caliber of 4.5 mm. It is almost completely similar to the Makarov combat pistol. Manufactured in Taiwan under license from Borner.
Pneumatics are used for entertainment and shooting at short (no more than 15 m) distances. But due to its similarity with combat PM, it can also be used for self-defense purposes - if a conflict arises, an ordinary person will not be able to determine whether it is a real pistol or a pneumatic one. Due to its low power, the bullet will not cause serious harm (only if it hits the eye), especially if the attacker is wearing thick clothing, but the weapon has a psychological effect.
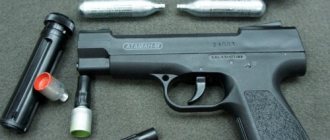
The operating principle of the pistol is simple. It contains an air chamber into which part of the gas enters when the can is pierced with a needle, and a bypass valve with a rod, which is hit by the trigger when the sear breaks. The gas mechanism is connected to the barrel with a plastic attachment (this is the only plastic element in the pistol). The charging chamber is connected to the magazine. From the chamber, the bullet is fed into the barrel by the needle of the bypass valve when the trigger hits the gas valve rod.
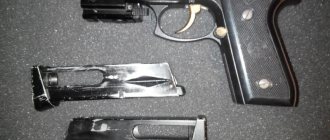
The magazine for loading bullets is removed after pressing the button, which is a design element of the clip. There are no buttons or flags directly on the pistol body for this. The magazine holds 17 copper-plated steel balls with a caliber of 4.5 mm.
After installing a magazine loaded with bullets and a gas can into the handle (clamped with a hexagon, which is included in the package), the gun is ready for use.
To prevent unexpected shots, a manual safety is installed; its lever is similar to a combat pistol. It is located on the right side of the body. The firing mechanism is cocked by pressing the trigger or pulling the trigger on the rear of the bolt.
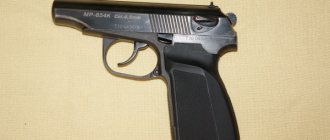
Repair of air pistol MP 654K
This sample is a domestic pneumatic version of the Makarov pistol. Its design is reminiscent of the original combat model, but is radically different in the elements of the gas cylinder system used.
Sights
The MP 654K model has non-adjustable sights - they are structurally part of the bolt frame.
Trigger mechanism
The main problem with the gun is that individual parts break when the ball gets inside the body. Despite the apparent strength, the load on the metal of the trigger when the spring is unclamped is very significant. Correction of the malfunction is achieved by complete disassembly and replacement of parts with new ones.
Shop
If the problem is eliminating gas leaks from the cylinder, it is necessary to replace the seals where it contacts the gun body. To change the spring stiffness, you can stretch it (this will help for a short time, at most until you buy a new one), or better yet, replace it.
A strong spring can be shortened, but this should be done gradually so as not to remove excess turns.
Air valve
You should pay attention to two aspects - replacing the spring and the valve itself. You have to buy a new spring when it becomes corroded (very rarely), while a worn valve is often replaced with a new one from the spare parts kit.
Repair of air pistol PM 49
Another popular pneumatic “clone” of the Makarov pistol was released by a Chinese manufacturer. Despite its ease of use and good accuracy, the model is less reliable and more difficult to maintain than the Izhevsk system.
Sights
As in the original, you can only ruin the sights on a pistol with a huge amount of bad luck. Repair still involves welding (or soldering) and finishing with a file.
Trigger mechanism
Another difference between the Chinese version of the “pneumatic PM” is the presence of a large number of parts and mounting screws. To replace trigger elements or even remove a ball that has rolled into it, you will have to go through a disassembly procedure that is tedious for beginners.
A visual guide to disassembling and assembling the PM 49 is here:
Shop
The main problem is usually not that the spring is too strong or weak, but that the seals are not tight enough. After finding the leak, you can start replacing the gaskets (they can be difficult to find on sale, you have to cut them out yourself). To reduce the load on the seals and prevent their premature failure, it is recommended to wipe the bottle neck before use with a rag soaked in silicone oil.
Air valve
Unlike the MP 654K, the PM 49 model does not have high strength components and gaskets fixed in the grooves.
Replacing the mainspring
Since replacing a part requires complete disassembly, do it on a light-colored material (a piece of sheet or towel). It is advisable to use a separate blanket for such purposes - this way you can avoid accidental loss of screws or small parts.
A video review of the Ataman air rifle can be viewed here. Reviews of all rifle modifications and their characteristics.
Air gun store ReZon.by - advice from an experienced
There are a number of difficulties that can be avoided by following simple rules:
1. The barrel should be cleaned with a rod with a diameter of less than 4 mm, first wrapped in gauze or rags.
2. Do not use force when screwing in screws or installing pins.
3. Installation of the magazine into the pistol occurs smoothly. Glacier PM is a pneumatic weapon that has copper elements at the base of the barrel that deform under pressure.
Today, pneumatics from Gletscher in Minsk, Grodno and other cities of Belarus are in demand due to their high quality and ease of operation. The service life of the product depends on the owner; it can be extended subject to compliance with the operating rules. If components fail, repairs should be entrusted to a professional.
Source
Repair of TT air pistol
A rather interesting and structurally complex development is the pneumatic version of the TT pistol. Its design ensures reliable operation of the gas system, which, if necessary, will be quite problematic to repair.
Sights
TT sights - rear sight and front sight
The rear sight and front sight of the pneumatic “analogue” of the Tula Tokarev are unregulated and can be repaired in the same way as in the Makarov pistol. The maximum that you can do yourself is to correct the slot in the rear sight with a needle file, moving the middle point of impact. This operation is not recommended for beginners, at least after a couple of thousand shots, when the shooter knows all the intricacies of his weapon.
Trigger mechanism
A distinctive feature of the pistol is the small number of moving parts and the absence of a powerful mainspring, so breakdown of the trigger mechanism is extremely unlikely.
You can see how the USM works in the video:
Shop
The original scheme, according to which the magazine is arranged separately from the gas supply system, reduces the adjustment and repair of the magazine to replacing the supply spring. The tightness of the cylinder puncture unit usually does not cause any complaints, and therefore requires only periodic visual inspection.
Air valve
The differences between the pneumatic TT and the much-loved PM model lie in the widespread use of pins and screws. To get to any part of the pistol, you must disassemble the bolt group or handle .
Replacing the mainspring
Since there is no powerful mainspring on the pistol, the repair consists of replacing one of two simple springs (see video about the operation of the trigger). Complete disassembly of a pneumatic TT is too difficult for novice users. If you suspect a serious breakdown, the best solution is to contact a repair center.
Repair stages:
- 1. Call the service center or write to us by email. Describe the problem, indicate the model of your rifle or pistol.
- 2. The technician will advise you on the approximate cost of repairing Borner and invite you to the service center.
- 3. In the workshop, after diagnostics, the exact price and timing of the work will be announced. Which agree with you.
- 4. After completing the work, the master will contact you and you can take your air gun home.
Pneumatic Makarov pistol Borner PM 49 and its complete disassembly/assembly
To completely disassemble a product such as a pneumatic PM, follow the step-by-step instructions:
1. Unscrew the Borner PM clamping screw with a hex key.
2. Take a Phillips screwdriver and unscrew the 8 screws of the PM 49 pneumatic housing. 7 are located on the right side of the pneumatic, and one, the longest, is under the barrel.
3. Take a flathead screwdriver and remove the barrel plug that is firmly in place.
4. The body of the Makarov Borner PM 49 air pistol consists of two parts. Once they are not fixed by anything, you can separate them.
5. Separately, I would like to note the story with the trigger rod, which flies off immediately after the parts of the pistol are separated. When assembling the PM 49 pistol, install it as shown in the photo.
6. During further disassembly and removal of the trigger, pay attention to how it is installed relative to the pistol barrel. When you remove it, the trigger spring immediately flies out of place.
7. Remove the trigger guard and trigger spring.
8. Remove the pistol trigger and the part with the spring that supports it.
9. Remove the barrel and gas chamber of the Borner PM 49 air pistol.
10. Unscrew the screw, remove the silumin part inside the housing that secures the weapon safety and remove it. Be careful not to lose the gasket that is located between the safety and the outside of the gun body.
Air gun Glatcher PM - replacement of insulating gaskets
After completely disassembling the Gletcher product and lubricating it, we replace the damaged insulating gaskets.
1. Use a flat-head screwdriver to open the airgun magazine by turning the screw located at the end counterclockwise.
2. Take out the valve seat, take out the valve and spring.
3. The insulating gaskets placed in the gas chamber are interchangeable. If you don’t have a repair kit, you should soak the multi-colored rings in neutral oil.
4. Well-maintained pneumatics purchased in Minsk or another city will last a long time. Assembly is carried out in reverse order.
Dismantling and repair of PM49 pneumatics
To disassemble a product such as the Makarov Borner PM 49 air pistol, you will need:
1. Phillips screwdriver.
2. Flat head screwdriver.
Determine the working space, prepare the box so as not to lose important parts of the pneumatics. So that nothing interferes with the further procedure, remove the PM49 magazine, and then remove the plastic cheeks of the Makarov pistol. Do not break the fixing tendrils, after removing them there should be four left - 2 on top, 2 on bottom.
Pneumatic Makarov pistol Borner PM 49 and its complete disassembly/assembly
To completely disassemble a product such as a pneumatic PM, follow the step-by-step instructions:
1. Unscrew the Borner PM clamping screw with a hex key.
2. Take a Phillips screwdriver and unscrew the 8 screws of the PM 49 pneumatic housing. 7 are located on the right side of the pneumatic, and one, the longest, is under the barrel.
3. Take a flathead screwdriver and remove the barrel plug that is firmly in place.
4. The body of the Makarov Borner PM 49 air pistol consists of two parts. Once they are not fixed by anything, you can separate them.
5. Separately, I would like to note the story with the trigger rod, which flies off immediately after the parts of the pistol are separated. When assembling the PM 49 pistol, install it as shown in the photo.
6. During further disassembly and removal of the trigger, pay attention to how it is installed relative to the pistol barrel. When you remove it, the trigger spring immediately flies out of place.
7. Remove the trigger guard and trigger spring.
8. Remove the pistol trigger and the part with the spring that supports it.
9. Remove the barrel and gas chamber of the Borner PM 49 air pistol.
10. Unscrew the screw, remove the silumin part inside the housing that secures the weapon safety and remove it. Be careful not to lose the gasket that is located between the safety and the outside of the gun body.
Replacing the valve of the pm x borner air gun
Disassembling the Borner Sport 704 air revolver is very simple if you have all the tools necessary for this, namely a Phillips screwdriver of the right size. We will look for a gas chamber to carry out repairs.
1. Remove the plastic handle that hides the cylinder and the clamping screw.
2. Carefully remove the second part of the handle. You will have to pry it a little with your fingers to get it out of the grooves.
3. Do not lose the gun clamp screw. It may fall out during disassembly.
4. Unscrew the screws securing the metal cover of the housing. One of them holds a drum.
5. Remove the revolver drum; it can be easily removed, after which it can be disassembled into two parts.
When assembling the revolver, insert the drum into the hole indicated in the photo below.
6. Remove the Borner 704 metal spring trigger.
7. Carefully pry and remove the revolver trigger mechanism. Do not lose the springs if an accident occurs, the photo below will help you make the correct assembly.
8. Now you can remove the Borner 704 gas chamber. You will need to unscrew one screw, indicated by the red arrow. The procedure for removing the valve is very simple, the main thing is not to make sudden movements so that other parts do not fall off or the silumin does not burst.
Now we have the pistol chamber in our hands, so we can begin to eliminate the pneumatic defect.
Gas poisoning in the Borner Sport 704 revolver - replacing the gas chamber o-rings
A repair kit with o-rings will allow you to eliminate the gas leakage defect of the revolver. To replace it, you need to disassemble the gas chamber.
1. Unscrew the valve seat (gold color).
2. Remove all components of the pneumatic valve.
The photo below shows the sequence of installation of parts for those who are confused or lost the spare parts. If you don't know which gasket needs to be replaced, replace the entire repair kit.