- March 26, 2020
- Weapons and ammunition
- Ivan Gresko
Your blowgun will last longer, and the shot power will remain stable, if you properly care for it, namely, clean and lubricate it on time. This explains why the question of how to disassemble an air rifle is one of the pressing questions for owners of blowguns. And this is not surprising, since it is not possible to clean and lubricate without disassembling. Information on how to disassemble an air rifle is presented in this article.
Everything about (GP) gas springs for air rifles.
- March 26, 2020
- Weapons and ammunition
- Ivan Gresko
Your blowgun will last longer, and the shot power will remain stable, if you properly care for it, namely, clean and lubricate it on time. This explains why the question of how to disassemble an air rifle is one of the pressing questions for owners of blowguns. And this is not surprising, since it is not possible to clean and lubricate without disassembling. Information on how to disassemble an air rifle is presented in this article.
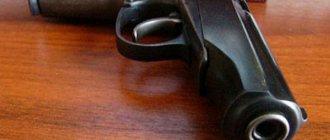
Incomplete disassembly
You can disassemble both a combat and non-combat pistol. Partial disassembly is carried out in order to “practice” in handling the weapon. The time for incomplete disassembly in the field can be reduced, since there is no need to check the loaded cartridge.
In practice, to service and care for the weapon, it is sufficient to carry out partial disassembly. Complete “dismemberment” must be done every 5 thousand shots to eliminate accumulated dirt.
Be sure to check the instructions for disassembling the weapon.
What should be done:
- Press the latch at the bottom of the handle and pull out the magazine.
- Remove the safety from the weapon.
- Lower the trigger guard down.
- Lift the back of the bolt up and pull it back.
- Remove the shutter from the frame.
- Remove the return spring.
Partial disassembly completed.
What tools might you need?
Before you begin the disassembly procedure, stock up on the following:
- Phillips screwdriver.
- With a hammer.
- A drift with a diameter of 0.4 cm. If you don’t have one, use a nail. It will be most convenient for you to work with a “hundredth”.
- Wooden plank.
- An empty box. You will put small parts in it so that they do not get lost.
If all the necessary tools are prepared, but you do not know how to disassemble an air rifle, follow a certain algorithm of actions.
Complete disassembly
If a Makarov air pistol is seriously dirty, dropped into water, broken, or subject to tuning, it must be completely disassembled. You can do complete disassembly of the MP-654K yourself if you have physically strong fingers. Otherwise, you simply won’t be able to collect weapons later.
Disassembly should be carried out on a clean white cloth, so you will notice the dropped components of the weapon and prevent their loss.
Procedure:
- Perform partial disassembly of the pistol.
- Then slide the cheeks back to remove the CO2 cylinder; pull it out of the handle.
- Remove the covers and set aside.
- Using a Phillips screwdriver, remove the screws that hold the two halves of the case together.
- Open the case, making sure that the components of the firing mechanism do not get lost.
- Remove the rod, remove the spring-loaded trigger, and move the guard to the side.
- Remove the barrel connecting to the gas valve. The green gasket is pressed with a special nut. Used to seal the gas valve assembly. In addition, it does not allow the gas to evaporate. If the cylinder is punctured and gas escapes, this means that the gasket is faulty and needs to be replaced. In this situation, you will have to change the o-rings. The repair kit includes all the necessary parts for the gun. When ordering replacement parts, please specify which model requires them.
- Carefully and carefully unscrew the impact mechanism, you will see the first ring that needs to be replaced.
- Unscrew the nut that presses the gasket in the gas block. Use tweezers or an awl to remove it.
- Replace the gasket and tighten the nut again.
Remember - the O-rings that you installed must be lubricated with silicone paint. This must be done with extreme care.
Replacing the bypass
The optimal bypass in an airgun is equivalent to 3.2 mm. If this indicator is lower, then maximum pressure occurs earlier and lasts slightly longer. As a result, the bullet accelerates very slowly and sluggishly. The wide bypass ensures maximum pressure later. This provides a short and sluggish bullet acceleration.
Bypass seal for Hatsan 125:
Replacing the bypass is due to the need to optimize the operation of the rifle. In this case, you can also resort to directly reducing the bypass volume or optimizing the cross-sectional diameter of the barrel gasket.
About dismantling IZH-38. Work progress
Before disassembling the IZH-38 air rifle, make sure that it is unloaded. Close the muzzle against the board to prevent cuff wear and fire a blank shot. Afterwards, you can safely proceed directly to the procedure itself. How to disassemble an air rifle? To do this, you first need to disconnect the iron, which is attached to the stock with three screws (two side and one near the trigger). Next, unscrew the two screws, remove the barrel and rod, slightly pressing the fuse to do this. Then, using a punch, the locking pin is knocked out. To prevent the block from flying out and injuring you, do not remove the punch, but press the block against the board and press on the cylinder. When it moves down, turn it slightly so that the spring pushes the pad out. Then remove the trigger, spring, guide and piston. When the air rifle is disassembled, first carefully inspect all its components. If no defects are found, the “oven” is cleaned and lubricated. Assembly is performed in reverse order. To do this, return the piston and spring along with the guide to their original place. After this, the trigger block is pushed in, and a hole for the pin is found on the trigger using a punch. At the end, return the safety lever to its original position.
Air rifle IZH 38 - characteristics, price
Technical characteristics of the IZH-38 aerial vehicle
The idea of recreating a training rifle for practical shooting exercises in closed spaces in the mid-30s - early 40s was embodied in the form of a spring-piston rifle PRSM. A little later it was replaced by the IZH-22 rifle, which became widespread in sports shooting sections and shooting ranges.
But the most popular and technically advanced at that time was the IZH-38 air rifle, serial production of which began in 1980.
| Characteristic | Parameter |
| Caliber | 4.5 mm |
| Overall length of weapon | 1050 mm |
| Barrel length | 460 mm |
| Barrel type | forged steel threaded |
| Ammunition type | lead bullets caliber 4.5-4.52 mm |
| Magazine capacity | 1 |
| Shot speed | up to 150 m/s (standard) from 180 ms (after modernization) |
| Rate of fire | 3-4 shots per minute |
| Power | 7.5 J |
| Piston stroke | 62 mm |
| Aim | front sight rear sight, milled grooves for installation of optics in some models of 1991-1993 |
| Energy source | twisted steel spring |
| Weight | 2800 grams |
Rifle equipment
The caliber of the 4.5 mm weapon complies with the international standard .177. One of the reasons for the approval of this particular standard was the availability of equipment for the production of ammunition of this caliber.
Why caliber 4.5
It is noteworthy that it was originally planned to equip the rifles with a 4 mm caliber to fire copper-plated steel balls or lead bullets. This caliber was favored by engineers familiar with the technologies of German gunsmiths, in particular the developers of the Suhl 311 rifle, with a magazine type with a magazine capacity of 10 balls of 4.0 mm caliber.
But supporters of the 4.5 mm caliber prevailed, in whose argumentation the technology for manufacturing rifled barrels of small calibers was a big plus.
What trunk
The barrel of the IZH 22 Vostok rifle was used as a prototype barrel. And here again there were conflicts. Almost all versions of the 38 series rifles available today are equipped with a barrel with 12 rifling. But during the development of the prototype, options for using a barrel with 6 and even 18 rifling were explored.
The first barrel with 6 rifling could not show the high speed of the bullet; it accelerated to a maximum of 107 ms, which was not enough for the characteristics of a training weapon.
The 18-groove barrel proved too expensive to manufacture and unreliable in practice. Passing through the bore, the bullet lost speed, which is why the flight range was insignificant, and the use of light Diabolo-type bullets led to the fact that a lead coating quickly formed in the bore.
Thus, for the final approval of the production model, the rifle received a forged barrel with a diameter of 13 mm with a brass rail with 12 grooves.
Receiver
The receiver with a piston mechanism was originally planned to be milled from a solid metal billet. But after a series of works, it was decided to switch to a tubular system.
In the same way, it was decided to replace the piston assembly with the cocking mechanism from an all-metal to a welded structure. Here they began to use stamping and spot welding instead of expensive turning and milling. This approach made it possible to reduce the cost of production by almost a third.
Fracture node
The fracture assembly with fixation was initially made of metal, although the option of using rigid plastic was considered.
Fuse
The rifle in all modifications does not have a safety lock. There is a safety device only against unauthorized release during loading. There is no safety lock for the case when the rifle is loaded.
Bed
For IZH-38 rifles, the stock was produced in two versions - synthetic and wooden. The synthetic stock had two cavities inside - in the bend area and directly in the butt. The butt back is non-removable.
The wooden stock and butt had no side notches, while the plastic stock had several variants of notches on the side surfaces - from parallel lines-protrusions to matte roughness.
Blueing was applied to the outer surfaces of the receiver, barrel and parts of the cocking and trigger mechanism. Compressor springs were made of monolithic steel wire; only in the period 1992-1993 were small batches equipped with a twisted spring made of twisted wire.
As standard, the rifle included, in addition to cardboard packaging, the following:
- Spare cuff and rubber rings;
- Compressor coil spring;
- Ramrod;
- Operating instructions and warranty card.
Design features
The IZH-38 air rifle belongs to the classic type of single-shot spring-piston rifles:
- Cocking is carried out by breaking the barrel, when by pushing the barrel down the locking mechanism is activated and the breech is opened, and by means of levers the cylinder piston is retracted to the rearmost position and the spring is compressed. This scheme does not allow the rifle to be multi-shot; each shot requires reloading the rifle by breaking the barrel. The piston group uses a complexly shaped leather cuff to increase the degree of air compression in the cylinder. Therefore, technical specifications depend on the condition and quality of the cuff. The cuff life is from 1500 to 3000 shots.
- The piston stroke of the rifle, depending on the production period, is 51-58 mm. Piston diameter 24.1-25.1 mm. The bypass from the compressor to the breech is carried out through a standard hole with a rubber seal, coaxially aligned with the axis of the barrel bore.
- Lever type release device. When cocking a rifle by breaking the barrel, the piston is retracted to the rearmost position using articulated levers. The spring is compressed, and the piston is fixed by a sear, the front part of which fits into the piston hooks, and the back part rests on the cutout of the trigger. When you press the trigger, the sear is pressed up, at the same time the front part moves down and releases the hooks on the piston body. Having gained freedom, the piston is pushed forward under the action of the mainspring. The air in the compressor cylinder is compressed and pushed through the bypass window into the chamber with the bullet in the barrel bore.
Removing bullets from the barrel
Bullets stuck in the barrel of a weapon during shooting must be removed as soon as possible. Otherwise, further use may result in the rifle being damaged.
The optimal bullet removal technique will depend on the depth of its penetration. If it is not too far away, then you can try to solve this issue using a regular cleaning rod. You must first remove the barrel and secure it well in a vice. After this, you should resort to using a cleaning rod. At the final stage of the work, it is imperative to thoroughly clean the barrel.
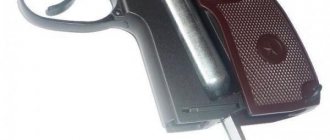
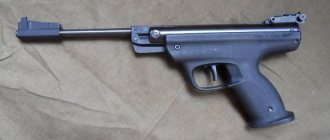
The procedure for disassembling the pistol
The process of disassembling a pneumatic short barrel is divided into incomplete and complete. The latter is required for major cleaning of weapons, repairs, and drying of elements. Incomplete is done when you need to clean the device from carbon deposits or dirt, lubricate parts, and inspect the condition of the mechanism.
Incomplete
An air pistol has the property that the owner can speed up the process of incomplete disassembly at the shooting site, since the chambered cartridge is not checked.
Incomplete analysis consists of the following steps:
- The magazine is removed.
- The trigger guard is pulled down and moved to the left.
- The shutter is pulled back, then rises up - retracted to the side.
- The return spring is removed and the bracket is returned to its original position.
The pistol is assembled in reverse order.
Full
It is better to completely disassemble the pistol on a white cloth laid down, in order to avoid losing one of the parts.
The complete procedure follows the incomplete one. The sequence may vary - it all depends on the pneumatic model.
How to completely disassemble the MP 654k air pistol:
- Using a screwdriver, unscrew the bolt securing the handle lining, then move it to the side.
- While the screwdriver is in your hands, you need to carefully remove the sear spring. It is advisable to use a tool with a thin end - it hooks easier. Then remove the sear itself.
- The mainspring is removed. To do this, you need to press it against the frame of the gun, and then remove the bolt.
- The trigger is separated, turned forward until the flats coincide with the slot in the frame - it is pulled forward.
- The rod from the trigger is pulled out.
- The trigger is removed by pulling the guard and turning the trigger forward.
- The final stage is disassembling the bolt casing: removing the fuse, then the released firing pin.
Assembling the weapon is performed in the reverse order.
Interesting fact . Disassembling the magazine is part of the complete disassembly procedure for the air pistol. However, users do not do this because it is unnecessary.
It is worth adding that the frequent procedure of complete disassembly accelerates the wear of the main parts of the device. It should only be produced when necessary.
How to disassemble the MP-512 air rifle?
This procedure is performed as follows. First of all, use a Phillips screwdriver to unscrew the screws. Two of them are located on the side of the stock, and one is located near the trigger near the guard. Then the “air blower” is turned towards itself, the back is pressed against the board and the “pneumatic air blower” is turned counterclockwise. This is necessary so that the pin pops out of the groove and the spring is released. Next, the contents of the compressor are removed, the rifle is broken and the screw that holds the barrel is unscrewed. The pin is removed, with the help of which the sear and safety lever are fixed, which is then removed from the trigger (SK).
Small parts are placed in a box. After cleaning and lubricating, the airgun is assembled. More on this below.
How to assemble an air pistol
To reassemble the weapon you need to do the following:
- Insert the trigger guard into the groove and secure it with a pin.
- Insert the spring from the bracket into the frame.
- Using the barrel bushing, recess the bracket spring. To do this, you need to rest the sleeve with its upper side against the edge of the table. The spring is quite elastic, so you have to try.
- Hold the spring with the barrel bushing and screw the barrel into place.
- Pull down the bracket and place the trigger in the groove.
- Return the trigger guard to its place.
- Place the trigger rod in the trigger eye.
- Return the trigger to its previous position.
- Install the mainspring, pressing it against the frame with your finger, and put on the lock.
- Place the handle shell on the frame and tighten the fixing screw. Tighten it all the way, then turn it half a turn counterclockwise. The pin of the screw must be vertical or horizontal, then it will be fixed using a spring-loaded tooth.
- Install the slide stop, aligning the hole with it and the hole on the left side of the frame.
- With the nose towards the trigger, insert the sear into these holes. Align the face at the other end of the sear axis with the groove on the frame and push the end inside the frame.
- Put the tail of the spring sear with the rubbing spout on top of the bolt stop.
- Place the firing pin in the bolt.
- Install the safety catch into the bolt, turn it counterclockwise and lock it in the “Fire” position.
- Place the return spring on the barrel (the narrow end to the “chamber”).
- Put the shutter in place. On some models, this requires pulling the trigger guard down.
- Check the operation of the trigger and fuse.
Method #3: Weighted Bullets
To increase air, some gunsmiths recommend using weighted bullets. Such ammunition increases not only the flight range, but also the penetrating ability of the weapon. Bullets with a flat surface are suitable for the MP-512. Their weight is approximately 15% more than that of standard herringbones, so the penetration power will also be higher. But do not forget that the cost of such cartridges leaves much to be desired.
We also draw the attention of readers to the fact that such ammunition is not suitable for hunting, since it does not pierce the flesh of game, but only leaves bruises on it. Flat bullets are often used for zeroing optical sights, as they help determine the area of impact of a ballistic projectile with maximum accuracy. Although if the shooter’s goal is to shoot at cans or bottles, then there is not much difference in the tip of the ammunition.
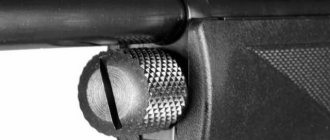
Gas spring installation
The gas spring is presented in the form of a cylinder with gas, which on one side has a movable rod. This element is pushed outward by compressed gas. This creates the force necessary to set the piston in motion. Replacing a traditional coiled wire spring with a gas spring can significantly improve shooting accuracy. The gas spring is installed as follows:
- Removing the axle screw.
- Removing the safety button axle pin.
- Removing the stop and all its components.
- Installing a gas spring.
- Installing the centering washer.
- Installation of the stop.
- Screwing in the screw.
Installing a gas spring on a Hatsan rifle:
It is most advisable to install the gas spring into the piston with the rod inside out.
Reactivate your weapon
Before strengthening the air with your own hands, it is necessary to re-preserve the weapon. This procedure involves removing the factory grease, which can be found in large quantities on a newly purchased rifle. To be fair, it is worth noting that re-preservation should also be carried out for used air vehicles. Before sawing the trunk, be sure to make sure that there is no oil left in it.
To remove grease, it is best to use a cleaning rod and a rag soaked in a solvent or a special compound, which can be purchased at a gun store (quite expensive, but the most preferable option). However, watch the intensity of your movements. Careless actions can scratch the barrel, causing the weapon to fire inaccurately. That is why it is highly not recommended to use folding cleaning rods.
The logic of the masters does not fail
If you think about it, you can come up with the idea of creating a gas spring from improvised means, the same car accessories for opening the trunk. A homemade gas spring for pneumatics will definitely cost the gun owner much less than purchasing a branded one. It will not be difficult for craftsmen to drill the cylinder and install a bypass valve with the same ball mechanism that innovators love to install in cars.
There is one big pitfall in this entire system - the small thickness of the working cylinder walls, which is not designed to work with high pressures. It is this reason that always leads to rupture of the gas spring and damage to the air gun modules. Perhaps the Kulibins will find this advice useful: branded gas springs have a wall thickness of 2-2.5 mm, the cylinder for opening the trunk of the domestic auto industry is 1-1.5 mm, and imported ones are 1.5-2.5 mm.
View gallery
What does this give to the owner of a pneumatic gun?
Having understood the design of a gas spring for pneumatics, the owner will wonder whether he needs it at all. After all, replacing a standard spring-piston system with an expensive device requires at least complete disassembly and proper assembly of the weapon, not to mention the price and complexity of maintenance. In fact, there are much more advantages than disadvantages, and any owner of pneumatics should know about them.
- Constant high power. Constancy lies in the fact that, unlike a coil spring, which is subject to the law of metal fatigue, a gas spring maintains constant pressure during operation. The spring-piston mechanism has a drawback - the pressure during decompression drops after 50% of the effective action is completed, because the air that pushes the bullet creates back resistance to the piston.
- No double-sided recoil when firing. A pressing problem for shooters using expensive optics. The gas spring works unilaterally - it compresses the gas, and the shot is fired by releasing the compressed air. Naturally, the recoil is the same as in military weapons.
View gallery
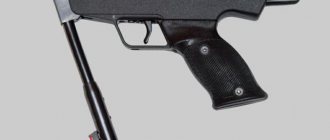
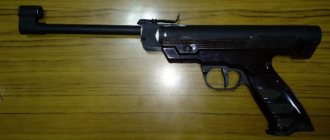
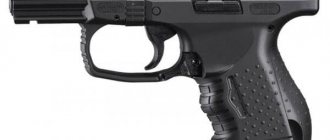
Air gun device
Weapon contains parts:
- frame consisting of two parts, they are symmetrical;
- a barrel that connects to the gas mechanism. The bullet flies out of the barrel using the energy of a compressed gas cartridge located in the magazine;
- feed unit;
- gate. There is a fuse on the left side of the bolt. When switching to the safety mode, the trigger is safely released without firing, ensuring that the hammer does not hit the firing pin;
- trigger mechanism. It makes it possible to shoot using self-cocking or pre-cocking. The gas for the shot is cut off using a working trigger;
- handle cheek;
- shop. The process of feeding a bullet onto the barrel line occurs due to the magazine spring;
- You can use two types of cans in weapons - 7 grams (if the included adapter is used) and 12 grams.
The parts are made of metal alloy. The slots are made of plastic. All materials from which the gun is made are not very hard. Therefore, you need to handle it carefully to avoid falls on hard surfaces or impacts. It is necessary to ensure that dirt and sand do not get into the mechanism.
In order to properly use personal weapons and provide them with proper care, you need to know how partial and complete disassembly and reassembly of weapons is done.
Procedure for zeroing an air rifle
Sight installation
Simply attaching it to a rifle does not mean ensuring high accuracy in hitting the target. Certain rules must be followed:
- When installing optics, pay attention to the correct position of the mounting (fastening) rings. It is not recommended to place them offset towards the center of the sight or towards its edges. Otherwise, deformation of the body during use of the rifle cannot be ruled out. The fact is that even partial (visually imperceptible) damage negatively affects the operation of the correction mechanism. Consequently, the point of equipping a weapon with an optical sight is completely lost, since increased shooting accuracy will not be ensured; on the contrary, it will decrease.
- After making the necessary adjustments (the procedure is indicated in the instructions for the sight), the position of the crosshair is checked. The upper and lower marks of the optics (linear or point, depending on the modification of the sight) must be positioned strictly vertically.
- Since each of us has our own vision characteristics, we should adjust the distance “to suit ourselves.” That is why experts do not advise trusting someone else to zero a rifle with optics, even if they are much more experienced in this matter.
- Final mounting of the optical sight. After choosing the optimal position of all available adjustments, they need to be fixed.
Target selection
Since when hunting, in the field, everything happens dynamically and the situation is constantly changing, it is better to zero the rifle “crosswise”. In order not to spend money on purchasing finished products, the target can be assembled from scrap materials, using plywood or boards as a basis. And applying the appropriate markings - a cross - takes a few minutes (with a felt-tip pen, gluing strips of PVC tape, adhesive tape with colored paper underneath, and so on). Fantasy itself will tell you what you need.
It is necessary to take into account that one target will not be enough. Firstly, two or three, installed at different distances from the location of the rifle, will significantly reduce the zeroing time. Although this is at the discretion of the shooter. Secondly, if the weather is windy, the target itself is quite light, and there will be a lot of shots, then one will definitely not be enough. Don't interrupt the shooting just to make a new one.
And one more nuance - a target that is decorated in “color” is visible more clearly at a distance than a black and white one. People with low vision should definitely take this into account. Therefore, painting, for example, a sheet of Whatman paper with a black marker is not the best option.
Selecting a shooting position
For an air rifle, taking into account its maximum firing range, targets are placed at a distance of 30 to 100 m. Based on this, a section of terrain is selected. There is no need to remind you that it should be located away from residential buildings, roads, and so on - this is implied.
What else will you need for shooting?
- Lining. It not only provides convenience, but also protects the surface of the rifle from scratches. Such products can be purchased, although making them yourself will not be difficult.
- Machine. Also available for sale for various types of weapons. But given the cost of such devices, most hunters use bags filled with earth, sand, and the like to give the rifle a stable position. How expedient this is will become clear a little later. An alternative is a bipod, although a simple machine is enough for a novice shooter.
- Stock of bullets. For high-quality zeroing of an optical sight, you will need at least 80 - 100 of them (depending on the skill and experience of the hunter).
- Setting tools. These are screwdrivers that are selected based on the size of the fixing screws and the configuration of the slots on the heads.
(2 ratings, average 5 out of 5)