SIGHT SHOOTING AT NIGHT
SIGHT SHOOTING AT NIGHT
When shooting at night, the main burden falls on trained night vision7. During night work, attention is turned on (only attention and no suspicion) and all organs of perception are used to search for both the visual silhouette of a target and to detect a hidden and camouflaged target.
| Diagram 38. Aiming at dusk with flashes and in the light of a rocket using a silhouette projected against a light background: A - take an even front sight on a light background; B - move the straight front sight to the target |
In military practice, special luminous attachments are used for night shooting, making the relative position of the front and rear sights clear. Unfortunately, these useful devices are small and easily lost. They are not used at all in law enforcement systems.
In the absence of special luminous attachments, the front sight is aligned in a slot on the side of the target against a more or less clear background and in this form is transferred to the target (Diagram 38). The target, illuminated for a moment, is first caught with the front sight, and then the rear sight is brought in and the front sight is aligned in the slot. But all this must be done very quickly. The best moment is the beginning of illumination, when uncamouflaged targets have not had time to hide.
When shooting in this way at dusk, on a moonlit night, for example, when a rocket flashes, the range of actual fire along the height silhouette can reach up to 300 m. You should shoot with the “P” sight on the machine gun and aiming below the waist
height silhouette or under the bottom of the chest target.
| Photo 115. Sighting rubber band |
| Photo 116 . Attaching the elastic band to the base of the front sight |
| Photo 117. Attaching the elastic band to the aiming bar |
When shooting at night, it is more convenient to first take a large front sight - this way it will be more visible - and only then align it in the slot! The target is first “caught” with the front sight, raising the head above the butt, and then the rear sight is brought in and the front sight is aligned in the slot.
In all wars, even before the advent of luminous attachments, the method of aiming along a white cord, which is quite clearly visible in the dark, was and is still being used. Nowadays, an ordinary underwear elastic band is used as such a lace, stretched between the front sight and the rear sight and secured with any soft wire, as shown in photos 115-117.
When shooting with such a cord, the sight is set to constant (“P”). At distances of 100 m or more, you should aim at the heels of a tall silhouette. In a night battle, you cannot rush to fire. It is more practical to shoot at targets that reveal themselves in the light, aiming with a “floor flash.”
When shooting at such targets, the “flash” is first taken into the half-ring of the front sight (front sight guard), and then the front sight is brought under the flash. Shoot with the "P" sight. In this case, you can not shoot immediately. Notice a large landmark (object) near which the flash appeared, mark this place and shoot at it a second or two after the flash goes off. After a shot or two, change your position so that they don’t do the same to you.
Remember! At night, when a target is detected, you cannot shoot while standing! Immediately lower the level and shoot from your knees. Reduce your silhouette and don’t expose yourself too much.
In a night battle, the one who has a better view of the battlefield wins. There are no miracles. Night sights are not always available everywhere, and they also have a nasty habit of failing at the most inopportune moments. The field of events has to be illuminated with rockets. During a night attack, it is more advantageous to throw flares further behind the enemy. This way you will not let the flashes blind you and will clearly see the silhouettes of your targets. Also make sure that you can take shelter in the shade of local objects. You need to illuminate the enemy, not yourself. When detecting the silhouette of a target, you should not peer at its center, but determine its outline. In any case, you need to aim at the bottom edge of the target. Do not look at the rocket under any circumstances! Otherwise, night vision will take a long time to recover.
You need to know that a fighter who is not trained for night operations often experiences the so-called “non-aimed shooting syndrome”, when untrained individuals, out of fear, begin to shoot in company with everyone else, without seeing the target, for complacency. This was the scourge of all partisan units during the Second World War. At the same time, a huge number of cartridges “flew out” with scanty effect.
To avoid repeating this mistake, you need to go through dry training before night shooting. At a shooting range or shooting range in the dark, find your target, aim your machine gun at it, and then have your partner, the instructor, illuminate that spot on the target field with a flashlight. You need to check this several times. All this is done first in the deepening twilight, then as the eyes get used to it, in the dark, under the illumination of a dying fire. Afterwards - with illumination of the rocket that fell in front of the target line and behind it.
Then practice identifying targets in the middle of bushes at distances from 20 to 200 m, then in the middle of a camouflage background. To make this work better, it is necessary, at the slightest opportunity, to “tie” the location of the target to any landmark that can be “spotted” on the ground.
In the old days, German, Soviet, and American instructors installed stealth targets at the shooting range and, after night shooting, severely punished cadets who looked at such targets in their sector of responsibility at night and did not shoot at them. This method contributed to the development in cadets of acute visual and auditory attention, as well as a specific “animal sense” for the target.
You should know that a light object at night will be visible against a dark background, and a dark object against a light background. And on the border of these two backgrounds, a stationary object of color of any intensity will not be visually perceived. At night, any light source will always appear closer to 14 real distances.
Surveillance with night sights and target designation
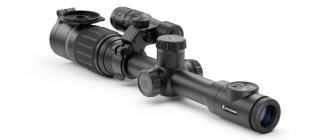
142. Successful observation in combat and high shooting results using a night sight are ensured by long-term training, since the contrast of the image and the color of the terrain and targets in the field of view of the sight differ significantly from the color when observed during the day with the naked eye.
The terrain in the observation zone should be examined during the day as soon as possible. To observe the enemy, it is necessary to use moments of illumination of the area with lighting equipment and infrared searchlights. In this case, it is necessary to ensure that the stars of the lighting cartridges and the flashes of shots do not fall into the field of view of the sight, especially in its central part, for which the weapon should be moved away from the source of interference. If exposed to bright light sources for a long time, temporarily turn off the sight or replace the filter with a denser one.
To observe and detect enemy infrared searchlights, you can use BI-8 binoculars (Appendix 4).
143. Observation of the battlefield using illuminated night sights is carried out both with and without the use of a searchlight.
Observation when irradiating an area with a searchlight is usually carried out if the area is not illuminated by rockets and other means of illumination.
144. To observe the enemy using night sights, you need to turn on the sight, put the filter switch handle in position H and, while observing through the sight, gradually open the hole in the diaphragm, turning the movable ring toward you. If the illumination of the image of the terrain with a fully open aperture is insufficient, then move the filter switching handle first to position K, and then to G and B. In case of low illumination of the image with filter B, it is necessary to set the handle to position H, remove the diaphragm (put it in a bag) and By changing the filters, achieve image contrast. After this, turning the illumination handwheel, set it to a position in which the sight reticle is not visible at all or is faintly visible.
Inspect the area in the observation zone from right to left from near objects to far ones. In addition, you must listen carefully to all kinds of sounds, since from them you can not only detect enemy actions, but also the approximate direction.
145. Having discovered a target, it is necessary to clarify its location using local objects, determine the nature and distance to it.
Target designation at night is carried out in the usual way, while the position of the target relative to local objects in the lateral direction can be determined using a square and divisions of the sight reticle.
When aiming with tracer bullets, aim carefully and fire one or two bursts.
Determining range using night sights
146. Range to targets is determined:
- by landmarks and local objects, the range to which was determined day or night when the area was illuminated by lighting means;
- according to the angular value of the target and local
Determination of the range to the target by angular value is carried out when the area (delivery) is irradiated with a night sight spotlight or another, more powerful infrared spotlight, as well as when the area is illuminated by lighting means.
To determine the range by the angular value of local objects (targets), it is necessary to know the width or height of the object (targets) to which the range is determined.
To determine the range you need:
— determine the width or height of an object (target);
— determine the angular magnitude of an object (target) in thousandths, using an aiming mark;
- calculate the range using the formula
D = H x 1000 / Y
where D is range;
B - width (height) of the object (target);
Y is the angular magnitude of the object (target) in thousandths.
Examples of determining range using the aiming mark of the NSP-2 sight
1. A medium tank 3.6 m wide is placed between the top of the square and the beginning of the stroke (12 thousandths) (Fig. 78, a).
Range 300 m (3.6*1000/12).
2. A medium tank 3.6 m wide is placed between the top of the square and the end of the stroke (47 thousandths) (Fig. 78, b).
Range 75 m (3.6*1000/47).
3. A medium tank with a width of 3.6 m is placed between the beginnings of the strokes (24 thousandths) (Fig. 78, c).
Range 150 m (3.6*1000/24).
4. A medium tank 7.5 m long is placed at the base of the square (33 thousandths) (Fig. 78, d).
Range 230 m (7.5*1000/33).
5. A running figure 1.5 m high is placed between the top and base of the square (16 thousandths) (Fig. 78, e).
Range 100 m (1.5*1000/16).
6. The distance between two objects, equal to 50 m, is placed between the ends of the strokes (94 thousandths) (Fig. 78, e).
Range 530 m (50*1000/94).
7. A medium tank 3.6 m wide is placed at half the distance between the top of the square and the beginning of the stroke (6 thousandths) (Fig. 78, g).
Range 600 m (3.6*1000/6).
Fig 78. Determining range using a night vision scope
Examples of determining range using the NSP-3, PPN-3 and PGN-1 sighting marks
1. The size of the image in the NSP-3 sight of a running soldier (Fig. 79, a) is equal to the height of the square - the range to the target is 100 m, since the height of the square at a distance of 100 m overlaps 160 cm (at 200 m - 320 cm, at 300 m -480 cm, etc.).
2. The enemy machine gun (Fig. 79, b) is placed between the top of the square and the vertical division - the range to the target is 200 m, since the angular value between these divisions is equal to four thousandths, and the width of the target is 80 cm. Using the “thousandth” formula, you can calculate the range to the target will be equal to 200 m (0.8 * 1000/4)
3. The enemy tank (Fig. 79, c) is placed between the base of the vertical division and the top of the square indicated by the number - the range to the target is 330 m, since the angular value of the tank corresponds to the angular value on the sight reticle, corresponding to the direct shot range.
Rice. 79. Determining range using the night sight reticle scale:
a - NSP-3; b-PPN-3; v-PGN-1
Examples of determining range using aiming marks and reticle strokes of the NSPU sight are shown in Fig. 80.
Rice. 80. Determining the range using the night sight reticle scale
