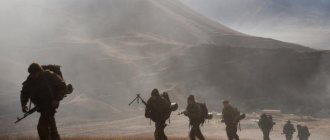
General instructions
116. Firing a rifle consists of performing the following techniques: preparing to fire
(assuming a shooting position, loading and installing the sight),
firing a shot, ceasing fire and restoring readiness to fire
.
The shooter fires at the commands of the commander or independently.
117. Shooting from a rifle can be done from a prone position, from a kneeling position, sitting, standing still and on the move. Shooting can be done from the hand or from a rest.
The shooter must perform all techniques quickly and automatically, without stopping observation of the target, with the exception of the time required to install the sight.
118. To load the rifle, the command “ Load”
" At this command, the shooters load their rifles in the position in which the team found them.
If necessary, before the command “ Charge”
» the shooting position can be indicated.
119. To open and fire, the squad (platoon) commander issues a command indicating the target, sight, aiming point (if necessary), and type of fire.
120. To open a rare single fire, the commander gives a command, for example: “ Straight at the machine gun, six, one figure to the left, right (left) one at a time - fire
"or"
Landmark 2 - white stone, one finger to the right - infantry in the rye, five, one on the right and left - fire
.
When the fire is rare, the shooters take careful aim and take turns firing one after the other. Fire is carried out until a command or signal for a ceasefire is given.
121. To open frequent single fire, the commander gives a command, for example: “ Along the attacking chain, three to the waist - fire
».
The arrows fire frequently without taking turns. The rate of fire is achieved due to the speed in the butt and reloading, but not due to aiming and releasing the trigger. Fire is carried out until a command or signal for a ceasefire is given.
122. To open frequent fire with the designated number of rounds, the commander gives a command, for example: “ At the enemy group, to the left of the road, four, per figure to the left, five rounds each - fire
" Having fired the designated number of rounds, the shooters themselves stop firing.
123. To open salvo fire, the commander gives a command, for example: “ Straight along the column, squad, salvo, five, to the waist. Department - or
", or "
Cavalry on the right - for battle.
By cavalry, platoon, salvo, six, into the horse's chest. Platoon - or ", or "
At a diving plane, squad, in one gulp, three, to the head.
Squad - or ", or "
At the attacking infantry, platoon, in one gulp, three, at the waist.
Platoon - or ."
On the command “in one gulp”, the shooters take the rifles at the ready and load them; on the command approximately “three” (sight height), they set the sight. On the command “squad” (platoon, company) take aim at the target and on the command “or” fire a shot, after which they immediately reload the weapon (prepare for the next salvo).
To continue firing volleys, if the target has not changed, only the command “ Separation”
(platoon) -
pli
.”
124. To temporarily stop shooting, the command “ Stop”
"or a long whistle is given, and if necessary, then the command "
Trigger
". On the first command, the shooter stops firing and reloads the rifle, and on the second, he reloads the rifle and puts the trigger on the safety cock.
125. For a complete ceasefire, the command “ Unload”
" The shooter pulls the aiming clamp back as far as it will go and unloads the rifle; then, if shooting was carried out from a prone position, places the rifle along the body, with the muzzle on the left hand, protecting the barrel bore, bolt and magazine box from clogging; if shooting was done from a kneeling position or while sitting, the shooter unloads the rifle, then, at the command of the commander, stands up and takes the rifle to his leg; if shooting was done while standing, the shooter unloads the rifle and independently takes it to his foot.
126. Depending on the physical characteristics of the shooter, shooting from a rifle can be done either with the right or with the left hand.
127. Each shooter, guided by the basic rules set out below for preparing to fire, must, depending on his individual characteristics, develop the most advantageous and stable position for shooting, while achieving a uniform position of the butt in the shoulder, the most comfortable position of the body, arms, legs and the monotonous emphasis of the elbows on the ground.
General provisions
89. Depending on the terrain conditions and enemy fire, shooting from a sniper rifle can be carried out from a prone, sitting, kneeling or standing position.
90. In combat conditions, the sniper occupies and equips the shooting area according to the commands of the commander or independently.
To shoot from a sniper rifle, it is necessary to choose a place that provides the best visibility and shooting, allows the sniper to hide from enemy observation and fire, ensures the convenience of performing shooting techniques and the ability to defeat the enemy with the first shot.
Depending on the situation, the place for shooting is selected in a trench, trench, shell crater, ditch, behind a stone, stump, etc. In a populated area, the place for shooting can be chosen in a window of a building, in an attic, in the foundation of a building, etc. P.
You should not choose a place for shooting near prominent individual local objects, as well as on the ridges of hills.
91. During advance preparation, it is necessary to check the possibility of firing in a given sector or direction, for which purpose the rifle is sequentially aimed at various local objects in the specified sector of fire. For ease of firing, it is necessary to prepare supports for the rifle. If any objects interfere with shooting, you need to choose a new, more convenient place for shooting. The sniper's shooting area must be carefully camouflaged.
92. To occupy a place for shooting, a command is given, for example: “To such and such (sniper such and such), the place for shooting there is for battle.” At this command, the sniper, applying himself to the terrain, takes the indicated place and is prepared to shoot.
In anticipation of immediate opening of fire, the rifle is carried with an attached optical sight.
93. To change the place for shooting, a command is given, for example: “So-and-so (sniper so-and-so), run over there - forward.”
Using this command, the sniper outlines the route to advance to a new place for shooting, covered sections of the path for stops, and a method of movement, if it was not specified in the command. Before moving, the rifle is put on safety.
Depending on the nature of the terrain and the presence of cover, the sniper moves by running, at an accelerated pace, running or crawling. When running, at an accelerated pace and when dashing, hold the rifle with one hand or both hands, as is more convenient. When crawling, the rifle is held with the right hand by the strap near the upper swivel or by the barrel linings (Fig. 48).
Rice. 48. Holding a rifle while crawling
94. To successfully perform fire missions in combat, a sniper must be fluent in rifle shooting techniques, perform all shooting techniques clearly and dexterously, without ceasing to observe the battlefield.
Each sniper, guided by the general rules for performing shooting techniques, must, taking into account his individual characteristics, develop and apply the most advantageous, stable and uniform position of the head, body, arms and legs, which ensures the best shooting results.
95. Shooting from a sniper rifle consists of preparing to shoot, firing a shot and stopping shooting.
Techniques for prone shooting
Getting ready to fire
128. To shoot prone, turn half a turn to the right while simultaneously putting your right leg forward half a step; tilting the rifle muzzle towards the target, quickly lower yourself to your left knee, then, leaning on your left hand, lie on your left side in a new direction; place the rifle on the palm of your left hand (at gunpoint) and lower the butt to the ground; move your right hand to the bolt handle, clasp it with your palm from below (Fig. 62), turn the handle to the left and pull the bolt back all the way; move your right hand to the cartridge bag, unfasten and open the lid of the bag, remove the cartridge clip and insert it into the grooves of the receiver; place your thumb and finger on the upper cartridge right next to the clip (Fig. 63) and, using the pressure of this finger, push the cartridges into the magazine box so that the upper cartridge fits under the reflector (cut-off-reflector blade), then throw away the clip; placing the flesh of the palm (near the thumb) of your right hand on the bolt handle, quickly move the bolt forward and turn the handle to the right as far as it will go.
Rice. 62. Prone position
Rice. 63. Loading a rifle
Note. When loading without a clip, insert cartridges one at a time into the upper window of the receiver, recessing them under the reflector (cut-off blade).
When loading is complete, lie flat on the ground with your legs spread slightly to the sides, toes facing out, and both elbows resting on the ground. If you do not have to open fire immediately, then move your right hand to the neck of the stock from the side, clasping it with your thumb from above, and pass your index finger into the trigger guard so that its outer side touches the guard; With the remaining fingers, tightly, but without tension, clasp the neck of the stock from below; hold the rifle on your left hand, lowering the butt to the ground and protecting the barrel from clogging (Fig. 64).
Rice. 64. Position of the shooter after loading the rifle
129. To set the sight to the required division, move your right hand to the sight and bring the rifle closer to you in order to better see the required division. After that, when shooting from a rifle with open sights, squeeze the clamp latch with your thumb and forefinger and move it until the front edge of the clamp aligns with the corresponding feature of the aiming bar.
When shooting from a rifle with an optical sight, remove the caps, set the sight according to the distance to the target and set the lateral correction drum to the desired division.
To set the sight according to the distance to the target, take the thumbwheel of the sight drum with the thumb and forefinger of your right hand and, rotating it in a clockwise direction, place the desired scale division opposite the pointer.
To install the lateral correction drum, take the drum handwheel with the thumb and forefinger of your left hand and, rotating it, place the required scale division opposite the pointer. Install the drum; to move the midpoint of impact to the right - on a scale with a + (plus) sign, to move to the left - on a scale with a - (minus) sign.
Firing a shot
130. Firing a shot consists of placing it, aiming and releasing the trigger.
131. To apply the butt, without losing sight of the target, firmly rest the butt against your shoulder; at the same time tilt your head slightly forward and, without straining or stretching your neck, place your right cheek on the butt; with your left hand, tucking it under the rifle, support the rifle in the palm of your hand (closer to the thumb) at the recesses of the stock or at the magazine box; With your right hand, without tension, grasp the neck of the stock and place your index finger with the first joint on the trigger (Fig. 65).
Rice. 65. Prone shooting position with open sights
132. When aiming, hold your breath as you naturally exhale, close your left eye, and look through the slot at the front sight with your right eye so that the front sight is in the middle of the slot, and its top is level with the upper edges (Fig. 66); in this position, bring the rifle under the aiming point while simultaneously pressing the trigger.
Note. If it is difficult for the shooter to close one eye separately, it is allowed to aim with his eyes open, but at the same time he must aim with only one eye, while the other eye must be pointed directly at the target.
Rice. 66. Level front sight when aiming with open sights
When aiming with an optical sight, placing the eye approximately 8 cm from the eyepiece along the continuation of the sight axis, place the tip of the stump under the aiming point; In this case, the side leveling threads should be located horizontally, and the shooter should see the entire field of view of the sight (Fig. 67).
Rice. 67. How to aim with a telescopic sight
133. To release the trigger, while holding your breath, smoothly press the trigger with the first joint of your index finger until the trigger, unnoticed by the shooter, as if by itself, falls off the combat cock, i.e. a shot occurs. When pulling the trigger, your finger pressure should be applied straight back. The shooter should gradually increase pressure on the trigger during those moments when the top of the level front sight is aligned with the aiming point. When the front sight deviates from the aiming point, the shooter must, without increasing or weakening the pressure on the trigger, straighten the aim and, as soon as the straight front sight is again aligned with the aiming point, again increase the pressure on the trigger. When releasing the trigger, you should not be embarrassed by the slight oscillation of the level front sight at the aiming point; the desire to squeeze the trigger necessarily at the moment of the best coincidence of the front sight with the aiming point will entail tugging on the trigger, and hence an inaccurate shot. If the shooter, while pressing the trigger, feels that he can no longer breathe, he must, without weakening or increasing the pressure of his finger on the trigger, take a breath and, holding it again, continue to squeeze the trigger.
Each shooter must be able to smoothly pull the trigger within 1-2 seconds to achieve 10 aimed shots per minute.
so UNT / Textbooks on CVP / Textbook on CVP for 10th grades of secondary schools (Mektep 2010)
§1. 5 Techniques and rules of rifle shooting
Safety precautions for rifle shooting
Safety during shooting is ensured by their clear organization, knowledge and strict adherence to the order and rules established at the shooting range or shooting range, and high discipline of all shooting participants.
In order to prevent accidents and ensure the safety of both shooters and bystanders, it is prohibited at the shooting range or shooting range:
— fire from a faulty weapon and with a white flag raised;
- take and load weapons without the command (permission) of the shooting director;
- aim and point even unloaded weapons to the sides and to the rear, at targets if there are people or animals in their direction, as well as at people or animals;
— remove loaded weapons from the firing line;
- leave a loaded weapon anywhere or transfer it to others without the command of the shooting director;
- to be on the firing line as a stranger to the command (signal) “Fire!” until the command (signal) “All clear!”
The shooter is obliged to hold the weapon in the line of fire with the muzzle of the barrel only in the direction of fire upward at an angle of no more than 60°, regardless of whether it is loaded or not; leave the weapon or transfer it to another person only at the command of the shooting director, while first unloading the weapon and making sure that there are no cartridges left in it; stop shooting when a person or animal appears in the fire zone.
Rifle shooting techniques. In order to learn how to shoot accurately from a rifle, you need to develop stable skills in performing shooting techniques. Rifle shooting techniques consist of preparing to fire, aiming and releasing the trigger.
Getting ready to shoot. Correct shooting position ensures the stability of the rifle, which has a decisive influence on shooting accuracy. The most comfortable shooting position is prone, as it provides the best stability for the shooter and the rifle. Preparation for shooting prone includes taking the shooting position, loading and holding the rifle.
The position for shooting prone with a rifle is taken as follows. Holding the rifle in his right hand with the muzzle forward, the shooter takes a full step forward and slightly to the right with his right foot. Leaning forward, he lowers himself onto his left knee. Then, resting his left hand on the ground, he sequentially lowers himself onto the thigh of his left leg and the forearm of his left hand. Lies on his left side and quickly turns over onto his stomach, legs slightly spread to the sides with his toes outward. In this case, the body of the body is located at an angle of 25-30° to the firing plane. The rifle is placed with the fore-end on the palm of the left hand.
The rifle is mounted as follows. The elbow of the left hand must be placed directly under the rifle, and the forearm of this hand must be moved forward so much that the fore-end rests not on the fingers, but on the palm of the left hand between the thumb and forefinger. With your right hand, take the butt and rest it on your shoulder so that you feel the entire butt plate touching your shoulder and its middle resting against the notch of the shoulder. Then, with your right hand, without any tension, grasp the neck of the butt, and place your index finger with the first joint on the trigger and lower your elbow freely to the ground (on the floor). Tilt your head slightly forward and, without straining your neck, place your right cheek on the top of the butt (Fig. 80, 81).
After preparing for shooting, it is necessary to check the correctness of the occupied position. This is done as follows. Having finished the butt, the shooter takes aim, then closes both eyes for a few seconds, after which, opening his right eye or left (if the shooter is shooting with his left hand), he looks at where the weapon is pointed in relation to the target. If the front sight has deviated to the left of the aiming point, then the entire body of the body must be moved to the left without moving the left elbow (Fig. 82). If the rifle is pointed to the right,
A
b
Rice. 82. Variants of incorrectly adopted position and ways to correct them: a - the rifle is pointed to the left of the aiming point - move the body to the left; b - the rifle is aimed below the aiming point - the body of the body
give back
you need to do the same, only to the right side. If the rifle is pointed lower, then the entire body of the body should be moved slightly back, without moving the elbows, and, conversely, if the rifle is pointed higher, then forward.
The correct position should be considered in which, during the test, the front sight remains exactly under the aiming point.
When shooting from a prone position, you can use a rest. Bags of sand or sawdust are used as a stop. When shooting from a rest, the left hand is placed on the rest, and the rifle is placed on it with the forend (Fig. 83).
The shooter achieves the correct position of the body relative to the stop by moving it slightly forward or backward until he assumes a comfortable and correct pose.
In shooting sports practice, another method of shooting from a rest is known. It differs from the previous one in that the rifle is placed on the rest, and the left hand supports the butt from below.
Aiming is the process of giving the barrel of a weapon the direction necessary to hit the target. It is performed using a sight and front sight.
When shooting with an open sight, to aim, you need to squint your left eye, and look through the sight slot at the front sight with your right eye and set it so that its top is visible in the center of the sight slot at the same level with the edges. This position of the front sight is called a “flat front sight.” The main attention should be paid to the correct position of the front sight in the sight slot and only periodically, to adjust the aiming, switch vision to the aiming point.
Rice. 83. Position when shooting from a rest
Aiming when shooting with a diopter
sighting is greatly facilitated, since the shooter, having installed the front sight in the center of the diopter, has the opportunity at the moment of the shot to monitor the alignment of only two points - the top of the front sight and the aiming point (Fig. 84).
When shooting at a target with a black circle (“apple”), it is recommended to aim with a small clearance so that the shooter can clearly see the edge of the “apple” (target) and the top of the front sight while aiming. The amount of clearance depends on the shooter’s vision; it should be the same for every shot.
Typical mistakes when aiming for novice shooters are as follows (Fig. 85): with a small front sight, the holes will be lower, with a large front sight, the holes will be higher than the aiming point; holding the front sight to the right or left (this gives a deflection of hitting the target in the direction in which the front sight is pressed into the slot);
Rice. 85. Typical mistakes when aiming
stalling the rifle to the right or left (in this case, the holes will be located in the direction the rifle is stalling and down).
Breath. The accuracy of a shot is significantly affected by the shooter's breathing. If you do not hold your breath while pulling the trigger, the weapon will oscillate significantly vertically and horizontally, since the butt drops when you exhale and the barrel rises up, and vice versa when you inhale. To prevent this from happening, it is necessary to hold your breath while aiming and pulling the trigger. Before you start pulling the trigger, you need to inhale, then exhale partially and hold your breath for 7-10 seconds. This time is enough to aim correctly and release the trigger smoothly.
Pulling the trigger. The basis of a well-aimed shot is a combination of weapon stability, correct aiming and trigger release.
You can aim well and correctly and hold your breath, but if you sharply press the trigger, the bullet will fly with a large deviation, since a sharp movement of the finger disrupts aiming. Therefore, you need to hold your breath and smoothly and evenly press the trigger, while simultaneously observing the correct position of the front sight in the slot and the aiming point.
The index finger should be placed on the hook with the first joint, and the pressure of the finger should be evenly directed along the axis of the bore. If the finger is placed incorrectly on the hook, the pressure force is directed at an angle, which causes the rifle to move, and aiming is disrupted.
Questions and tasks:
1. What safety precautions are taken when conducting rifle shooting?
2. What does proper shooting preparation ensure?
3. How to check the correct position for prone shooting?
4. What is a “flat front sight” and what is its role in aiming?
5. Name the typical mistakes when aiming and pulling the trigger.
6. What are the consequences of errors when aiming and pulling the trigger in battle?
7. In your workbook, complete tasks No. 1-4.
Reloading
134. Having pulled the trigger, immediately reload the rifle by taking the rifle into the loading position, opening the bolt to eject the spent cartridge case (cartridge), and closing it again to chamber a new cartridge.
To maintain uniformity of the stock and speed up shooting at the same target, you can reload the rifle without removing the stock from your shoulder; to do this, holding the rifle in the shoulder with your left hand, use the fingers of your right hand to cock the trigger and then reload the rifle.
Stopping firing and restoring readiness to fire
135. The cessation of shooting can be temporary or complete. In the first case, the trigger is put on the safety cock, in the second, the rifle is unloaded.
136. To set the hammer to the safety cock, pull the sighting collar back as far as it will go, open the bolt, pick up the cartridge removed from the chamber, reload the rifle and close the bolt; rest the back of the head of the butt in the crook of the elbow of your right hand or press the butt with this elbow to the side of your chest, as is more convenient; take the trigger with the fingers of your right hand by the button, pull it all the way back and turn it to the left; check (by shaking the handle) whether the shutter does not open.
137. To resume shooting, if the trigger was put on the safety cock, take the rifle to the loading position, rest the butt, as indicated in Art. 136, pull the trigger back and, turning it to the right, carefully cock the trigger; place the sight and move your hand to the neck of the stock.
138. To completely stop the fire, pull the aiming clamp back until it fails; open the bolt, throw out the cartridge case, and if there was a cartridge in the chamber, then pick it up and put it in the bag; With the thumb of your right hand, press the upper cartridge under the cutoff-reflector tooth; with the index finger of your right hand, press the latch of the magazine box cover towards the trigger guard, open it with your thumb and middle finger and, catching the falling cartridges in your palm, put them in the bag; close the lid of the magazine box; close the shutter and smoothly pull the trigger, holding it with your thumb on the button so that there is no click; close the lid of the cartridge bag and fasten it.
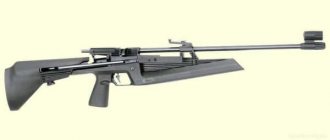
Shooting techniques and rules
You should shoot from the air at targets according to existing rules, using certain techniques. Compared to an air pistol, a rifle allows you to aim more carefully in a comfortable position, and make quality shots without haste, since the target is usually located at a great distance.
Before you start shooting, you definitely need to find out which eye is dominant - this will significantly increase accuracy, and it will be clear on which side the rifle will need to be positioned. This is revealed as follows:
- stretch their arms out in front of them and form a small circle with their index fingers and thumbs;
- looking through it, focus on any specific point, and bring your hands closer to your eyes;
- the eye opposite which the fingers folded in a circle will be the leading (main) one.
The rifle will need to be positioned opposite the dominant eye.
The shooting rules are as follows:
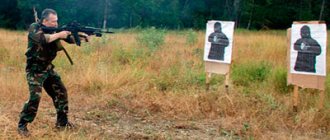
- Before starting shooting, always check the area - there should be no strangers, animals, or explosive objects on the “firing” line. The bullet trap (behind the targets) must be clean and empty.
- The shooter takes the shooting position - ready. It must be remembered that the index finger is always on the side of the trigger, and not on it! The rifle is held at eye level.
- Install the sight. Align the front sight with the sight.
- When ready, the body is turned towards the target and the target, front sight with sight and eye are aligned in one line.
- With even breathing, inhale and exhale halfway, hold your breath and fire a shot by pressing the trigger. Exhale after the bullet hits the target.
If the shooter is left-handed, then all the basic preparations and positions described for the right hand are used for the left.
Often, when they start shooting for the first time, instructors offer the beginner first training/familiarization with the weapon: holding the rifle, aiming, pulling the trigger, performing breathing techniques. Then they shoot at white targets to develop the technique of smoothly pressing the trigger, and then with more difficulty - hitting the center of the white target. Further, each subsequent lesson will have tasks that are more complex.
Techniques for shooting from the knee
139. To shoot from the knee, throwing the rifle with the muzzle towards the target, pick it up with your left hand at gunpoint; simultaneously putting the foot of your right foot back, quickly lower yourself onto your right knee and sit on your heel; put your left hand on the thigh of your left leg, and move your right hand to the bolt handle, load the rifle, set the sight, as indicated in Art. 129. Keep the shin of the left leg as straight as possible; the hips of the right and left legs should form an angle slightly less than a straight line (Fig. 68).
Rice. 68. Kneeling position
140. To apply from the knee, rest the left elbow on the flesh of the leg or, depending on the build, lower it slightly from the knee; Raise the elbow of your right hand and insert the butt of the rifle into your shoulder (Fig. 69). Aim, fire a shot, reload and cease fire as if in a prone position.
Rice. 69. Kneeling butt
Gun
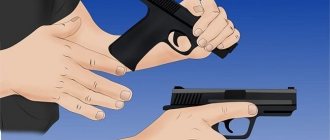
Existing standing pistol shooting positions can be divided into one-handed and two-handed shooting positions.
A sports stance for pistol shooting requires rigidly securing the joints, relaxing the muscles and accurately aiming the weapon at the target. The shooter stands sideways to the target, raises his hand with the pistol and points it at the target. The other hand is freely lowered or placed behind the back.
This position allows you to make an accurate shot, because the distance from the pupil to the rear sight is greatest and the rear sight and front sight are visible quite sharply, this makes aiming the most accurate. Aiming in this position is affected by all sorts of stimuli, from elementary tremor to sharp gusts of wind. In addition, the sideways position, although it reduces the area of the shooter’s figure, makes him more vulnerable to enemy bullets. The following stance will be more practical for close combat. The shooter stands in the basic hand-to-hand combat stance, the pistol is held with one hand in line with the eyes, the arm is slightly bent at the elbow.
In such a stance, there is no need to change body position to transfer a weapon from the left hand to the right. It is also easy to assume a two-handed shooting position. The ability to shoot with both the left and right hand is important when taking an advantageous position. For example, when firing through a doorway or from around the corner of a building. If the shooting space is on the left, then the greatest protection is provided by a left-sided stance, and vice versa, if the space is on the right - a right-sided stance.
The two-handed shooting position has several options. If you need to quickly move after shooting, a left- or right-handed stance is suitable for this. It is accepted as follows: in the basic stance, the shooter moves his right leg forward approximately the length of the leg from toe to knee and the width from the hand to the bent elbow. From this stance it is easy to move into the position for shooting from the knee and prone.
When there is less opportunity for movement, but there is a need to transfer fire along the front, a frontal stance is preferable. To accept it, the shooter takes a basic stance and takes the weapon with a two-handed shooting grip at eye level.
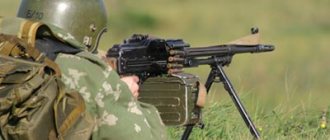
Shooting from a machine gun
In the classic position, the shooter stands sideways to the direction of fire, the legs, slightly bent at the knees, are rigidly fixed with muscles that are equally tense. The torso bends slightly back at the lower back and turns in the direction of shooting. The hip joints are rigidly fixed.
The left hand, supporting the weapon, rests on the ribs of the left side, its elbow rests on the iliac crest of the pelvic bone or on an element of equipment (pouch, waist pouch, special roller, etc.). The right hand grips the pistol grip tightly without unnecessary tension. It is better to lower your elbow along your right side. This position reduces the size of the shooter. The shoulders are slightly raised so that the sights are at the level of the head, without excessively tilting it. The butt of the weapon rests comfortably on the shoulder socket (if the shooter is not wearing special equipment such as body armor, rigid unloading, etc.).
The cheek touches the butt or is near it. In this position, it is difficult to transfer fire to large angles, especially to the left (for a left-sided stance), since the body already has a slight bend to the left side, and the left leg is moved forward. It is also difficult to quickly move in any direction from this position. All this limits the use of this stance in close combat. Another option for shooting while standing is more practical.
To assume the position, you must stand in a right-sided (left-sided) stance. The position of the legs and torso is identical to the position in hand-to-hand combat. The butt is pressed to the shoulder. The left hand holds the weapon by the forend or a special handle, the right hand clasps the pistol grip. In this position, aiming at the target is faster, although with less accuracy.
Fire can be transferred to larger angles and at higher speeds. When shooting, you can look with both eyes, left or right, depending on the situation. Taking into account the distance to the target, the shooter can make precise aiming when vision is concentrated on the front sight, medium when the situation is clearly visible and the front sight is blurry, and fast when the direction of the weapon is controlled by peripheral vision in the direction of the barrel.
Seated shooting techniques
141. For shooting while sitting, one of the following techniques can be used:
a) sit on the ground half-turned in relation to the target and firmly rest your heels on the ground; place your left hand on the thigh of your left leg, as is more convenient, and take the rifle at gunpoint with this hand; open the bolt with your right hand, load the rifle and set the sight, as when shooting prone;
b) cross your legs and tuck them under you so that the foot of the right leg is passed between the thigh and shin of the left leg, or so that the foot of the left leg is tucked under the shin of the right leg; place your left hand on the thigh of your left leg, as is more convenient, and take the rifle at gunpoint with this hand; open the bolt with your right hand, load the rifle and set the sight, as when preparing to shoot while lying down.
When applying in a sitting position, rest the elbows of both hands on the knees or, if the shooter’s physique allows, lower them behind the knees (Fig. 70–71).
Rice. 70–71. Shooting stock while sitting
Perform the remaining techniques for firing a shot and stopping fire in the same way as when shooting while lying down.
Safety precautions
At the beginning of airgun shooting training, to avoid unforeseen circumstances, the instructor explains safety rules. The complete list consists of the following items:
- Always be extremely careful and make sure your rifle is loaded.
- Never point the muzzle towards a person; no one is safe from accidents. Be sure to control the shooting area in front of you; no one should be there while shooting.
- Shoot only when you are absolutely sure that the bullet will pass through, in order to avoid unexpected injuries. If the surface is hard, ricochet may occur.
- Check the fuse for proper function before use. Always keep the safety on until you fire. If you notice a breakdown, it would be better to change the weapon or postpone training.
- You should only pass the rifle to another person unloaded, so make sure the magazine is empty after you finish shooting.
- Until you are ready to shoot, remove your finger from the trigger. This error is the most common cause of unexpected injuries.
Techniques for standing shooting
142. To shoot while standing, turn half a turn to the right in relation to the target and, without placing your left leg, move it to the left in the new direction of the shoulders as wide as is more convenient for the shooter, while distributing the weight of the body evenly on both legs; at the same time, with your right hand, throw the rifle with the muzzle towards the target and pick it up with your left hand at gunpoint; Press the elbow of your left hand to your side, move your right hand to the bolt handle, load the rifle and set the sight as if it were in a prone position (Fig. 72).
| Rice. 72. Standing shooting position | Rice. 73. Butt for standing shooting |
To stock it while standing, place the rifle with the magazine box on the palm of your left hand, closer to the flesh of the thumb, insert the stock into your shoulder and rest the elbow of your left hand on your side or place it on the lid of the cartridge bag. Keep the elbow of your right hand at shoulder height (Fig. 73) or slightly lower. Perform the remaining techniques for firing a shot and stopping fire in the same way as when shooting while lying down.
Techniques for shooting from a rest position
143. The use of a rest significantly facilitates shooting conditions, promotes camouflage and creates cover for the shooter from enemy observation and fire.
The rest should provide the shooter with a comfortable shooting position.
When shooting from a rest, place the rifle with the fore-end (under the pin) directly on the rest, supporting the butt with your left hand from below at the right shoulder (Fig. 74).
Rice. 74. Shooting from point blank range
Cover the hard stop with an overcoat roll, turf, etc.
When shooting from a rest, it is allowed to place the rifle not on the rest, but on the palm of the left hand, resting on the rest.
Techniques for shooting from skis
145. To shoot from skis in a prone position, take the rifle in your right hand, the sticks in your left; leaving the heels of the skis in place, spread the toes of the skis to the sides; leaning on sticks, stand on your left and then on your right knee; quickly lie down, putting the sticks in front of you; place the elbow of your left hand on the sticks and take the rifle at the ready (Fig. 76).
To shoot from skis in a kneeling position, place the poles on the left side; turn the toe of the right ski to the right and place its rear end on the heel of the left ski; lower your right knee onto your right ski and take the rifle at the ready (Fig. 77).
| Rice. 76. Butt for shooting from skis in a prone position | Rice. 77. Butt for shooting from skis in a kneeling position |
To shoot from skis in a standing position, take the same position as for shooting without skis (Fig. 78). For stability when shooting while standing, you can use sticks as a support, for which you fasten the sticks and put them in loops on your left hand (Fig. 79); place the sticks on the left side and place the rifle on them.
| Rice. 78. Butt for shooting from skis in a standing position | Rice. 79. Butt for shooting from skis in a standing position from a rest |