Weapons are a masculine topic, and children of high school age and little boys show increased interest in this topic - they constantly play war, imitate various heroes. Therefore, they will definitely be interested in how to make brass knuckles out of paper. You can make it yourself, and we offer you options for crafts, diagrams and methods for assembling these weapons from paper and cardboard.
- Features of this paper weapon
- Where can crafts on this topic come in handy?
- Examples of ready-made crafts made from paper and cardboard
- How to make brass knuckles
- Required materials and tools
- Step-by-step assembly with dimensions
- Video master classes
- Origami with diagram
- Cutting templates
Painted paper craft
Standard equipment MP 654K
Almost all additional accessories for this pistol must be purchased separately. The standard package includes an instruction manual, a set of seals (spare parts), a screwdriver for disassembly and a pack of explosive balls (200 bullets). To start using pneumatics, you will need to buy CO2 gas cartridges, a cleaning rod and gun oil for lubrication.
Other accessories you may need:
- bullet catcher (convenient to use during training on paper targets);
- holster (not a required attribute, as it attracts a lot of attention).
Charging using the UPS5 press
This universal device is essentially a cunning press that allows you to crimp cartridges with a “star”, it can also remove primers and insert new ones in their place, and press wads (Figure 3).
In addition to this, the equipment set for 12 gauge cartridges includes:
The kit also includes attachments for 12-gauge cartridges: a standard star-type crimp, a crimp ring for the bottom of the clip, for final pressing of the ammunition.
Loading 12 gauge cartridges at home is carried out as follows:
Instead of the sleeve used, a matrix is installed, which makes the second and final compression of the liner; if the height of the press is insufficient for complete crimping, a calibration ring is placed.
Device and circuit
During the manufacture of this model, parts from a real PM are used, this gives the air pistol the closest appearance to a combat pistol. The barrel is slightly shortened and extends beyond the muzzle, which creates the appearance of a real 9 mm caliber. The most obvious difference between the MP54K and the Makarov pistol is the absence of an ejector for spent cartridges.
The operating principle of pneumatics is significantly reminiscent of military weapons. The mail trigger has not undergone any changes, it just lacks a firing pin. The magazine was also changed, it was modified to be equipped with balls and a place was made for installing a gas cartridge.
Features:
- a can of carbon dioxide is placed in the holder and tightened until it is pierced with a needle;
- carbon dioxide in the can begins to change from a liquid state to a compressed state, and is located in a sealed container;
- the balls are installed in a cage that has a feeder and a spring;
- when you press the trigger, the trigger hits the valve, which releases a certain portion of gas;
- the escaping carbon dioxide has high pressure, acting on the bullet and pushing it out of the barrel at a certain speed.
Before transportation, the weapon must be unloaded - for which it is necessary to shoot the remaining bullets in the clip and carefully unscrew the cylinder with the remaining carbon dioxide.
Performance characteristics:
- Initial flight speed – 115 m/s.
- Caliber – 4.5 mm. Copper-plated explosive balls or lead shot of the appropriate diameter can be used as ammunition.
- Weight – 730 g.
- The number of cartridges in the magazine is 13 pieces. The holder also contains a device for breaking through and attaching a gas cartridge. One cylinder is enough for about 70 shots, then the air pressure is not enough for the normal trajectory of the bullet.
- The case material is weapon steel, the handle lining is plastic.
- Dimensions (LxHxW) – 16.9x14.5x3.5 cm.
- The trigger mechanism is double.
- The barrel is metal, with rifling.
- The standard sight is an open, non-adjustable front and rear sight.
- The fuse is mechanical.
The main advantages of this model include simplicity of design, recognizable appearance and high initial speed of the bullet. This made the pistol the most popular among airgun enthusiasts.
Ease of partial disassembly and ease of maintenance minimize labor costs when caring for the gun. Multi-charging makes it possible to fire several shots in a row without being distracted by frequent charging.
The disadvantages of the model include:
- a problem common to all gas-cylinder air pistols, which is associated with a decrease in the temperature in the can during active shooting, which leads to a significant decrease in the initial speed;
- not always high quality workmanship;
- possible defects in some pistols that impair the tightness of the gas fittings;
- quite high cost;
- inaccurate resemblance to a combat PM - an experienced person can see the absence of an ejector and a screw installed to press the canister from below on the handle;
- It is not possible to install sighting equipment other than a laser pointer on the front of the trigger guard.
Despite some shortcomings, they are not at all critical for recreational shooting. You can increase the initial take-off speed and reduce barrel wear if you use lead shot. A small modernization to improve the tightness will not take much time, but will help in practice to understand the design of the weapon. Timely maintenance increases the service life of the gun - pneumatics need to be lubricated and cleaned.
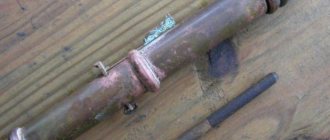
Crossbow pin mechanism
The pin mechanism is easy to manufacture. It's easy to do it yourself. How to make a pin mechanism? For the pin mechanism, you need to make a groove on the stock. The bowstring will be wound through this groove. A hole is drilled directly under the bowstring, into which either a wood or metal pin is inserted. A bar is attached to the bottom of the stock so that when you press on it, it presses on the pin. The pin, having thus received the command, pushes the bowstring out of the groove. The device is simple, easy to manufacture, but has many disadvantages: there is no safety lock in the mechanism, the trigger is heavy, and it also wears out quickly.
Disassembly and cleaning
In order to completely disassemble the pistol, the usual operating instructions are not enough. It is best to observe the entire procedure from the outside. If there is no one to show this process in practice, training videos can help.
Complete disassembly of the weapon may be necessary after accidentally dropping the pistol into the mud. It is not worth disassembling pneumatics unless absolutely necessary.
During routine lubrication or cleaning, partial disassembly and maintenance of components and mechanisms can be performed. For disassembly you will need:
- remove the clip;
- pull the trigger guard down - it becomes delayed on the left side and allows you to remove the bolt frame;
- Pull the shutter towards you all the way and lift the rear part up. The front of the bolt carrier is then released from the hook and it is removed through the barrel;
- the return spring, which is located on the barrel, is removed.
To clean the barrel you will need a metal cleaning rod. Cleaning the barrel consists of wiping it with a rag soaked in silicone oil with a cleaning rod, which is pushed into the bore. Then, when there are no dirty spots or residues from lead bullets on the rag, the barrel is wiped dry.
To clean different parts, use a regular toothbrush. A small amount of oil should be dropped into the contact areas of the moving mechanisms using an aerosol liquid or an oil can with an extended tip.
When disassembling pneumatics, you must follow the manufacturer's instructions, which are indicated in the operating manual. Lubrication and cleaning are carried out in several stages:
- treating the surface of the case with oil, without wiping dry. This will allow the oil to create a small film that will protect the steel surface from corrosive processes;
- USM lubricant. It is more convenient to do this if you add a little oil on top of the moving mechanisms, then fire 2-3 blank shots. There is no need to completely disassemble the firing mechanism once again;
- cleaning the barrel with a rag on a cleaning rod until foreign deposits are completely removed (especially after using lead shot). At the end, the remaining lubricant is wiped dry with a rag.
The pistol is assembled in the reverse order.
Loading a cartridge with a container
The specificity of using such projectiles is that they are initially designed to increase shot accuracy. Modern manufacturers have made it much easier for hunters to equip 12-gauge cartridges with a container (Figure 4).
Figure 4. Stages of loading a cartridge with a container
They make special container wads, which also contain a shock absorber with a seal. The latter copes well with breakthroughs of powder gases; due to shock absorption, the pressure surge in the chamber is smoothed out, which allows you to maintain the shape of the shot cloud.
The polyethylene cup itself prevents contact of pellets with the walls of the barrel, preventing them from deforming, and reduces its lead content. Its operating principle is no different from the usual one, except for greater speed and convenience.
The main elements must be strong so that the product does not warp or deform during assembly or firing.
How to load 12 gauge cartridges at home with loaded containers:
Common faults
Most often, repairing pneumatics consists of installing new seals instead of deformed ones and replacing a dead spring. When installing sealing gaskets, they must be carefully removed from their seats.
Excessive haste often leads to the appearance of chips in the areas of contact between the metal surface and the seal, this negatively affects the tightness.
To get rid of air leaks, the gaskets can be treated with silicone grease. You should not use VD-40, a popular product among car enthusiasts, as it destroys rubber seals.
To install a new recoil spring, you need to partially disassemble the weapon. Installing the bullet feeder spring in the magazine is more labor-intensive, since the magazine will need to be completely disassembled. To replace broken elements of the trigger mechanism, the weapon must also be completely disassembled.
If the purchased pistol initially has a low initial bullet velocity, it is worth inspecting the weapon for the presence of a gap between the top of the clip and the barrel channel. The larger the gap, the more air is wasted.
To eliminate the gap, a thin silicone gasket is glued to the breech side of the barrel channel or the factory bushing in the barrel is replaced with one made of fluoroplastic. Getting rid of the gap will increase the speed of the ball by almost 20%.
Custom assembly
First, about the method of loading cartridges into a brass sleeve. I use a brass shell for hunting, where the maximum weight of a shotshell by caliber is required. For a good shot, there must be 100% absence of breakthrough of powder gases. Fitting the powder spacer to a brass case is not easy. Therefore, even having acquired some kit for making gaskets and wads, I buy components in weapons and hunting stores.
The parameters set by the manufacturers allow, if necessary, to adjust both the shape and size of the components. The need to cut out hundreds of gaskets and wads yourself has long ceased. While adjusting the next batch of gaskets, I paid attention to one detail - a plastic stopper for the shot for the brass sleeve. I close all my cartridges, loaded with a brass sleeve, with it.
But one nuance is important here. The cork compresses the air, and in the middle of the sleeve the strength of the hand with the guard is no longer enough to overcome the resistance. To install the plug on a powder charge, you need to lower it with tweezers sideways until the charge and only then turn it with a thin hammer, lightly pressing it until the grains crunch.
Next, two well-greased felt wads made of high-quality dense felt with a height of 18 millimeters are installed (this minimum height for a high-quality shot was selected experimentally). In addition, felt wads serve as a high-quality shock absorber and remove some of the combustion products from previous shots.
The plastic plug is taken of a nominal caliber, but the wads and spacers for shot are taken of 16 gauge, since the internal diameter of the brass sleeve is closer to it. By assembling this semi-finished product with 1.8 grams of Sokol gunpowder for 20 caliber by changing the weight, number and method of equipping the shot shell, the hunter can change the characteristics of the shot in a fairly wide range and be confident in its quality.
Now about the unusual method of loading into a plastic sleeve. Literature recommends calibrating the cartridges after assembling them. I wrote this in advance to make some hunters think.
The plastic case has an internal diameter with minimal deflection that is equal to the choke constriction of most standard shotguns. Its internal volume is much smaller than the volume of brass, which means that the components must be selected taking into account the free space extremely competently.
A less high gasket of 3–3.2 millimeters (two pieces) required better quality wads (increased density) and the presence of sediment. And although I use osalka all the time, I left the height high. I also use a stacked gasket for the shot, but this time it consists of two gaskets. The wad is felt, greased, composed of two parts and in a free state is 18 millimeters.
But the diameter of the gaskets should be such that when installed in the sleeve, they create, due to their larger diameter, peculiar rings on the surface of the sleeve. Together with the greasy wads, you get a kind of piston that gives a high-quality shot.
I will say right away that it is impossible to install an excessively large diameter gasket in the sleeve, and you can choose from several manufacturers in the store. The caliber of gaskets and wads is nominal. The cartridges fit perfectly into the smallest diameter chamber and are easily removed from it.
To maintain interest, I will say that from the above components (except for powder and shot samples) you can assemble cartridges, wisely selecting components for any caliber. And change the characteristics of the shot using only the weight, number and method of equipping the shot shell.
The use of containers is impractical; when fired from a cartridge with a brass sleeve, the container introduces disorder when passing through the choke constriction. Even sprinkling with starch does not help. And sprinkling any number of shot with starch without a container gives an increase in accuracy and, consequently, range up to shot number 1.
Source
Repair of air pistol MP 654K
The stages of diagnosing a non-working pistol are quite ordinary - first you need to identify the problem, only then begin repairs. The option “completely disassemble the weapon and then we’ll see” will not work. The steps to determine the different causes of breakdowns are as follows:
- low initial velocity of bullet departure - you need to inspect whether the seal on the barrel is deformed. The problem can often be solved by installing a new gasket;
- poisons the air from the can - inspect the place of air leakage from the clip by immersing the magazine in a jar of water (preferably with alcohol, so it will evaporate faster). After which the leak can be easily seen. Repair work consists of installing silicone gaskets in the sealing area of the canister and gas chamber;
- the trigger mechanism is broken - you need to shake the weapon, if you hear extraneous noises inside that resemble the knocking of metal particles, this means that the parts are broken and need to be replaced (including the spring);
- bullets sticking into each other while firing, or they fly out of the barrel several at a time - the problem is a very strong spring in the clip or a deformed barrel seal;
- visual damage - identification of chips on the aiming bar;
- The can runs out very quickly - you need to listen to see if the can hisses (does it poison the air). You need to put a drop of alcohol in place of the silicone gaskets - if air escape is visible, you need to change the seals.
Sights
This product is a Russian pneumatic replica of a combat PM. The entire design completely copies a real pistol, but is fundamentally different in the installed elements for the use of gas cartridges.
Just like the original, the MP654K contains standard non-adjustable rear sight and front sight - the sighting bar is structurally fixed to the bolt. These devices are quite difficult to damage, and the only repair option is to seek help from an experienced welder. Welded new elements will need to be adjusted with a file and covered with bluing.
Trigger mechanism
The main problem with this model is that some elements break when a bullet hits the inside of the body. Despite its apparent reliability, the load on the trigger mechanism during spring operation is quite large. The damage is corrected after disassembling the gun and installing new parts.
You also need to take into account that this pneumatic gun has the hammer cocked by pulling the bolt frame back all the way, this simulates reloading a real pistol. But if you pull the trigger at the same time, the trigger gets under the bolt frame and the weapon jams. This applies specifically to the MP654K model, where there is a cutout in the inner ridge of the valve for mounting the valve body.
To many, this may seem like an incorrigible problem. But sticking of the trigger should not be a reason to contact a gunsmith, since this can be corrected very easily: you need to remove the clip, secure the cleaning rod in a vice, pull the bolt frame back and, pressing the cleaning rod through the barrel channel onto the trigger, fully cock it. After which the bolt carrier and trigger will work normally.
In some cases, there are products where the bolt cannot be retracted; it rests on the trigger. Most likely, this is due to an insufficient cocking angle; this is noted when the hammer and sear are of the wrong size. To correct this damage, you need to grind down the bevel of the bolt frame ridge and the top of the trigger so that the bevel will cock it while the bolt moves forward.
Shop
If the problem is to get rid of air leakage from the can, then you need to change the rubber gaskets at the point of contact with the body. To change the spring stiffness, simply stretch it (this will help for a short time), but it is best to replace it with a new one. A powerful spring is cut off, but this must be done gradually, otherwise excess turns can be cut off.
Sometimes it is not the seals that are to blame for air leaks, but the seal needle, scratches or cracks on it. In this case, a seal for the PM will be needed. During its installation, it is better to immediately change the rubber seals.
A seal is a metal element in an airgun that prevents large amounts of air from passing through when the airgun is initially fired. In the MP654K gas cylinder model, there are two rubber seals on the seal:
- The gasket is black on the back of the shutter needle (to replace it, you need to disassemble the magazine).
- The large seal above the cylinder is white; a spare one is included in the spare parts kit.
Also, deformed and miscalibrated balls often cause quite unpleasant and in some cases difficult to eliminate delays in the process of using the gun. Sometimes a few of these balls jam the clip. In the MP654K model, it is necessary to completely disassemble the clip directly in the pistol body. To do this, you will need to remove the handle, the gas cylinder and unscrew the seal. The operating instructions for some pneumatics indicate that before loading the magazine, the balls must be “rolled” along the barrel. This will avoid this possible trouble.
Air valve
You need to pay attention to several nuances - you need to install a new spring and the air valve itself. You also need to purchase a spring separately if it has become corroded, and the valve is usually replaced with a new one from the repair kit.
To carry out the work you will need the following:
- White valve seat seal (from the spare parts kit) and internal rubber transparent magazine head seal.
- Wide flathead screwdriver.
- Factory key (found in the basic configuration of the pistol).
DIY cartridge
Lately, a lot has been written about “self-rolling” cartridges. I loaded it mostly with black powder. Instead of wads there was a newspaper.
I have read a lot of literature on hunting weapons. I.B. asked me to explain some points that I could not comprehend myself. Shishkina, M.M. Blum, now deceased, N.L. Izmetinsky. These people took the time to answer my letters. I will always be grateful to them.
I'll start with metal sleeves
The fact that the cartridge case must move freely in and out of the chamber does not need to be explained to anyone. Checking this before loading cartridges is a must. I do not add black powder under the center fire primer, but sand the inside of the cartridge case with medium grade sandpaper. You can also use fine sandpaper. After processing, the inside of the sleeve is clean, without carbon deposits. I press the capsule in using UPS-5. Then I take a weight from the 2g scale set and place it on the pressed primer. I hold and push. At the same time, the capsule is deepened and sits all the way on the anvil of the sleeve.
Gunpowder "Falcon", highest grade. On the can for 12 gauge they say 2.3 g. For autumn and spring I pour 2.1 g. For winter with a temperature of -20 degrees I pour no more than 2.25 g.
Using a ballpoint pen, I write the shot number and year of equipment on a cardboard wad.
Now, to protect the shot from spilling out, I take Moment glue. I twist the tube and squeeze a portion of glue into the sleeve. The glue should cover the shot wad by 2–2.5 mm. The glue dries quickly. The inscription is clearly readable under a layer of glue. Also, along the edge of the sleeve, the glue comes into strong contact with the metal treated with sandpaper. You can also coat the capsule with glue. Then, even if you find yourself in the water, the cartridges will not be damaged and you will not have to reload them.
In “ROG” No. 10 for 2010, B. Laputko “gave a dressing down” to A. Yarkovoy regarding fractions with tails. I have been using No. 3 slightly teardrop-shaped self-cast shot for several years now. Cable and battery lead shot is solid. I tested it and compared it with “Fetter’s” perfectly spherical shot. Shot at 35; 40; 45 meters on sheets of wallpaper 60x60 cm and 100x100 cm. Shot with TOZ-34 rifles; IZH-58; IZH-27; IZH-54 (18.2 mm), TOZ-66. The fight is very good. Accuracy, scree, sharpness are very good. Here's a shotgun shot for you. So I support hunter A. Yarkovoy. When shooting in the dark from the barrels there is no fire. The shot is biting. The inside of the trunks is free of soot.
Long-range cartridge
It can be seen that a set of wood fiber wads acts as a shock absorber. And when flying out of the barrel, a felt wad of large diameter and 12 mm thick is slowed down by residues (dust) from other fibrous wads. There are no windows in the target. I think a fight like this creates very good forcing pressure. Since the inside of the sleeve is sanded, the felt wad is not greasy. Additional wads act as a shock absorber. The shot is hard and protected by a jacket from the bag. And when changing lanes in the choke, graphite dust helps a lot.
A few words about factory cartridges
I think hunters from the outback who shoot hand-rolled cigarettes will be interested in my advice.
With respect to the ROG team and to all the rollers.
Oleg Akulov, Belgorod region, Stary Oskol December 1, 2011 at 00:00
Source
Main conclusion
So, having understood the principle of operation of the BBBS and having familiarized yourself with the drawings of silencers, you can draw one main conclusion - the manufacture of a silencer for firearms is a rather complex issue, both in terms of calculations and in terms of production. Therefore, we strongly advise you not to do this yourself. It is better to contact specialized stores and purchase this device there. Moreover, there you can buy not only a silencer, but also a butt plate, supports, handles and much more, which will make hunting much easier for you.
Step-by-step instructions for making Kukri
Step-by-step instructions are needed to understand the sequence of actions. If you follow this algorithm, you get a predictable result:
- We apply a pattern to the selected piece of material. We make an overlap along the contour of 5 mm, it makes it possible to later process all the edges with a file and get the desired size.
- Using a sharp tool, preferably with an ebonite tip, the contour is applied.
- A blank is cut along the outlined contour. It is possible to use a grinder.
- The blank is heated red-hot and forged with a hammer weighing 3 kg. In this way the blade and tang are formed. The process lasts about 30 minutes, so it is better to do it together.
- During this time, the metal will cool and become dark. It's time to heat it up again and beat 1.5 kg with a hammer. During the process, it is advisable to constantly change surfaces so that the processing proceeds evenly.
- The dol is formed using a metal rod. It is pressed against the blade blank and beaten with a light hammer.
- Water is poured onto the hot blade of the almost finished workpiece. It should be cold and flow in a thin stream onto a strip of metal along the cutting edge. This is how zone hardening is done - periodically heating the workpiece and pouring cold water on it.
- The resulting workpiece is processed with a file and sanded with fine sandpaper. The polishing process is carried out using genuine leather.
- The handle is made of wood and is mounted on a shank; fastening occurs with glue.
- A metal cap is put on the end of the handle and secured with a nut to the shank.
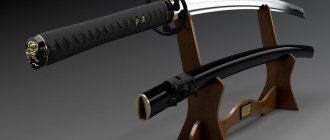
Kukri knife.
Operating principle
A slight evolution of weapons from our childhood. Surely everyone reading this has thrown a stone at someone at least once in their life? Surely almost everyone had a couple of dozen slingshots? And who made a crossbow with elastic bands and a clothespin? Has anyone used inflated bottles among throwing weapons? Now, if the memory begins to recover, then we continue.
Since homemade pneumatic weapons in our country today are not shown by high masters of this business, the main principles of creating them are simpler and cheaper. Therefore, the basic principles of operation of such weapons:
- rubber(!!!)-piston pneumatics - based on “syringes” and rubber bands
- PCP – no matter how cool it sounds, based on a plastic bottle and a bicycle pump
It is these two classes that describe the entire model range of inexpensive homemade pneumatics on the Internet. There are also options with flammable liquids... but this is another level.